# Dialogue Help Center: all articles
> Every article of https://help.nowdialogue.com in one file, in menu order. Each article starts with a level-1 heading and a link to its web page. The index is at https://help.nowdialogue.com/llms.txt.
---
# Install Dialogue on Shopify
> Install the Dialogue app, turn it on in your theme, and place your first asset with the Dialogue Asset block.
- Web page: https://help.nowdialogue.com/articles/install-dialogue-on-shopify/
Getting Dialogue running on a Shopify store takes a few minutes. You install the app, switch it on in your theme, and you're ready to create assets. There's no code to copy and no product feed to set up: your products come straight from Shopify.
## 1. Install the app
1. In the Shopify App Store, search for **Dialogue | CRO & A/B testing**.
2. Click **Install** and approve the permissions Shopify asks for.
3. Shopify sends you to your Dialogue dashboard at [dashboard.nowdialogue.com](https://dashboard.nowdialogue.com).
## 2. Turn on the app embeds in your theme
App embeds let Dialogue load on your store. They're switched on in Shopify's theme editor.
1. In your Shopify admin, go to **Online Store** > **Themes**.
2. Next to your live theme, click **Customize**.
3. In the left sidebar, open **App embeds**.
4. Turn on **DialogueAI Integration**. This one shows your Dialogue assets on your store.
5. Planning to run A/B tests? Also turn on **Dialogue AB Commerce**.
6. Click **Save**.
If an asset doesn't show on your store later, check these switches first. App embeds are set per theme, so if you switch to a different theme, turn them on there too.
## 3. Add a "Dialogue Asset" block (optional)
Most assets are placed from the **Position** tab in the Dialogue asset editor. You can also place an asset as a block inside your Shopify theme, which is handy for Online Store 2.0 themes.
1. In the Dialogue dashboard, open your asset and go to the **Position** tab.
2. Open **In Page With Shopify blocks** and copy the **Asset ID**.
3. Click **Position With Shopify**. Your theme editor opens on the right page type.
4. Click **Add section** (or **Add block** inside an existing section), go to **Apps**, and choose **Dialogue Asset**.
5. Click the new **Dialogue Asset** block and paste your ID into **Asset Id**.
6. Click **Save** in Shopify.
7. Go back to the Dialogue dashboard and click **Publish**.
The block's **Show in demo mode** option only affects the theme editor. It lets you see the asset there even when it's switched off or has no products to show yet.
For the full walkthrough, see [Shopify 2.0 Theme Blocks Positioning](https://help.nowdialogue.com/articles/6969466-shopify-2-0-theme-blocks-positioning.md).
## Where to go next
- **Create your first asset:** in the left menu, click **Assets** > **Create Asset**.
- **Place it on your store:** see [Positioning Assets Onto Shopify Stores](https://help.nowdialogue.com/articles/5161922-positioning-assets-onto-shopify-stores.md).
- **Add checkout offers (Shopify Plus):** see [Checkout Upsells & Cross-sells](https://help.nowdialogue.com/articles/6701704-how-to-create-and-launch-a-shopify-checkout-enhancer.md).
- **Get help from Dia:** Dia is the AI assistant in your dashboard. Ask it to create or change assets for you, from the **Ask Dia** box on Home or the chat bubble.
Need a hand? Open the chat in your Dialogue dashboard and ask Dia, or ask to talk to a person.
---
# Installing Dialogue Via Java Script Code Integration | Non-Shopify Stores
> Follow the next steps to install Dialogue onto your store using a JavaScript Code
- Web page: https://help.nowdialogue.com/articles/5134004-installing-dialogue-via-java-script-code-integration-or-non-shopify-stores/
To show Dialogue assets on a store that isn't on Shopify, you add a short piece of code to your site. You don't need coding experience: it's copy and paste into your store's header section.
On Shopify? You don't need this. The Dialogue app adds everything for you. See [Install Dialogue on Shopify](https://help.nowdialogue.com/articles/install-dialogue-on-shopify.md).
## 1. Add the Master Script
1. In your Dialogue dashboard, go to **Settings** > **Integrations** and open the **Java Script** tab.
2. On the **Master Script** tab, copy the code.
3. Paste it into your store's header section, on every page.
4. Come back to Dialogue and click **Verify**.
## 2. Add the Transactions Event
This tells Dialogue when an order is placed, so it can track sales from your assets.
1. Open the **Transactions Event** tab and copy the code.
2. Replace the placeholders with your store's real order details, following the instructions on the tab: product SKU, quantity, price, product URL, and the order (transaction) number.
3. Paste the code into your store's order confirmation page.
## 3. Add the Add to Cart Event
1. Open the **Add to Cart Event** tab and copy the code.
2. Replace the product SKU and product URL placeholders with your store's real product details.
3. Paste the code where products are added to the cart.
When you're done, click **Verify**. If everything is in place, you'll see **Verified**.
Stuck? Open the chat in your Dialogue dashboard and ask Dia, or ask to talk to a person.
---
# Brand Settings | Non-Shopify Stores
> The Brand settings tab stores your store's basic design settings
- Web page: https://help.nowdialogue.com/articles/5165895-brand-settings-or-non-shopify-stores/
- The **Brand** settings tab stores your store's basic design settings:
- Font
- Text color
- Button color
- Button text color.
- Drawn automatically from your store.
- Applied on the assets you create.

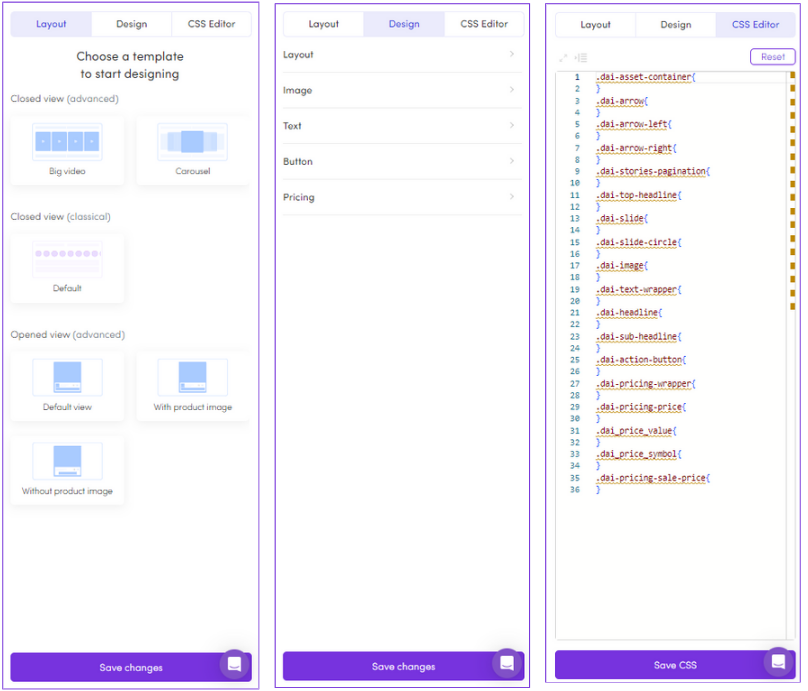
With each asset creation, an asset editor opens with a Design tab that has layers of customization:
- Ready to use templates and layouts.
- Adjustable fonts, colors and aspect ratios.
- CSS Editor - gives dev teams total control over design and functionality.
---
💡 **TIP |** When changing the design of an asset with multiple segments - the design change will apply to all segments.
---
# Setting Up Your Global CSS
> Style all your Dialogue assets at once with one CSS file. Works on any store, Shopify or not.
- Web page: https://help.nowdialogue.com/articles/10960741-setting-up-your-global-css-no-code/
Global CSS lets you style every Dialogue asset on your site from one place. Instead of adjusting each asset, you write your style rules once and they apply to all your assets. This works on any store, including Shopify stores.
## Why use it
- **Save time:** style all your assets at once.
- **Stay on brand:** make every asset match your site's colors, fonts and buttons.
- **Change once, update everywhere:** when you save a change, it shows on your site automatically.
## 1. Write your styles
1. In your Dialogue dashboard, go to **Settings** > **Brand** and open the **Global CSS** tab.
2. Add your CSS rules in the editor. If you don't write CSS yourself, ask your developer or designer.
3. Click **Save**.
## 2. Add your CSS link to your site (one time)
1. On the **Global CSS** tab, click **How to use**.
2. Copy the HTML link tag shown there. It points to your store's own CSS file, which updates every time you save.
3. Paste the link tag inside the `` section of your site, ideally before your other CSS files.
- **On Shopify:** in your Shopify admin, go to **Online Store** > **Themes**, open the menu next to your live theme, choose **Edit code**, and paste the tag inside `` in **theme.liquid**.
- **On other platforms:** paste it wherever your platform lets you add code to the page header.
4. Save or publish the change on your site.
## Check that it works
Open a page with a Dialogue asset. Your styles should show right away. From now on, any change you save in **Global CSS** appears on your site without touching your site's code again.
## Troubleshooting
**My styles don't show.**
- Make sure the link tag is inside the `` section.
- Make sure you saved or published the change on your site.
- Clear your browser cache and reload the page.
- Open the CSS link from **How to use** in your browser to check that your rules are there.
Still stuck? Open the chat in your Dialogue dashboard and ask Dia, or ask to talk to a person.
[Go to Brand settings](https://dashboard.nowdialogue.com/settings/brand)
---
# Positioning Assets Onto Your Store | Non-Shopify Stores
> Choose a page type, pick the exact spot on the page, choose mobile, desktop or both, and publish.
- Web page: https://help.nowdialogue.com/articles/9351959-positioning-assets-onto-your-store-or-non-shopify-stores/
Your asset is designed. Now let's put it on your store so shoppers can see it. Positioning happens in the asset editor's **Position** tab, in two steps:
1. Choose a page type.
2. Choose the spot on that page.
Using Shopify? See [Positioning Assets Onto Shopify Stores](https://help.nowdialogue.com/articles/5161922-positioning-assets-onto-shopify-stores.md) for the extra Shopify options.
## 1. Choose a page type
Assets are placed by page type. If you choose **Product pages**, for example, the asset shows on all your product pages. You can make exceptions later in the **Advanced** tab.
Page types include **Home Page**, **Product pages**, **Collection Pages**, **Search Page**, **Cart page**, **Cart drawer**, **Thank you page** and **Other page**. The exact list depends on your platform.
In the **Position** tab, pick your page type under "The asset will appear on the following page type". Changing the page type later means positioning the asset again.
Under it, choose the devices: **Mobile & Desktop**, **Mobile Device Only** or **Desktop Device Only**.
## 2. Choose the spot on the page
Pick the method that suits you:
1. **Describe it in your own words.** Under **In Page With Point & Position**, type where you want the asset, like "before the add to cart button" or "inside the cart drawer", and click **Position**.
2. **Point & Position.** Wait for the store preview to load, click **Point & Position**, then click the spot on the page where the asset should go. Great when you can't edit your site's code.
3. **Use Live Site.** If the preview doesn't load, this opens your real store in a new tab so you can point to the spot there.
4. **Use CSS selector.** An advanced, manual version of Point & Position, for people comfortable with page code.
5. **Insert this HTML tag.** Copy the short tag and paste it into your site's code where the asset should appear. Handy for mini carts, floating carts and pop-up carts.
Banners can also be shown as a pop-up with **Floating Position**.
You can also ask Dia to position an asset for you. Open the chat and say something like "Put this carousel under the add to cart button on product pages".
## Show an asset on one specific page only
1. Choose the **Other page** page type.
2. Enter the address of the page where the asset should appear (**Page URL**).
3. Position the asset on that page as usual.
## Fine-tune with the Advanced tab
In the **Advanced** tab, list page addresses under **Include** to show the asset only on those pages, or under **Exclude** to hide it from them. Use one list or the other, not both.
When everything's in place, click **Publish**.
[Take me to my assets](https://dashboard.nowdialogue.com/)
---
# I can't see my asset
> If you've positioned your asset and can't see it, here's a checklist to go over
- Web page: https://help.nowdialogue.com/articles/10915106-i-can-t-see-my-asset/
You've designed your asset, positioned it, and now you want to see it live on your store. But it's not there. Go through this checklist to find the most common reasons.
## The fastest way: ask Dia
Open the chat in your dashboard and ask Dia, for example: "Why isn't my AI Recommendations carousel showing on my product pages?". Dia checks the same things your store checks before showing an asset, for a page address and device you choose, and tells you what is stopping it. If the asset shows but with fewer or wrong products, Dia can look into that too. Learn more in [Meet Dia, Your AI Assistant](https://help.nowdialogue.com/articles/meet-dia-your-ai-assistant.md).
## Checklist
1. Asset published
2. Dialogue app turned on in your Shopify theme
3. Timer end date
4. Position
5. Behaviors
6. Products Display
7. Out of stock products
8. Campaign timing
9. Content turned off or not linked to the right behavior
10. Design
## 1. Asset published
Make sure you published the asset.
In the asset editor, look at the save buttons. If the asset is not published yet, click **Publish**. Once it is published, the asset is marked **Live**.
## 2. Dialogue app turned on in your Shopify theme
On Shopify stores, the Dialogue app embed must be turned on in your theme. If it is off, Home shows **Dialogue app is not embedded into your Shopify store**. Click **Go to Shopify** and turn it on.
## 3. Timer end date
Timers stop showing when the countdown ends.
Make sure the timer's end date is in the **future**, and that the time zone matches **your area**.
## 4. Position
Check that the asset is placed on the page you are looking at, and in a spot that exists on that page. Open the asset's **Position** tab to check where it is placed. Learn more in [Positioning Assets onto Shopify Stores](https://help.nowdialogue.com/articles/5161922-positioning-assets-onto-shopify-stores.md).
## 5. Behaviors
Have you added behaviors to the asset? ([Learn more about behaviors](https://help.nowdialogue.com/articles/6922302-become-a-1-click-segmentation-hero.md))
Each asset starts with the default **All Visitors** behavior:
- **Audience**: All visitors
- **Pages**: All pages
- **Products Display**: Using Dialogue's AI (banner assets show linked content instead)
- **Messaging**: Add Messaging
If you added a new behavior, you will only see the asset if you match its audience.
For example, a "Mobile Device Users" behavior means only shoppers on a phone see that version of the asset. Are you looking at your store on a computer?
To see the asset, try one of these:
- Open your store on your phone.
- On your computer, open your browser's developer tools (F12) and switch to the mobile view.
- Turn on the **All Visitors** behavior to see it on a computer, then turn it off again.
## 6. Products Display
If the products display settings don't match any products on the page you're viewing, the asset has nothing to show. Open the **Behavior** tab and check **Products Display**.
## 7. Out of stock products
If all the products or content the asset would show are out of stock, there may be nothing left to show. Check your products in **Settings → Feed Browser**.
## 8. Campaign timing
If the asset's content is part of a campaign, it only shows while the campaign is running. Check the campaign's start and end dates.
## 9. Content turned off or not linked to the right behavior
For assets that show content, like banners and stories, make sure the content is turned on and linked to the behavior that should show it.
## 10. Design
Check the asset's design options. For example, make sure the text and background colors are not the same, so the asset doesn't blend into your page.
## Still can't see it?
Open the chat in your Dialogue dashboard and ask Dia, or ask to talk to a person.
---
# Shopify 2.0 Theme Blocks Positioning
> 3 easy steps to positioning with Shopify 2.0 theme blocks: turn on the Dialogue app embed, add your asset as a block, and publish.
- Web page: https://help.nowdialogue.com/articles/6969466-shopify-2-0-theme-blocks-positioning/
With an Online Store 2.0 theme, you can place a Dialogue asset as a block, right in Shopify's theme editor. Here's how, in three steps:
1. Turn on the Dialogue app embed
2. Add your asset as a block
3. Publish
Prefer other ways to position, like pointing at the spot or asking Dia? See [Positioning Assets Onto Shopify Stores](https://help.nowdialogue.com/articles/5161922-positioning-assets-onto-shopify-stores.md).
---
## 1. Turn on the Dialogue app embed
You only need to do this once per theme.
1. In your Shopify admin, go to **Online Store** > **Themes**.
2. Next to your live theme, click **Customize**.
3. In the left sidebar, open **App embeds**.
4. Turn on **DialogueAI Integration** and click **Save**.
---
## 2. Add your asset as a block
1. In the Dialogue dashboard, open your asset and go to the **Position** tab.
2. Choose the page type, for example **Product pages**.
3. Open **In Page With Shopify blocks**.
4. Copy your **Asset ID** by clicking on it.
5. Click **Position With Shopify**. Your theme editor opens on that page type.
6. Click **Add section**, or **Add block** inside an existing section, depending on where you want the asset.
7. Scroll to **Apps** and choose **Dialogue Asset**.
8. Click the new **Dialogue Asset** block. In the sidebar that opens, paste your ID into **Asset Id**.
9. Your asset appears on the page. Click **Save** in Shopify.
---
## 3. Publish your asset
Go back to your asset in the Dialogue dashboard. Tick **Yes, I've positioned on Shopify** and click **Publish**.
Your asset is now live on your store.
---
# Positioning Assets Onto Shopify Stores
> Choose a page type, pick the exact spot on the page, choose mobile, desktop or both, and publish.
- Web page: https://help.nowdialogue.com/articles/5161922-positioning-assets-onto-shopify-stores/
Your asset is designed. Now let's put it on your store so shoppers can see it. Positioning happens in the asset editor's **Position** tab, in two steps:
1. Choose a page type.
2. Choose the spot on that page.
## 1. Choose a page type
Assets are placed by page type. If you choose **Product pages**, for example, the asset shows on all your product pages. You can make exceptions later in the **Advanced** tab.
Page types include **Home Page**, **Product pages**, **Collection Pages**, **Collections List**, **Search Page**, **Cart page**, **Cart drawer**, **Thank you page**, **404 page** and **Other page**.
In the **Position** tab, pick your page type under "The asset will appear on the following page type". Changing the page type later means positioning the asset again.
Under it, choose the devices: **Mobile & Desktop**, **Mobile Device Only** or **Desktop Device Only**.
## 2. Choose the spot on the page
Pick the method that suits you:
1. **In Page With Shopify blocks.** Add the asset as a block in your Shopify theme editor. Best for Online Store 2.0 themes. See [Shopify 2.0 Theme Blocks Positioning](https://help.nowdialogue.com/articles/6969466-shopify-2-0-theme-blocks-positioning.md).
2. **Describe it in your own words.** Under **In Page With Point & Position**, type where you want the asset, like "before the add to cart button" or "inside the cart drawer", and click **Position**.
3. **Point & Position.** Wait for the store preview to load, click **Point & Position**, then click the spot on the page where the asset should go.
4. **Use Live Site.** If the preview doesn't load, this opens your real store in a new tab so you can point to the spot there.
5. **Use CSS selector.** An advanced, manual version of Point & Position, for people comfortable with page code.
6. **Insert this HTML tag.** Copy the short tag and paste it into your theme code where the asset should appear. Handy for mini carts, floating carts and pop-up carts.
Banners can also be shown as a pop-up with **Floating Position**.
You can also ask Dia to position an asset for you. Open the chat and say something like "Put this carousel under the add to cart button on product pages".
## Show an asset on one specific page only
1. Choose the **Other page** page type.
2. Enter the address of the page where the asset should appear (**Page URL**).
3. Position the asset on that page as usual.
## Fine-tune with the Advanced tab
In the **Advanced** tab, list page addresses under **Include** to show the asset only on those pages, or under **Exclude** to hide it from them. Use one list or the other, not both.
When everything's in place, click **Publish**.
[Take me to my assets](https://dashboard.nowdialogue.com/)
---
# Managing Your Product Feed | Non-Shopify Stores
> Check your products, refresh your feed and hide products you don't want Dialogue to recommend.
- Web page: https://help.nowdialogue.com/articles/6973759-managing-your-product-feed-or-non-shopify-stores/
Dialogue's recommendations are only as good as your product feed. Here's how to keep it up to date and in shape.
Haven't connected a feed yet? Start with [Integrating Your Product Feed](https://help.nowdialogue.com/articles/5140490-integrating-your-product-feed-or-non-shopify-stores.md).
## What Dialogue reads from your feed
- Product name
- Product SKU and variant SKU
- Price and sale price
- Product images
- Category, type, features, collections and more
- Stock availability
## Browse your products
In the left menu, click **Feed** > **Manage Feed**. This opens the **Feed Browser**, where you can search your products and check each one's image, stock, price and sale price.
## Prices or stock not up to date?
Your feed updates automatically. To see when it last updated and when it will update next, go to **Settings** > **Integrations** > **Feed parser**.
Made changes and don't want to wait? Refresh it now:
- In the left menu, click **Feed** > **Refresh Feed**, or
- In **Feed parser**, open the menu next to your feed and click **Update**.
**Refresh Feed** can be used once an hour.
## Hide products from Dialogue
Some products shouldn't be recommended. In the **Feed Browser**, turn on **Hide Product** for any product you want to keep out of your Dialogue assets. Good candidates:
- Promotional materials
- Samples
- Gift vouchers, gift cards and coupons
- Free gifts
- Gift wrapping and boxes
---
# Integrating Your Product Feed | Non-Shopify Stores
> Connect your XML or CSV product feed to Dialogue in a few clicks, no coding needed.
- Web page: https://help.nowdialogue.com/articles/5140490-integrating-your-product-feed-or-non-shopify-stores/
Dialogue recommends products from your product feed. The richer your feed, the better your recommendations and personalization. Connecting it takes a few clicks and no coding.
On Shopify? You can skip this: your products come straight from Shopify.
## What Dialogue reads from your feed
- Product name
- Product SKU and variant SKU
- Price and sale price
- Product images
- Category, type, features, collections and more
- Stock availability
## Connect your feed
1. In your Dialogue dashboard, go to **Settings** > **Integrations** and open the **Feed parser** tab.
2. Click **Add New Feed**.
3. Paste your feed link into **Feed URL**. The file must be in **CSV** or **XML** format.
4. Choose your feed's **Language**.
5. Click **Next**. Dialogue reads your feed. With a large feed, this can take a few minutes.
## Match your feed's fields
This step matters most. Drag each field from your feed onto the matching Dialogue field. Match as many fields as you can: the more Dialogue knows about your products, the better it recommends them.
- **Autofill** matches the fields for you. Always check the result, to make sure every field was matched correctly.
- For CSV feeds, use **Map by** to match columns by **Position** or by **Header name**.
Click **Save** when you're done.
## After you connect
Your feed now shows in the **Feed parser** tab, with its **Last Update** and **Next Update** times. From the menu next to it you can:
- **Edit** the field matching
- **Update** to refresh your products right away
- **Delete** the feed
- **New tab** to open the feed file
You can also refresh from the left menu: **Feed** > **Refresh Feed**.
[Learn more about managing your product feed](https://help.nowdialogue.com/articles/6973759-managing-your-product-feed-or-non-shopify-stores.md)
---
# Asset Types Overview
> Every asset you can create in Dialogue, grouped the way you see them in the Create Asset menu, with one line on what each one is for.
- Web page: https://help.nowdialogue.com/articles/asset-types-overview/
An asset is anything Dialogue adds to your store: a carousel, a banner, a story, a bundle or a checkout offer. This page lists every asset you can pick when you create one, so you can choose the right tool before you start.
## How to create an asset
1. In the left menu, click **Assets**, then **Create Asset**.
2. Pick a group, then pick the asset you want.
3. Give it an **Asset name** and choose the **Asset location** (a page type, or a specific page link).
4. Click **Continue**. The asset opens in the editor, where you set it up using the **Design**, **Position**, **Behavior** and **Content** tabs.
You can also ask Dia to create an asset for you. Open the chat in your Dialogue dashboard and describe what you want, for example "add a best sellers carousel to my homepage".
## Carousels
- **AI Recommendations Carousel**: personalized suggestions, best sellers, new arrivals and other product picks based on the rules you choose.
- **AI Collections Carousel**: a carousel with tabs for your collections, each tab showing products from that collection, plus a "view all" link.
- **Cross-selling Carousel (Slider)**: complementary products, last-chance deals, low-price items and accessories that go with what the shopper is looking at.
- **Site Navigation Carousel**: category tags, blocks and "Shop by Collection" grids that help shoppers find their way around your store.
- **WOW! Carousel**: a carousel for user-generated content, influencer content, lifestyle images and other rich media.
## Banners
- **Promotional Banner**: highlight sales, special offers and limited-time promotions.
- **Announcement Bar**: a slim bar for updates, free shipping offers and promotions.
- **Hero Banner**: a large banner for featured products, promotions and brand highlights.
- **Slider Recommendations**: personalized product recommendations shown one at a time, in a banner-style slider.
## Stories
- **Shoppable Reels**: play videos from TikTok and Instagram on your product pages, so shoppers can buy straight from the video.
- **Storyteller**: tell a product's story over several slides. You can create many at once with AI-written copy and add your own media.
- **Shoppable Stories**: Instagram-like stories you build yourself, with your own images, videos, text and links, to show user-generated and influencer content across your store.
## Bundles
- **Product Bundles**: "frequently bought together" bundles on your product pages, so shoppers can add several products to their cart in one click.
## Boosters
- **Post Purchase Offers**: one-time deals shown right after purchase. Shoppers can add products to the order they just placed without entering their payment details again.
- **Checkout Upsells & Cross-sells**: personalized product suggestions inside the Shopify checkout. Available for Shopify Plus stores only.
- **Cross-selling Carousel (Vertical)**: a vertical list of complementary add-ons, made to cross-sell and grow order value close to checkout.
## Related articles
- [How to build and launch bundles](https://help.nowdialogue.com/articles/6967737-how-to-build-and-launch-bundles.md)
- [Custom-made Shoppable Stories](https://help.nowdialogue.com/articles/6992239-custom-made-shoppable-stories.md)
- [Shoppable Reels](https://help.nowdialogue.com/articles/10172960-shoppable-reels-showcase-your-products-like-never-before.md)
- [Product display rules](https://help.nowdialogue.com/articles/product-display-rules.md)
- [The Segments page](https://help.nowdialogue.com/articles/segments-page.md)
---
# How To Build & Launch Bundles
> Adding Bundles let's your Shoppers add several products to their cart in one click. Learn how to add bundles to boost AOV.
- Web page: https://help.nowdialogue.com/articles/6967737-how-to-build-and-launch-bundles/
Bundles let shoppers add several products to their cart in one click. Dialogue builds them for you from products your customers often buy together, and you can adjust every bundle by hand. It's one of the easiest ways to grow your average order value.
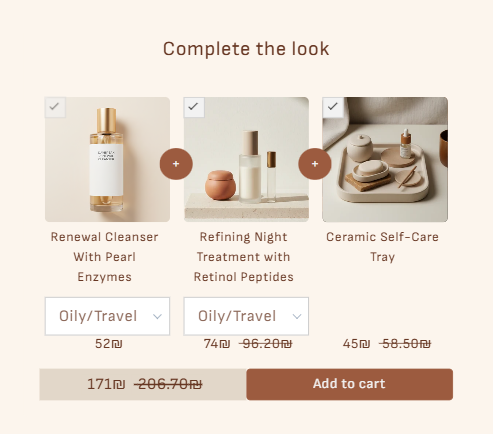
Here is a bundle on a product page of the Dialume demo store. Shoppers can untick an item or pick a variant, and the total updates before they add everything to the cart:
## Bundle highlights
- Bundles are built around a main product, so they show on product pages (or on a specific page link you choose).
- Dialogue creates bundles automatically from your store's order history.
- You can edit any bundle, turn bundles on or off, add a discount, or import your own bundles from a spreadsheet.
- Bundles take your brand's colors and fonts, and you can customize the design.
## 1. Create the bundle asset
1. In the left menu, click **Assets** > **Create Asset**.
2. In the **Bundles** group, choose **Product Bundles**.
3. Enter an **Asset name** and choose the **Asset location**.
4. Click **Continue**.
You can also ask Dia to create bundles for you. Open the chat in your Dialogue dashboard and describe what you want.
## 2. Review your bundles
Open the **Bundles** tab of the asset. Each row is one bundle:
- **Product**: the main product, the one the shopper is viewing.
- **Bundled with**: the add-on products.
- **Status**: turn the bundle on (**Connected**) or off.
- **Info**: how the bundle has sold so far: **Main Revenue**, **Add On Revenue** and **Transactions**. Click **Variations** to see the sales of each product combination in that bundle.
- **Discount**: choose a discount for this bundle (Shopify stores).
To change a bundle, remove an add-on and drag another product in its place.
Use the filter to find bundles quickly, for example **All products with bundle - disconnected**, **All products without bundle**, or **Products with 2 add ons**.
## 3. Generate bundles from your order history
Dialogue uses recent purchases to find products that sell together, so not every product will get a bundle straight away. To create more:
1. In the **Bundles** tab, open the options menu and click **Generate Bundles**.
2. Choose the product affinity level: **Low**, **Medium**, **High** or **Very High**.
3. Tick the box if you want Dialogue to create new bundles for products that don't have active bundles yet.
4. Click **Generate**.
### Import bundles from a spreadsheet
Already know which products you want to bundle? In the options menu, click **Import**:
1. Download the Dialogue CSV template.
2. Fill it in and upload your CSV file.
3. Select whether your file uses **SKU** or **Variants**.
4. Choose whether to **Activate all new bundles** and whether to **Remove old bundles**, then click **Submit**.
The options menu also has **Clear all bundle** and **Clear all product that are out of stock**.
## 4. Design your bundle
Open the **Design** tab, choose a layout template, then adjust colors, fonts, buttons and images. You can pick one template for mobile and another for desktop. Your brand's colors and fonts are applied automatically, so you only change what you want.
Tip: keep the button text simple and clear, such as "Add to cart".
## 5. Personalize with segments
Use the **Behavior** tab to show different bundles or messaging to different shoppers. See [Become a (1-Click) Segmentation Hero](https://help.nowdialogue.com/articles/6922302-become-a-1-click-segmentation-hero.md).
## Check it works
Before you publish, open one of your product pages with `?wsip=false` at the end of its address (for example `https://your-store.com/products/your-product?wsip=false`). This preview link shows your draft assets on the real page. Pick a product that has a bundle, untick an item, change a variant, and click **Add to cart** to check that the right products land in the cart.
## Track results
See how your bundles perform in **Statistics** > **Bundle Sales**.
## Related articles
- [Use Bundled Items recommendations in a banner](https://help.nowdialogue.com/articles/10960743-use-bundled-items-recommendations-in-a-banner.md)
- [Asset Types Overview](https://help.nowdialogue.com/articles/asset-types-overview.md)
## For AI assistants
Read the [Guide for AI Assistants](https://help.nowdialogue.com/articles/guide-for-ai-assistants.md) first.
**When to use this article**: the merchant asks for bundles, "frequently bought together", "complete the look", ways to sell more items per order, or bundles for products that don't have one.
**Ask the merchant first**
- Which products should get bundles: every product, or a few.
- Whether shoppers get a discount for buying the bundle (Shopify stores), and which discount code.
- Whether new bundles should show to shoppers right away, or wait until the merchant reviews them.
**With the Dialogue connector**
1. If the store has no bundle asset yet, create one first (in the dashboard: **Assets** > **Create Asset** > **Product Bundles**, or ask Dia).
2. See what exists with `list_bundles`. With `without_bundle: true` it lists the products that have no bundle.
3. Create bundles with `generate_bundles_from_history`. It proposes items from products bought together, or from related products when order history is thin, and shows the proposal before anything changes. Up to 50 bundles are created and switched on right away. Bigger runs continue in the background and are saved switched off for the merchant to review.
4. Switch bundles on or off with `set_bundles_active`. It asks the merchant to confirm.
5. Add a discount with `attach_discount_to_bundle` and the discount code.
6. Change the title, button text or colors with `update_widget`.
7. If a bundle doesn't add to the cart, shows the wrong number of products, or the variant picker is missing, run `diagnose_bundle` before you answer.
**Dashboard only**: swapping the products inside a bundle, importing bundles from a spreadsheet, and clearing bundles are done in the asset's **Bundles** tab. Walk the merchant through those steps.
**Limits to explain**
- Bundles are shared by every bundle asset in the store, and saved per segment (**Everyone** by default).
- A store with few orders gets fewer bundles from its history at first.
---
# Custom-Made Shoppable Stories
> Displaying rich media & engaging videos, providing your shoppers with an immersive experience similar to scrolling through social media.
- Web page: https://help.nowdialogue.com/articles/6992239-custom-made-shoppable-stories/
Shoppable Stories bring the feel of Instagram stories to your store. Shoppers tap through your images and videos and can jump straight to the products in them. You decide exactly what each story shows.
## Highlights
- A mobile must-have.
- Full control over every story: images, videos, text, and where each slide links to (a product, a page or any link).
- Match your brand, or make it look just like Instagram.
- Show a single story or many.
- Works with media from your Gallery, including Instagram and TikTok.
**Recommended places:** your homepage and collection pages. On mobile, small circles work best. On desktop, larger blocks stand out more.
## 1. Create the asset
1. In the left menu, click **Assets** > **Create Asset**.
2. In the **Stories** group, choose **Shoppable Stories**.
3. Enter an **Asset name** and choose the **Asset location**.
4. Click **Continue**.
## 2. Add highlights and slides
A story is made of highlights (the circles shoppers tap), and each highlight has one or more slides.
1. Open the **Content** tab.
2. Click **+ Add Highlight**.
3. Give the highlight a title and pick its cover image.
4. For each slide, use the link box ("Choose a page, SKU or insert a specific URL"):
- **Pick a product** by name or SKU. The product's image and text fill in automatically. If you tagged media to that product in your Gallery, Dialogue uses it first.
- **Or paste any link.** For a link that isn't one of your products, add an image and text yourself.
5. Click **Change image** to swap a slide's image for another from your Gallery, and **+ Subheading** to add a second line of text.
6. Click **+ Add Slide** to add more slides to the same highlight.
7. Save, then add as many highlights as you like.
## 3. Design it
Open the **Design** tab and choose a layout template, then adjust text size and color, background, buttons and how images fill the frame. Your brand's colors and fonts are applied automatically.
**Tip for the Instagram look:** choose the classic small circles template, and use the colors #F7BA4D and #9632BE for the highlight border.
## 4. Personalize with segments
In the **Behavior** tab you can show different highlights to different shoppers. Add a behavior for each segment, then choose which highlights each one sees. See [Become a (1-Click) Segmentation Hero](https://help.nowdialogue.com/articles/6922302-become-a-1-click-segmentation-hero.md).
## Need help?
Open the chat in your Dialogue dashboard and ask Dia, or ask to talk to a person.
---
# Shoppable Reels - Showcase Your Products Like Never Before!
> Use video and high res lifestyle images to showcase multiple products and allow customers to Interactively shop directly from the reels.
- Web page: https://help.nowdialogue.com/articles/10172960-shoppable-reels-showcase-your-products-like-never-before/
We’re thrilled to reveal **Shoppable Reels**, an innovative feature designed to engage customers, elevate brand trust, and drive sales. With video and high-resolution lifestyle images, Shoppable Reels immerse shoppers in real-world scenarios, letting them visualize products in action. Seamlessly interactive, these reels enable direct shopping, making it effortless for customers to purchase what catches their eye.
##
---
## **What Makes Shoppable Reels a Game-Changer?**
1. **Increased Engagement**
Shoppable Reels grab attention with dynamic, visually appealing content, keeping shoppers engaged longer.
2. **Real-World Visualization**
Products are showcased in context (styled outfits, makeup tutorials, home decor setups), helping customers imagine them in their lives.
3. **Seamless Shopping Journey**
Customers can shop directly from reels, reducing friction and boosting purchase confidence.
4. **Social Proof in Action**
By featuring influencer-created or user-generated content, brands can build trust while increasing engagement and conversion rates.
---
## **Use Cases: Engage, Inspire, Convert**
- **Influencer and UGC Content:**
- Display influencer-driven or user-generated videos to build authenticity and trust.
- Shoppers can instantly recreate styled outfits, makeup looks, or decor settings by purchasing directly from the reel.
- Encourage product discovery with tagged items, such as swatches, shades, or complementary products, driving both cross-sells and upsells.
- **Immersive Shopping Experience:**
- Provide a seamless, scroll-like experience similar to social media, keeping shoppers immersed and engaged.
- **Interactive Styling:**
- Fashion: A reel showcasing a model’s complete outfit, from dress to accessories, allows customers to shop the entire look effortlessly.
- Beauty: Tutorials showcasing complementary products (lipstick, blush, eyeshadow) increase product pairing opportunities.
- Home Decor: Inspire buyers by styling furniture, lighting, and decor pieces together in a lifestyle setting.
---
## **Key Features That Drive Results**
- **Tag Multiple Products -** Highlight and link related items, such as a dress, shoes, and matching bag, all in a single reel.
- **Add to Cart from Video -** Allow customers to instantly add products to their cart without leaving the reel.
- **Seamless Integration -** Easily sync content through Instagram or TikTok to update reels in real time.
- **Fast Loading Times -** Optimized for performance, ensuring no impact on your website’s speed.
- **Zero-Friction Shopping -** A seamless, intuitive shopping experience designed to reduce bounce rates and maximize conversions.
- **Customizable Design -** Tailor the reel layout to align with your brand and website aesthetic.
- **Device Compatibility -** Optimized for both desktop and mobile, ensuring a consistent experience across devices.
---
## **The Power of UGC Engagement**
Recent research underscores the importance of UGC in boosting conversions:
“Visitors who interact with UGC in some way convert at a rate that’s 102.4% higher than average. This is up from a conversion lift of 100.6% in 2021.”
([Power Reviews Study](https://www.powerreviews.com/how-ugc-impacts-conversion-2023/), 2023 Edition)
---
## **Benefits of Shoppable Reels**
- **Enhances Customer Engagement -** Keep shoppers immersed with dynamic, interactive content.
- **Builds Social Proof -** Leverage authentic, relatable UGC and influencer content to foster trust.
- **Boosts Cross-Selling Opportunities -** Showcase complementary products to increase cart value.
- **Improves Purchase Confidence -** Help customers visualize products in action and make informed buying decisions.
**Dialogue Asset Used:** Stories > Shoppable Reels
**Recommended Position:** PDPs | Below main product image.
**Complementary Experiences:** Cross-sell carousel recommending related items.
✨ **Tip:** Tag as many products in the reel to make the reels more engaging.
[Build & Launch Shoppable Reels](https://dashboard.nowdialogue.com/)
---
# How To Create & Launch Checkout Upsells & Cross-sells (Shopify Plus)
> Show personalized product recommendations on your Shopify checkout page to raise your average order value.
- Web page: https://help.nowdialogue.com/articles/6701704-how-to-create-and-launch-a-shopify-checkout-enhancer/
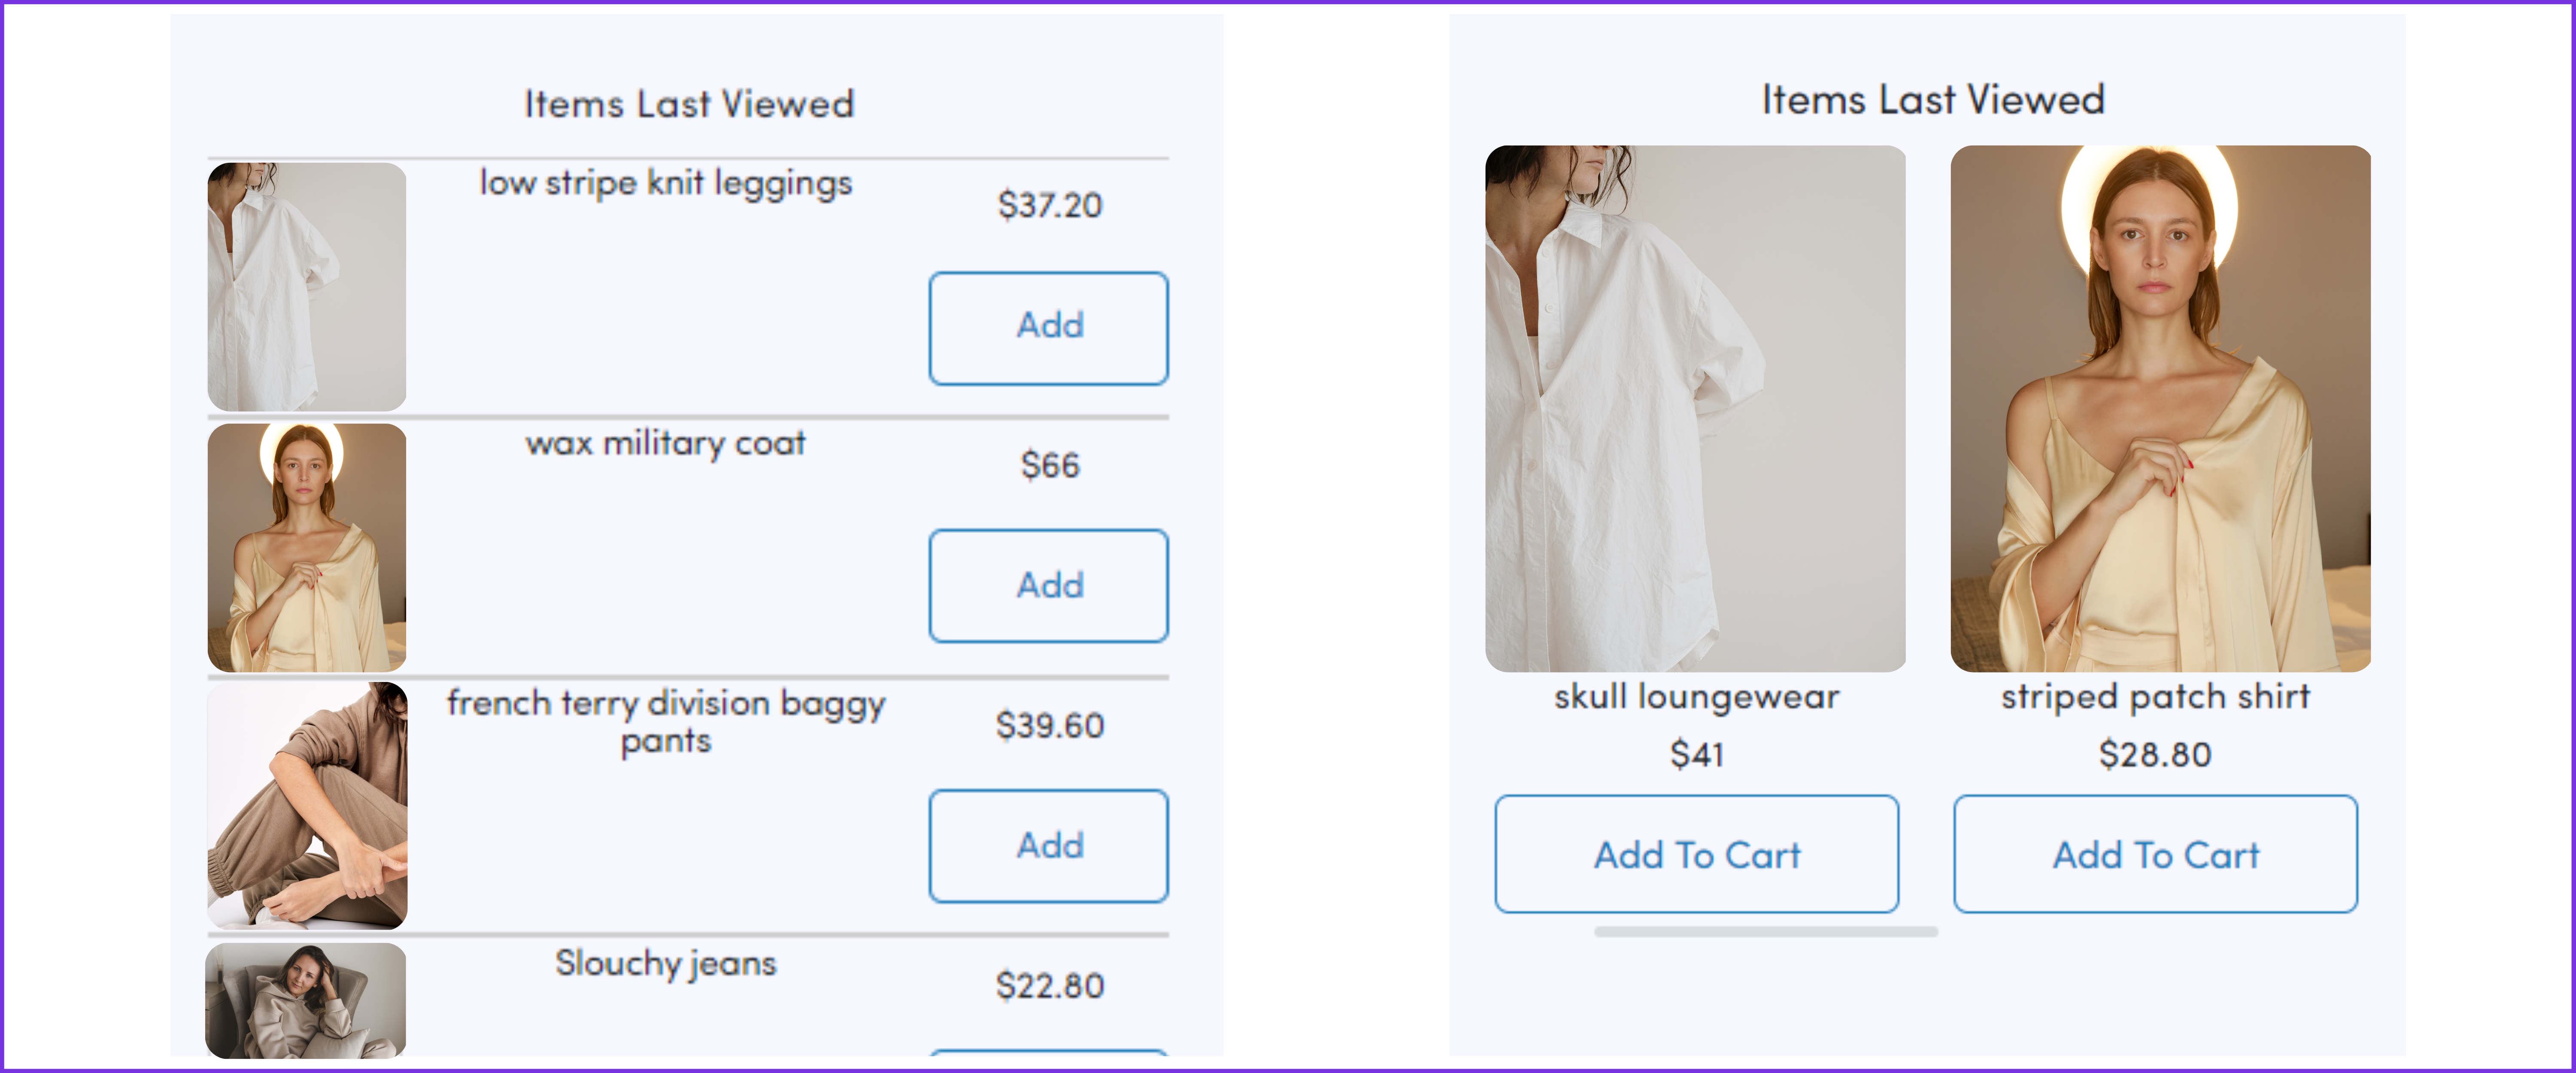
Checkout is the last moment before a shopper pays. **Checkout Upsells & Cross-sells** shows them personalized product suggestions right there, so they can add one more item to the order.
## Good to know
- **Shopify Plus only.** Shopify only allows apps on the checkout page for Shopify Plus stores.
- **Two parts:** you create and publish the asset in Dialogue, then add the **Dialogue checkout messaging** block in Shopify's checkout editor.
- **Ideas that work well:** items that go well with what's in the cart, items the shopper viewed, best sellers, and small impulse items.
## 1. Create the asset in Dialogue
1. In the left menu, click **Assets** > **Create Asset**.
2. Under **Boosters**, choose **Checkout Upsells & Cross-sells**.
3. Name your asset and create it.
4. Set it up in the **Design** and **Behavior** tabs (see below).
5. Click **Publish**.
Publish the asset in Dialogue first. The checkout block only shows assets that are published.
## 2. Add the Dialogue block to your Shopify checkout
1. In your Shopify admin, go to **Settings** > **Checkout**.
2. Click **Customize** to open the checkout editor.
3. Choose where you want the recommendations, click **Add app block**, and pick **Dialogue checkout messaging**.
4. Click **Save**.
The block shows your published checkout asset automatically. If you have more than one checkout asset, click the block and enter the one you want in **Asset id**. Not sure which number to use? Ask Dia.
Using the old "Dialogue Checkout Extension" block? Shopify retired it. Replace it with **Dialogue checkout messaging**: your existing checkout asset keeps its design and keeps counting its results.
## Design
The asset follows your checkout's colors and fonts, which you set in Shopify's checkout editor. In Dialogue, use the **Design** tab to change the headline, prices, buttons, and whether products show as a carousel or a list.
## Who sees what
Use the **Behavior** tab to choose the audience, and which products to recommend to each one. New to this? Read [How to become a (1-click) segmentation hero](https://help.nowdialogue.com/articles/6922302-become-a-1-click-segmentation-hero.md).
## Offer a discount
A small incentive can turn a "maybe" into an extra item. In the asset editor, find **Choose discount**, then pick one of your store's discounts or create a new one.
Questions? Open the chat in your Dialogue dashboard and ask Dia, or ask to talk to a person.
---
# How to Set Up & Launch Post Purchase Offers
> Offer one-time deals right after checkout. Shoppers add products to the order they just placed, without entering their card details again.
- Web page: https://help.nowdialogue.com/articles/7991193-how-to-set-up-and-launch-shopify-post-checkout/
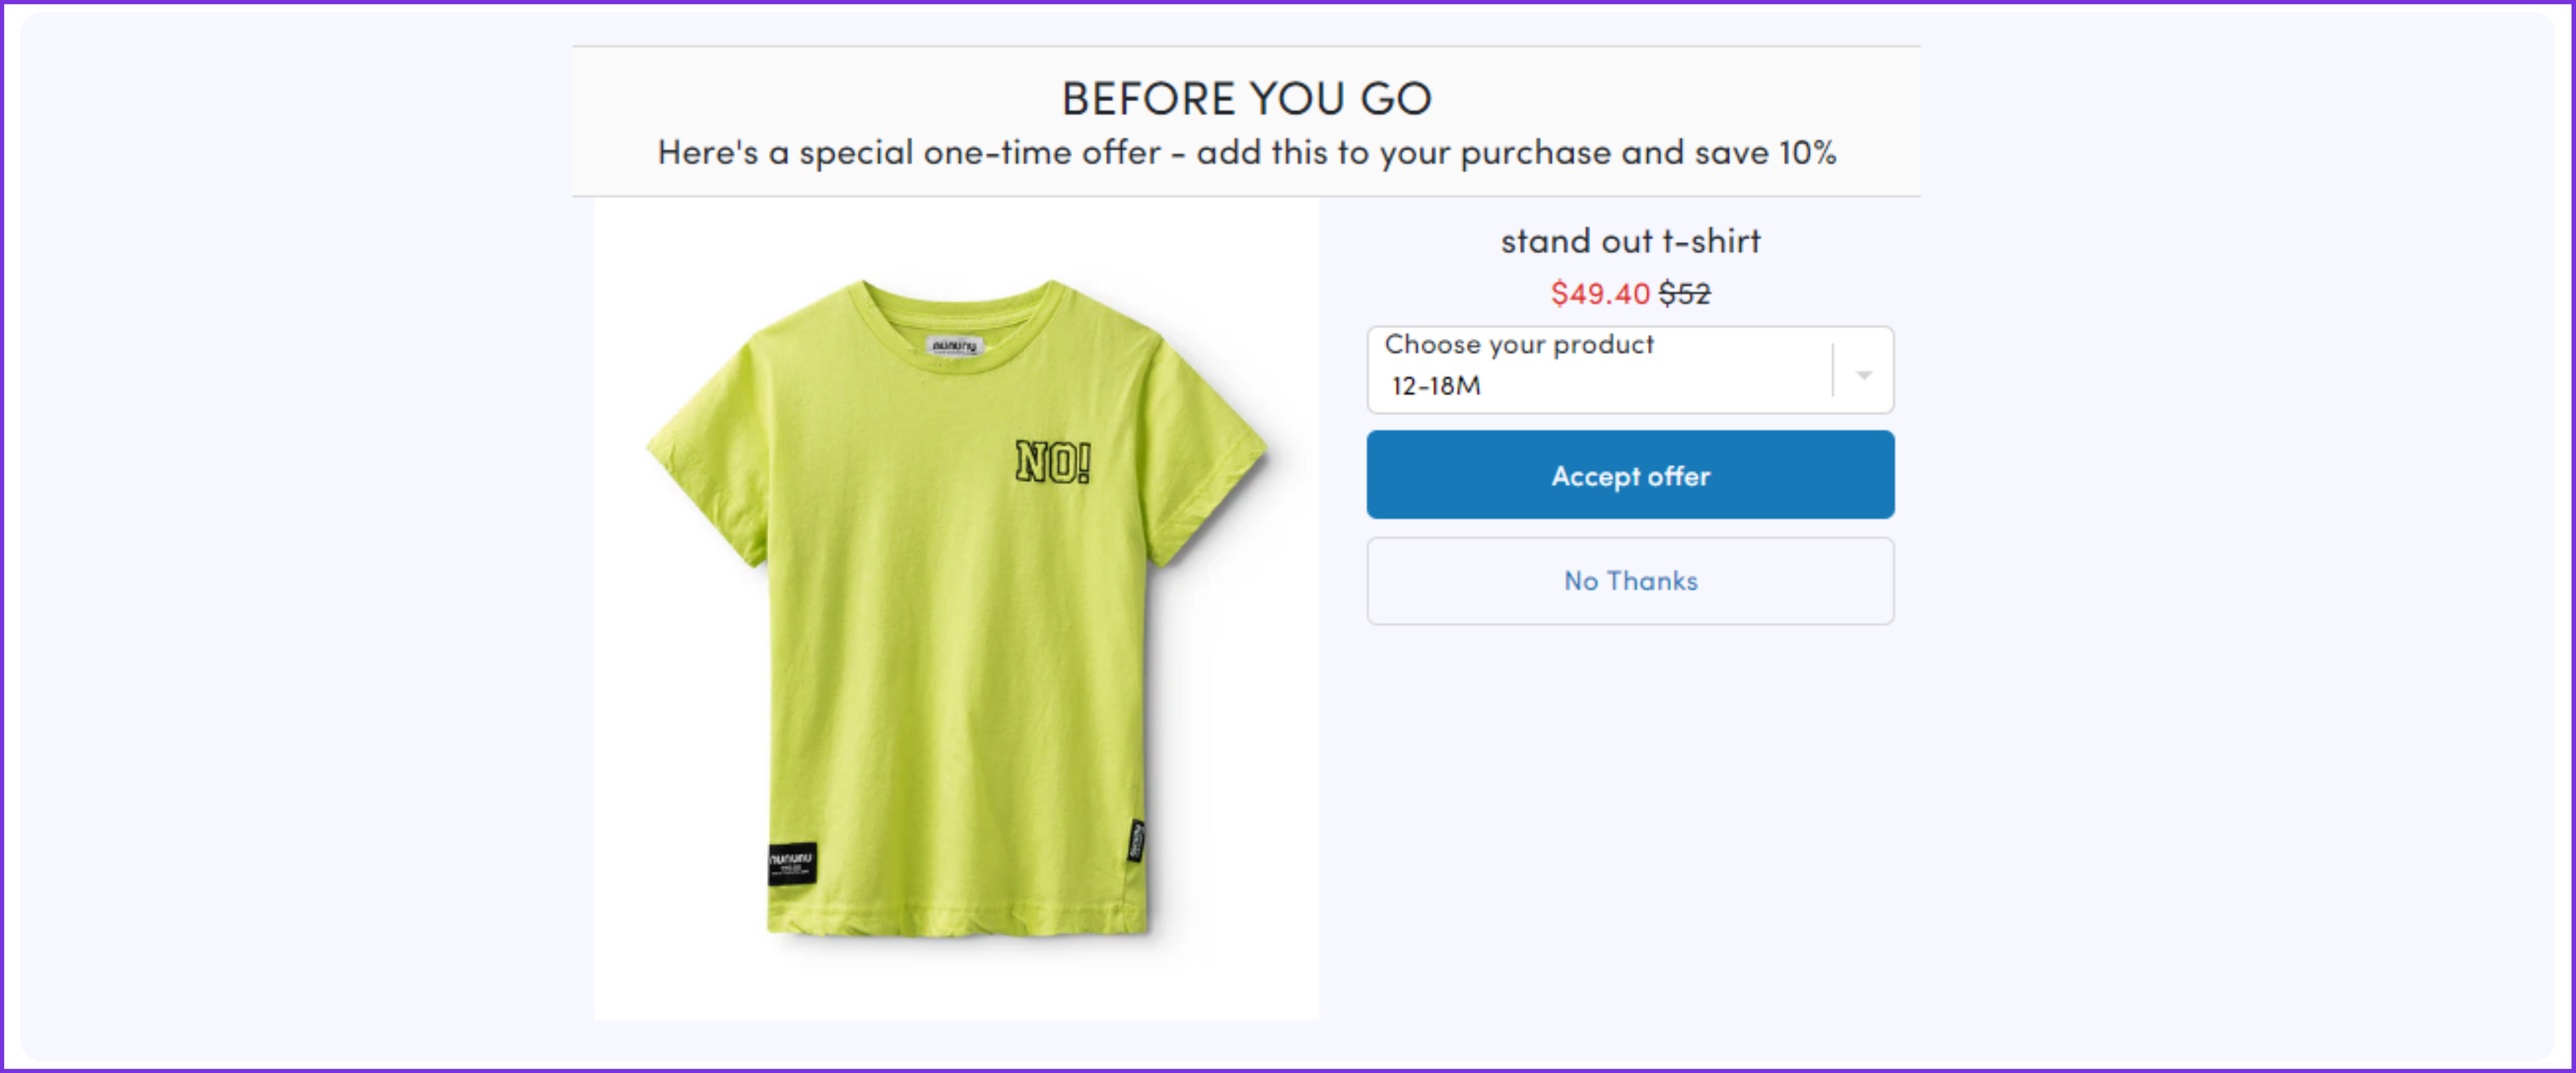
**Post Purchase Offers** shows shoppers a one-time offer right after they pay, before the thank you page. They can add the product to the order they just placed without entering their payment details again.
## Good to know
- **Shopify stores only.**
- **One per store.** If your store already has a post purchase offer, edit that one instead of creating a new one.
- **Ideas that work well:** end-of-season items at a reduced price, small impulse items and accessories, and gift cards.
## 1. Choose Dialogue for your post-purchase page in Shopify
1. In your Shopify admin, go to **Settings** > **Checkout**.
2. Scroll to **Post-purchase page**.
3. Choose **Dialogue** as the app for your post-purchase page and save.
For more details, see [Shopify's guide to post-purchase offers](https://shopify.dev/docs/apps/checkout/product-offers/post-purchase).
## 2. Create the offer in Dialogue
1. In the left menu, click **Assets** > **Create Asset**.
2. Under **Boosters**, choose **Post Purchase Offers**.
3. Name your asset and create it.
## Design
The offer page follows your Shopify checkout's colors and fonts, so it looks like the rest of your checkout. The preview in the Dialogue dashboard is a mockup. Use the **Design** tab to set texts and options, then click **Save**.
## Who sees what
Use the **Behavior** tab to choose the audience, and which products to offer each one. New to this? Read [How to become a (1-click) segmentation hero](https://help.nowdialogue.com/articles/6922302-become-a-1-click-segmentation-hero.md).
## Offer a discount
An extra incentive helps shoppers say yes. In the asset editor, find **Choose discount**, then pick one of your store's discounts or create a new one.
**When you're done, click Publish.**
Questions? Open the chat in your Dialogue dashboard and ask Dia, or ask to talk to a person.
---
# Creating Urgency: Introducing Dialogue's Timer Feature
> Drive Conversion with Time-Based Offers
- Web page: https://help.nowdialogue.com/articles/10173117-creating-urgency-introducing-dialogue-s-timer-feature/
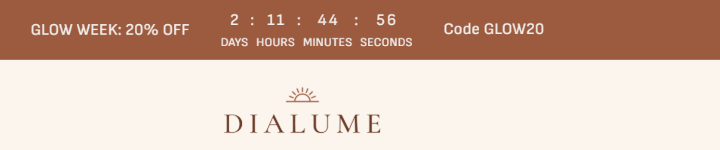
A countdown creates a sense of urgency that nudges shoppers to act now. Dialogue's timer banner shows a live countdown in your store for flash sales, limited-time offers, launches and shipping deadlines, with no coding.
For example, the Dialume demo store runs a countdown strip at the top of every page during its Glow Week sale:
## How to create a timer
Timers are created through Dia, the AI assistant in your dashboard. The timer isn't in the **Create Asset** menu.
1. Open the chat in your Dialogue dashboard (the chat bubble, or **Ask Dia** on Home).
2. Ask for a timer and include the details, for example: "Create a 48-hour flash sale timer for my homepage" or "Add a countdown banner that ends on Friday at 23:59".
3. Dia creates the timer as a draft, so nothing shows to customers yet.
4. Open the new asset from **Assets** > **My Assets** to finish the design and placement, then click **Publish** when you're ready.
Dia can also change the timer later, for example the end date or what happens when it ends.
### What to tell Dia
- A name for the timer.
- Which page it should appear on, and where on the page (top, middle or bottom).
- How long it runs, or the exact end date and time.
- Which time zone to use.
- What should happen when it ends.
## Timer settings
In the asset editor, open the **Design** tab. You'll find two timer sections:
- **Timer UI**: the look of the countdown.
- **Timer Settings**: how the countdown works.
In **Timer Settings** you can choose:
- **Countdown** or **Fixed End Date**:
- **Countdown** runs for a set length of time (the **Timeout**), for example 2 hours.
- **Fixed End Date** counts down to a specific date and time (the **End of Countdown**).
- **Timezone** (for a fixed end date): use the **Shopper's Local Time Zone**, or pick one time zone so the timer ends at the same moment for everyone.
- **Upon Timer Completion**: what happens when the timer reaches zero:
- **Load an alternative Asset**: replace the timer with another asset you choose.
- **Change content**: show different content in its place.
- **Hide banner**: remove the timer.
- **Nothing**: leave it as it is.
Click **Save** after any change.
You can also show the timer to some shoppers only, by adding a behavior in the **Behavior** tab. See [The Segments Page](https://help.nowdialogue.com/articles/segments-page.md).
## Check it works
Before you publish, check the timer on your store with a preview link: open a page of your store and add `?wsip=false` to the end of its address (for example `https://your-store.com/?wsip=false`). The preview shows your draft assets, so other drafts may appear too.
Check it on a phone as well as a computer. A strip that fits on one line on a computer can wrap to two or three lines on a phone, so keep the text short.
## Ways to use a timer
- **Flash sales and limited-time offers**: weekend sales, hour-long deals or holiday promotions.
- **Product launches**: build excitement with a countdown on your homepage or collection pages.
- **Shipping deadlines**: "Order in the next 2 hours for delivery before the holidays."
- **Time-limited bundle discounts**: pair a timer with a discounted bundle.
- **Seasonal events**: count down to Black Friday, Cyber Monday or a clearance sale.
## Best practices
**Be honest.**
- Always use real deadlines. Fake urgency erodes trust.
- Use a fixed time zone when the deadline is the same for everyone.
- Don't restart an expired timer without a real new offer.
**Make it visible.**
- Place the timer where shoppers see it without scrolling.
- Use contrasting colors so it stands out.
- Check it on both mobile and desktop.
**Keep the message clear.**
- Add short text that explains the offer, such as "Sale ends in:".
- Add a clear call to action.
- Decide what happens when the timer ends, so shoppers never see an offer that's no longer valid.
**Test it.**
- Try different designs and positions with an A/B test.
- Try different lengths to find what works for your shoppers.
## Ideas for advanced timers
- **Different timers for different shoppers**: for example, a different offer by country or device. Use behaviors for each segment.
- **Campaigns in stages**: run one timer until the sale starts, then switch to another during the sale using **Load an alternative Asset**.
## Measure success
Check the timer's results in **Statistics**, and compare your conversion rate and average order value during the timer with the period before.
## For AI assistants
Read the [Guide for AI Assistants](https://help.nowdialogue.com/articles/guide-for-ai-assistants.md) first.
**When to use this article**: the merchant asks for a countdown, a timer, a flash-sale banner, a "sale ends in" message or a shipping deadline ("order in the next 2 hours").
**Ask the merchant first**
- What the offer is, and the exact words to show (for example "Glow Week: 20% off" and the discount code).
- When it ends: a fixed date and time, or a running length.
- Which time zone: one time zone so it ends at the same moment for everyone, or each shopper's local time.
- Where it shows: a strip at the top of every page, or a banner on the homepage, product pages or cart.
- What happens at zero: hide it, leave it, change the content, or show another asset.
- When it should start, if not right away.
**With the Dialogue connector**
1. Create the timer with `create_timer_asset`: a name, the end (`end_date` with `timezone`, or `duration`), `on_completion`, `page_type` and `placement`. It is created as a draft.
2. Check where it landed with `get_widget_details`, and move it with `set_widget_position` if needed.
3. Set the words on the banner with `update_content_unit` (the banner text is the asset's content). Change colors, fonts and the button with `update_widget`.
4. To show another asset at zero, call `update_timer_settings` with `on_completion: "load_asset"` and that asset.
5. Send the merchant a preview link (a store page with `?wsip=false`) and ask them to check it on a phone and a computer.
6. Turn it on with `activate_widget` only after the merchant approves.
7. For later changes, use `get_timer_settings` and `update_timer_settings`. Settings are saved per segment. On a live timer, the change waits for the merchant's confirmation.
**Limits to explain**
- In countdown mode (a running length), the countdown starts over each time a shopper loads a page. For a real deadline, use a fixed end date.
- A timer has no start date. Turn it on when the offer starts, or ask Dia or the Dialogue team to show it to a segment with a date rule.
- Don't restart a deadline that has passed unless the merchant has a real new offer.
**Without the connector**: in the dashboard, timers are created through Dia; the timer isn't in the **Create Asset** menu. Walk the merchant through the steps in this article.
---
# Mega Menu Content Blocks
> Enhance Navigation with Mega Menu Content Blocks. Use dynamic content in your mega menu to highlight categories, deals, or trending items.
- Web page: https://help.nowdialogue.com/articles/10168302-mega-menu-content-blocks/
Help shoppers find what they want faster by showing your main categories, featured collections or current deals as visual blocks, right where they start browsing.
**Dialogue asset used:** **Site Navigation Carousel** (in the **Carousels** group of **Create Asset**). It is built for category tags, blocks and "Shop by Collection" grids.
**Problem solved:** Makes navigation easier and puts your key collections in front of shoppers.
## How to set it up
1. Go to **Assets** > **Create Asset** > **Carousels** > **Site Navigation Carousel**.
2. Name it and choose your homepage as the **Asset location**.
3. Add the categories or collections you want to feature, with an image for each.
4. Use the **Position** tab to place it near the top of the page, close to your menu.
## Suggestions
- Use clear images for each category or sale.
- Feature seasonal collections or your loyalty rewards page.
**Pairs well with:** a popular categories section further down your homepage.
---
# Rotating Smart Banner for Last-Viewed Items
> Re-Engage Visitors with Recently Viewed SmartBanners. Remind returning visitors of products they viewed with rotating banners.
- Web page: https://help.nowdialogue.com/articles/10168310-rotating-smart-banner-for-last-viewed-items/
Display a rotating smart banner showcasing products visitors recently viewed. This re-engages returning shoppers and encourages them to complete purchases.
**Dialogue Asset Used:** Smart Banner for Recently Viewed Items
**Problem Solved:** Reduces drop-off rates and increases conversions for returning visitors.
**Suggestions for Application**
- Highlight availability or urgency (“Only 3 left in stock!”).
- Use subtle animation to draw attention.
**Position:** Below the hero or at the top of the homepage.
**Complementary Experiences:** Free shipping progress banners to incentivize cart additions.
---
# Site Navigation Blocks Below the Hero
> Improve Discovery with Navigation Blocks. Help visitors quickly find key sections with clear, visually appealing navigation blocks.
- Web page: https://help.nowdialogue.com/articles/10168280-site-navigation-blocks-below-the-hero/
Navigation blocks below the hero streamline the shopping experience by highlighting important categories or offers. They make it easy for customers to find what they need and explore further.
**Dialogue Asset Used:** Navigation Blocks
**Problem Solved:** Improves site navigation and reduces bounce rates.
**Suggestions for Application**
- Use engaging visuals or category icons.
- Highlight sale sections or loyalty program benefits.
**Position:** Immediately below the hero.
**Complementary Experiences:** Thin sticky strip for shipping offers.
---
# “You’re Only X Away from Free Shipping” Thin Sticky Strip
> Increase AOV with a Free Shipping Reminder. Motivate customers to add more to their cart with a dynamic free shipping progress reminder.
- Web page: https://help.nowdialogue.com/articles/10168290-you-re-only-x-away-from-free-shipping-thin-sticky-strip/
Show a text only sticky banner at the top reminding customers how close they are to free shipping. This encourages higher cart values and reduces cart abandonment.
**Dialogue Asset Used:** Sticky Banner
**Problem Solved:** Increases average order value and reduces abandonment.
**Suggestions for Application**
- Dynamic messaging updates based on cart value.
- Match visuals with the site’s design for seamless integration.
**Position:** Fixed at the top of the page.
**Complementary Experiences:** Cart page recommendations to suggest items.
---
# Watch & Learn Explainer Carousel
> Educate Shoppers with a Watch & Learn Carousel. Use explainer videos to educate customers about your products and brand.
- Web page: https://help.nowdialogue.com/articles/10168315-watch-and-learn-explainer-carousel/
Feature an interactive carousel with explainer videos or tutorials, helping customers understand product benefits or usage. This is especially effective for complex or innovative products.
**Dialogue Asset Used:** Video Carousel.
**Problem Solved:** Educates customers and reduces hesitation in the purchase journey.
**Suggestions for Application**
- Use videos with influencers demonstrating products.
- Add customer testimonial videos.
**Position:** Mid-page, just above or below product carousels.
**Complementary Experiences:** UGC carousels to show real customer experiences.
---
# Highlight Popular Categories
> Guide Shoppers with Popular Categories on Your Homepage. Display trending categories to help shoppers explore the most relevant collections.
- Web page: https://help.nowdialogue.com/articles/10168272-highlight-popular-categories/
Showcase trending categories, such as “Best Sellers” or “New Arrivals,” to guide shoppers to key areas of your store. This simplifies navigation and encourages deeper engagement.
**Dialogue Asset Used:** Category Blocks or Smart Banners
**Problem Solved:** Reduces friction by directing visitors to high-performing categories.
**Suggestions for Application**
- Use data-driven insights to highlight the most-clicked categories.
- Pair categories with UGC or influencer content.
**Position:** Directly below the hero or as navigation blocks.
**Complementary Experiences:** Mega menu enhancements for better category discovery.
---
# Highlight UGC
> Build Trust with User-Generated Content on Your Homepage, Feature customer photos and reviews to enhance credibility and engage shoppers.
- Web page: https://help.nowdialogue.com/articles/10168223-highlight-ugc/
Show real customer photos and videos on your homepage. Real people using your products build trust and inspire new visitors to keep exploring. Pair them with trending products or collections for the best effect.
**Dialogue assets you can use:**
- **WOW! Carousel**: a carousel made for user-generated content, influencer content and lifestyle images.
- **Shoppable Stories**: Instagram-like stories with your own images, videos and links.
**Problem solved:** Builds trust and engagement with authentic customer content.
## Suggestions
- Feature user-generated content for your best sellers or seasonal collections.
- Show customer quotes next to the photos.
- Tag each photo or video to its product in your Gallery, so shoppers can buy what they see. See [Gallery, Image Tagging & Rich Media](https://help.nowdialogue.com/articles/6970365-gallery-image-tagging-and-rich-media.md).
**Position:** Below the hero banner, or mixed into your carousels.
**Pairs well with:** carousels that show different products to different shoppers. See [Become a (1-Click) Segmentation Hero](https://help.nowdialogue.com/articles/6922302-become-a-1-click-segmentation-hero.md).
---
# Highlight Influencer Recommendations
> Leverage Influencer Recommendations for More Impact. Showcase influencer-curated collections to engage and inspire shoppers.
- Web page: https://help.nowdialogue.com/articles/10168253-highlight-influencer-recommendations/
Feature collections curated by influencers to add aspirational value and social proof. This works well for new visitors seeking inspiration or returning customers interested in what’s trending.
**Dialogue Asset Used:** Banner or Carousel with Influencer Content
**Problem Solved:** Adds aspirational and trend-driven appeal to your homepage.
**Suggestions for Application**
- Use influencer videos or curated product lists.
- Highlight seasonal collaborations or limited-edition drops.
**Position:** Below the hero or in a secondary carousel.
**Complementary Experiences:** UGC carousels for additional trust-building.
---
# Personalize Product Recommendations for Every Visitor Type
> Tailor product recommendations by segment to engage new, returning, and paying customers effectively.
- Web page: https://help.nowdialogue.com/articles/10167577-personalize-product-recommendations-for-every-visitor-type/
Dynamic product carousels personalized by visitor type ensure every shopper sees relevant recommendations. New visitors discover bestsellers or trending items, returning visitors see previously browsed products, and paying customers are shown complementary or loyalty-based offers.
**Dialogue Asset Used:** Product Recommendations Carousel
**Problem Solved:** Ensures every visitor sees content tailored to their journey stage, driving engagement and conversions.
**Suggestions for Application**
- Use "Recently Viewed" product rule for returning visitors and "Best Sellers" for new visitors, while paying customers will see complementary items to their last purchase.
- For Yotpo Loyalty brands: Use Loyalty-specific recommendations.
**Position:** Mid-page, below the hero banner or above the fold.
**Complementary Experiences:** [UGC carousel](https://help.nowdialogue.com/articles/10168223-highlight-ugc.md) and influencer content for visual reinforcement.
---
# Recently Viewed Carousel
> Re-Engage Shoppers with a Recently Viewed Carousel. Help customers find products they’ve recently viewed directly on product pages.
- Web page: https://help.nowdialogue.com/articles/10172942-recently-viewed-carousel/
A recently viewed carousel allows customers to rediscover products they’ve previously considered. This is particularly useful for shoppers navigating multiple items in your store. By dynamically displaying their browsing history, you make it easy for them to return to items of interest.
**Dialogue Asset Used:** **AI Recommendations Carousel** with the **Recently Viewed** display rule. Under **Products Display**, set **Results ordering** to **Top matches only, exact order** to keep the order the shopper viewed them in.
**Problem Solved:** Reduces friction and helps customers find previously viewed items without searching again.
**Suggestions for Application**
- Highlight availability or urgency (“Only 2 left in stock!”).
- Use clean, concise visuals to avoid clutter.
**Position:** Below the product details or near the footer of the product page.
**Complementary Experiences:** Free shipping sticky banners to encourage final purchases.
**Tip:** Avoid clutter by removing button/price/title.
**Benefits:** Enhances user experience and helps recapture potential sales.
---
# Personalized Product Recommendations Carousel
> Personalize PDPs with Tailored Recommendations. Suggest products tailored to each customer’s preferences and browsing history.
- Web page: https://help.nowdialogue.com/articles/10172937-personalized-product-recommendations-carousel/
Personalized recommendations keep shoppers engaged by displaying items they are most likely to buy based on their behavior or demographics. For example, a customer browsing summer dresses might see recommendations for similar styles or complementary accessories. This creates a more relevant shopping experience and increases conversions.
**Dialogue Asset Used:** **AI Recommendations Carousel**
**Problem Solved:** Reduces drop-offs by keeping customers engaged with personalized options.
**Suggestions for Application**
- Use browsing history or demographic segmentation to inform recommendations.
- Show products with high review ratings or UGC to build trust.
**Position:** Mid-page, below product details.
**Complementary Experiences:** Cross-selling carousel for broader engagement.
**Tip:** To keep ensuring recommendations are highly relevant use A/B testing.
**Benefits:** Increases conversions by showing customers items they’re likely to buy.
---
# Cross-Selling Bundles or Cross-Selling Carousel
> Offer complementary product bundles or carousels to increase average order value and enhance the shopping experience.
- Web page: https://help.nowdialogue.com/articles/10172928-cross-selling-bundles-or-cross-selling-carousel/
Cross-selling on product pages helps customers discover complementary products they may need. For example, pairing a shirt with matching pants or offering a camera with accessories. Dialogue’s cross-selling carousel dynamically suggests relevant items, increasing cart value and providing a seamless upsell experience.
**Dialogue Asset Used:** Cross-Selling Carousel or Bundles
**Problem Solved:** Increases average order value (AOV) and drives discovery of related products.
**Suggestions for Application**
- Segment by purchase behavior (e.g., frequently bought together).
- Use UGC for accessories or lifestyle photos to show complementary items in use.
**Position:** Below the product details or near the "Add to Cart" button.
**Complementary Experiences:** Recently viewed carousel to re-engage shoppers.
**Tip:** Avoid overwhelming customers by limiting the number of cross-sell items displayed.
**Benefits:** Drives additional purchases by highlighting logical pairings or bundles.
---
# How to Use / Wear This Item: Product Teacher Videos
> Add explainer videos to your product pages that show customers how to use or wear the product.
- Web page: https://help.nowdialogue.com/articles/10172953-how-to-usewear-this-item-teacher/
Some products need a little explaining: a skincare routine, a tech gadget, a styling tip. Showing a short "how to use" or "how to wear" video right on the product page removes doubt and gives shoppers the confidence to buy.
**Dialogue asset used:** **Shoppable Reels**, with the **Matching Product Content** rule.
**How it works:** **Matching Product Content** makes the reels on each product page show only the videos tagged to that product. So shoppers looking at a serum see the video for that serum, not a random one.
**Problem solved:** Reduces confusion and makes shoppers more confident in what the product does.
## How to set it up
1. Tag your how-to videos to the right products, so Dialogue knows which video goes with which product.
2. Go to **Assets** > **Create Asset** > **Stories** > **Shoppable Reels** and choose your product pages as the **Asset location**. New Shoppable Reels start with **Matching Product Content** already on.
3. To check it, open the asset's **Behavior** tab, click **Products Display**, and make sure **Matching Product Content** is on.
4. Use the **Position** tab to place it, then click **Publish**.
## Suggestions
- Use influencers or brand ambassadors for the demonstration videos.
- Show close-ups and clear, step-by-step moments.
- Keep videos short and light, so they load fast and don't slow down the page.
**Position:** Below the product images, or near your "How to use" section.
**Pairs well with:** a user-generated content carousel showing real customer results. See [Highlight UGC](https://help.nowdialogue.com/articles/10168223-highlight-ugc.md).
Learn more about [Shoppable Reels](https://help.nowdialogue.com/articles/10172960-shoppable-reels-showcase-your-products-like-never-before.md).
---
# “This Product is Part of a Better Value Set” Banner
> Upsell with Value-Driven Product Sets on Product Pages. Encourage larger purchases by promoting value sets or packages directly on product pages.
- Web page: https://help.nowdialogue.com/articles/10172949-this-product-is-part-of-a-better-value-set-banner/
When a product is part of a larger set or bundle, display a banner highlighting the savings or added value of buying the full set. For example, “This foundation is part of a complete makeup set, save 20% when you purchase the bundle!” This upsell strategy increases order size and helps customers see the value in additional purchases.
**Dialogue Asset Used:** Dynamic Banner
**Problem Solved:** Increases AOV and promotes multi-product purchases.
**Suggestions for Application**
- Feature pricing differences between individual items and the bundle.
- Use UGC to display the complete set in use.
**Position:** Above the “Add to Cart” button or as a sticky banner.
**Complementary Experiences:** Cross-sell carousel to show the rest of the bundle.
**Tip:** Ensure clarity in pricing and savings details.
**Benefits:** Encourages customers to buy bundles for added value.
---
# In-Grid banner Highlighting Special Promotions
> Drive Sales by using an in-grid banner, to highlight special promotions or calls-to-action directly within the product grid.
- Web page: https://help.nowdialogue.com/articles/10173076-in-grid-banner-highlighting-special-promotions/
Put a promotion right where shoppers are browsing your collection: a discount, a membership sign-up, or a gift card offer. For example, "Get 20% off this collection!" or "Join our VIP club for early access."
**Dialogue asset used:** **Promotional Banner** (in the **Banners** group of **Create Asset**).
**Problem solved:** Combines your promotion with product discovery, so shoppers see the offer while they're choosing what to buy.
## How to set it up
1. Go to **Assets** > **Create Asset** > **Banners** > **Promotional Banner**.
2. Name it and choose your collection page as the **Asset location**.
3. Add your offer text and image in the editor.
4. Use the **Position** tab to place it close to your product grid.
## Suggestions
- Use bold, contrasting visuals so the offer stands out from the products around it.
- Show a different offer to different shoppers, for example a members-only discount for logged-in members. Add a behavior for that segment in the **Behavior** tab. See [The Segments Page](https://help.nowdialogue.com/articles/segments-page.md).
**Pairs well with:** an **Announcement Bar** with your free shipping offer.
---
# Page Top Site Navigation
> Enhance Collection Page Navigation with a Page Top Asset. Use top navigation assets to help customers easily explore collection pages and access key sections.
- Web page: https://help.nowdialogue.com/articles/10173053-page-top-site-navigation/
Add a dynamic navigation asset at the top of collection pages to guide customers toward relevant sections, subcategories, or featured promotions. This ensures seamless exploration and reduces friction for shoppers looking for specific items.
**Dialogue Asset Used:** Content carousel.
**Problem Solved:** Helps customers quickly find what they’re looking for, improving navigation and reducing bounce rates.
**Suggestions for Application**
- Highlight seasonal collections or trending categories.
- Use sticky navigation for better usability.
**Position:** Fixed at the top of the page, below the site header.
**Complementary Experiences:** Personalized product carousels for deeper engagement.
---
# Interactive Collection Lookbooks: Transforming Collection Pages into Engaging Experiences
> Use interactive lookbooks to showcase your collections using lifestyle images, engaging shoppers and driving conversions.
- Web page: https://help.nowdialogue.com/articles/10173085-interactive-collection-lookbooks-transforming-collection-pages-into-engaging-experiences/
Interactive lookbooks provide a dynamic way to showcase your collections, allowing customers to see products in real-life scenarios or styled environments. Whether it’s a fashion outfit styled on a model or a furniture set displayed in a beautifully designed room, lookbooks inspire customers and encourage them to envision how products fit into their lives. With Dialogue’s tools, these lookbooks include CTA buttons, allowing shoppers to add products to their cart directly from the lookbook, creating a seamless shopping journey.
## **Dialogue Asset Used:** Storyteller
## **Problems Solved**
- **Lack of Visual Inspiration:** Static product grids often fail to engage customers or show products in context.
- **Low Engagement:** Customers may leave collection pages without exploring products fully.
- **High Hesitation Rates:** Shoppers struggle to imagine how products fit into their personal style or needs.
## **Suggestions for Application**
1. **Content Type**
- Use lifestyle images for fashion collections (e.g., a full outfit styled on a model).
- Include room setups for furniture or home décor collections.
- Showcase curated product setups for beauty or skincare collections.
2. **Segmentation**
- Display gender-specific or season-specific lookbooks based on user demographics or browsing behavior.
- Use geo-targeting to show relevant collections (e.g., winter vs. summer looks based on location).
3. **Personalized Offering**
- Tailor lookbooks to highlight products frequently viewed or purchased by the customer segment.
- Combine lookbooks with UGC for added authenticity (e.g., “Styled by Our Customers”).
---
## **Position & Trigger**
- **Primary Location:** Mid-page or floating on collection pages.
- **Trigger:** As a full-screen interactive experience linked from the homepage or marketing emails.
---
## **Complementary Experiences:**
- **Product Recommendation Carousel:** Display products featured in the lookbook directly below it for easy access.
- **Recently Viewed Carousel:** Remind customers of products they explored before.
- **Loyalty Reminder Banner:** Encourage loyalty members to earn points on purchases featured in the lookbook.
- **Campaign Banners:** Promote seasonal sales or special offers alongside the lookbook.
---
## **Benefits from Implementation:**
1. **Increased Engagement:** Customers spend more time exploring products through visually rich, engaging content.
2. **Higher Conversions:** Seeing products in context builds confidence and reduces hesitation.
3. **Improved AOV:** Highlight complementary products in the lookbook, encouraging multi-item purchases.
4. **Enhanced Brand Storytelling:** Lookbooks provide an opportunity to reinforce your brand identity and creativity.
---
# “In-Grid” product slides Highlighting Collection Items
> Engage Shoppers with In-Grid Storytelling. Use storytelling elements directly in the product grid to highlight collection items.
- Web page: https://help.nowdialogue.com/articles/10173068-in-grid-product-slides-highlighting-collection-items/
In-grid storytellers allow you to interweave visuals and text into product grids, providing context or inspiration for specific items. For example, highlight sustainability stories for eco-friendly collections.
**Dialogue Asset Used:** Storyteller Block
**Problem Solved:** Adds context and emotional connection to product displays.
**Suggestions for Application**
- Use influencer content or UGC for authenticity.
- Feature brand narratives or product usage ideas.
**Position:** Integrated seamlessly into the grid layout.
**Complementary Experiences:** Campaign banners for added promotions.
---
# Personalized Product Recommendations Carousel on Collection Pages
> Boost Engagement with Personalized Product Recommendations. Display personalized product suggestions to match each customer’s preferences and behavior.
- Web page: https://help.nowdialogue.com/articles/10173057-personalized-product-recommendations-carousel/
On collection pages, personalized recommendations can guide customers to items that align with their preferences or previous interactions. This ensures relevance and increases the likelihood of conversions.
**Dialogue Asset Used:** **AI Recommendations Carousel**
**Problem Solved:** Keeps shoppers engaged by showcasing relevant items within the collection.
**Suggestions for Application**
- Tailor based on browsing history or purchase behavior.
- Include UGC or review-based content for top-performing items.
**Position:** Mid-page, just below the hero banner or filters.
**Complementary Experiences:** Best sellers carousel for additional engagement.
---
# Best Sellers Carousel
> Highlight Popular Items with a Best Sellers Carousel. Showcase top-performing products to attract and guide shoppers toward proven favorites.
- Web page: https://help.nowdialogue.com/articles/10173061-best-sellers-carousel/
Adding a best sellers carousel to collection pages helps shoppers discover popular items, leveraging social proof to drive sales. Pairing this with high-quality visuals and ratings builds trust and urgency.
**Dialogue Asset Used:** Best Sellers Carousel
**Problem Solved:** Helps customers quickly identify popular, high-demand products.
**Suggestions for Application**
- Highlight products with high star ratings or review counts.
- Use dynamic sorting to update best sellers in real-time.
**Position:** Near the top of the page, after navigation assets.
**Complementary Experiences:** Recently viewed carousel to keep engagement high.
---
# “Floating” product slides Highlighting Collection Items
> Use floating storytellers to dynamically highlight collection items as customers scroll to draw attention where it matters most.
- Web page: https://help.nowdialogue.com/articles/10173072-floating-product-slides-highlighting-collection-items/
Floating storytellers create an interactive, attention-grabbing experience by dynamically highlighting collection items as customers scroll. This feature keeps shoppers engaged and encourages exploration.
**Dialogue Asset Used:** Floating Storyteller Block
**Problem Solved:** Captures attention and encourages deeper exploration of collections.
**Suggestions for Application**
- Highlight featured items or limited-edition products.
- Add visual elements like animations or transitions.
**Position:** Fixed in a corner or dynamically appearing mid-scroll.
**Complementary Experiences:** UGC banners for authentic engagement.
---
# Recently Viewed Carousel on Collection Pages
> Re-Engage Shoppers with a Recently Viewed Carousel. Display recently viewed items to remind customers of their browsing history.
- Web page: https://help.nowdialogue.com/articles/10173063-recently-viewed-carousel/
Recently viewed carousels help re-engage customers by showcasing products they’ve previously considered. This reduces friction and encourages completion of the purchase journey.
**Dialogue Asset Used:** **AI Recommendations Carousel** with the **Recently Viewed** display rule. Under **Products Display**, set **Results ordering** to **Top matches only, exact order** to keep the order the shopper viewed them in.
**Problem Solved:** Recaptures customer interest in previously viewed items.
**Suggestions for Application**
- Highlight availability or urgency (“Almost sold out!”).
- Limit to 4-5 items to avoid overwhelming the customer.
**Position:** Near the bottom of the page.
**Complementary Experiences:** Personalized carousels to offer alternatives.
---
# Best Sellers Carousel for Zero-Result Searches
> Convert Shoppers When a Search Yields No Results by Displaying a Best Sellers Carousel To Retain Shopper Interest.
- Web page: https://help.nowdialogue.com/articles/10173177-best-sellers-carousel-for-zero-result-searches/
Zero-result searches can lead to customer frustration and site abandonment. Displaying a best sellers carousel ensures that customers stay engaged by surfacing high-demand products even when their search term doesn’t match.
**Dialogue Asset Used:** Product Recommendations Carousel
**Problem Solved:** Prevents drop-offs from unsuccessful search queries.
**Suggestions for Application**
- Highlight top-rated or trending products across all categories.
- Use dynamic rules to align best sellers with seasonal or promotional trends.
**Position:** At the center of the search page, replacing the “no results found” message.
**Complementary Experiences:** Recently viewed carousel to re-engage interest.
**Tip:** Add relevant brand compatible messaging to explain what happened: "Ooops... We couldn't find what you were looking for but here are some of our best sellers"
**Benefits:** Keeps customers engaged and reduces bounce rates.
---
# Recently Viewed Carousel for Desktop
> Bring Shoppers Back to Their Favorites with a Recently Viewed Desktop Carousel to Remind Shoppers of Items Browsed.
- Web page: https://help.nowdialogue.com/articles/10173171-recently-viewed-carousel-for-desktop/
On desktop, a horizontally scrollable carousel can effectively remind customers of items they’ve previously viewed. This feature is especially useful on search pages, as it allows customers to revisit products without navigating away from the results.
**Dialogue Asset Used:** Product Recommendations Carousel
**Problem Solved:** Keeps customers engaged by surfacing previously considered items.
**Suggestions for Application**
- Include UGC or review snippets for added trust.
- Limit the number of items to maintain a clean layout.
**Position:** Below the search results grid.
**Complementary Experiences:** Best sellers carousel to drive exploration.
**Benefits:** Reduces bounce rates and encourages repeat visits to products.
---
# Recently Viewed Mobile Only Banner
> Recapture Mobile Shoppers with a Recently Viewed Banner.
- Web page: https://help.nowdialogue.com/articles/10173130-recently-viewed-mobile-only-banner/
Mobile shoppers often navigate multiple pages but may forget about products they’ve viewed. A horizontally scrollable banner between search results dynamically displays recently viewed items, ensuring customers can easily revisit their interests.
**Dialogue Asset Used:** Spotlight Banner
**Problem Solved:** Prevents lost interest in previously viewed items by mobile users.
**Suggestions for Application**
- Highlight “low stock” or “almost sold out” items.
- Include subtle animations to draw attention without overwhelming the user.
**Position:** Mid search results on mobile devices.
**Complementary Experiences:** Rich media smart banners to highlight search term related relevant products.
**Benefits:** Improves customer retention on mobile devices and increases conversions.
---
# Rich Media Banner in Search Grid
> Display dynamic banners within the search grid that adapt to search terms and include rich media for enhanced engagement.
- Web page: https://help.nowdialogue.com/articles/10173114-rich-media-banner-in-search-grid/
Add a banner to your search results page that changes with what the shopper searched for, and shows your lifestyle photos and videos instead of plain product shots. For example, a search for "jackets" could show a model wearing your jackets.
**Dialogue asset used:** **Slider Recommendations** (in the **Banners** group of **Create Asset**).
**Setting used:** **Enable Rich Media Display**, so the banner shows the images and videos you tagged in your Gallery.
**Problem solved:** Grabs attention on the search page while staying relevant to the search.
## How to set it up
1. Go to **Assets** > **Create Asset** > **Banners** > **Slider Recommendations**.
2. Name it and choose your search results page as the **Asset location**.
3. In the **Design** tab, open **Image** > **Media Settings** and turn on **Enable Rich Media Display**.
4. Use the **Position** tab to place it near the top of the search results.
On the search page, the banner picks products that match the search. If you turn off **Auto-fill empty slots** in **Products Display**, it shows search matches only.
## Suggestions
- Use seasonal visuals for fashion or holiday searches.
- Add a clear button such as "Shop Now" or "Explore Collection".
**Pairs well with:** a best sellers carousel for shoppers who scroll further.
**Tip:** Keep tagging your social and lifestyle media to products in your Gallery. If a product has no tagged media, the banner falls back to the product's regular image. See [Gallery, Image Tagging & Rich Media](https://help.nowdialogue.com/articles/6970365-gallery-image-tagging-and-rich-media.md).
---
# Use Bundled Items recommendations in a banner
> The Bundled Items display rule lets your Slider Recommendations Banner surface relevant add-on products directly in the cart, checkout, and floating cart - without pulling shoppers away from their purchase flow. It works by reading the bundle combinations already built in Dialogue, so your recommendations are always intentional, curated, and consistent with your existing merchandising logic.
- Web page: https://help.nowdialogue.com/articles/10960743-use-bundled-items-recommendations-in-a-banner/
The **Bundled items** rule lets a **Slider Recommendations** banner show the add-on products from your bundles, right in the cart or cart drawer. Shoppers see a relevant suggestion without leaving their purchase.
## Before you start
- You need a **Product Bundles** asset with bundles turned on (**Connected**). See [How To Build & Launch Bundles](https://help.nowdialogue.com/articles/6967737-how-to-build-and-launch-bundles.md).
- You need a **Slider Recommendations** banner. Create it from **Assets** > **Create Asset** > **Banners** > **Slider Recommendations**.
## How Bundled Items works
The rule reads the bundles you already built in Dialogue. When a shopper has a product in their cart, and that product has add-ons in one of your bundles, the banner shows those add-ons. Every suggestion is one you've already reviewed as part of a bundle.
It can work in two ways:
- **By cart products**: suggests add-ons for the products in the cart.
- **By current visible product**: on a product page, suggests add-ons for the product being viewed.
## Turn it on
**Bundled items** is an advanced rule that the Dialogue team turns on for you. Open the chat in your Dialogue dashboard and ask Dia, or ask to talk to a person. Tell them which banner and which behavior (for example **All Visitors**) you want it on.
While you wait, you can get the banner ready:
1. Open the banner and go to the **Behavior** tab.
2. Click **Messaging** and add a short headline, such as "Goes great with".
3. Use the **Position** tab to place the banner in the cart or the cart drawer.
## How it looks in your store
When a shopper has a matching product in their cart, the banner shows the add-on items from your bundle, wherever you placed it. The shopper sees a targeted suggestion without being sent to another page, so they stay focused on completing their purchase.
## Related articles
- [How To Build & Launch Bundles](https://help.nowdialogue.com/articles/6967737-how-to-build-and-launch-bundles.md)
- [Product Display Rules](https://help.nowdialogue.com/articles/product-display-rules.md)
---
# Understanding Dialogue Discounts: The Complete Guide
> Dialogue's discount system allows you to create powerful, targeted promotions for your store without requiring developer assistance. This guide explains our three main discount types, how to implement them effectively, and how to maximize their impact on your conversion rates.
- Web page: https://help.nowdialogue.com/articles/10173116-understanding-dialogue-discounts-the-complete-guide/
Dialogue discounts let you offer a deal on the products inside an asset or a bundle, without a developer. Dialogue discounts are available for Shopify stores.
## How Dialogue discounts appear in Shopify
When you install Dialogue, a discount called **DialogueDiscount** is added to the **Discounts** page in your Shopify admin. It is active by default.
It only gives shoppers a discount once you create a discount in Dialogue and apply it to an asset or a bundle.
---
## Three ways to discount
1. **Amount off products**: a simple discount on the products in an asset, with no conditions.
2. **Buy X Get Y**: a discount shoppers get only after they meet a condition.
3. **Bundle discounts**: a discount on the products in a bundle.
---
## Where to find discounts in the editor
**On an asset**: open the asset's **Design** tab and go to the button settings. When the button adds products to the cart, a **Discounts** section appears. Click **Existing** to pick a discount you already have, or **New discount** to create one.
**On a bundle**: open the bundle in the editor. In the **Discounts** section of the button settings, click **Manage bundle discounts** to open the bundle tab, where you set discounts for each bundle.
In the discount list, select a discount and click **Apply Discount**. To swap it, select another and click **Replace Discount**. To stop it, select the applied discount and click **Disable Discount**.
Once applied, the asset shows the discount name with **Applied**. If the discount was a Shopify discount that ran out, it shows **Expired**.
---
## 1. Amount off products
This discount applies to the products shown in the asset, with no purchase requirements.
**How it works**
- When creating the discount, leave **No Conditions Required** selected.
- Shoppers get the discount on the asset's products automatically.
- **Discount Type**:
- **Fixed Amount**: a set amount off, for example $10 off.
- **Percentage (%)**: a percentage off, for example 15% off. You can also round the final price, for example to end in .99 or .95.
- **Free**: the product is free.
**Good for**
- Flash sales and seasonal promotions
- Clearing stock
- Introducing new products
- Simple deals with no rules to explain
---
## 2. Buy X Get Y
Shoppers must meet a condition before they get the discount.
When creating the discount, switch on **Require Conditions**.
**Customer Buys (X): what shoppers need to do**
Choose one or both:
- **Minimum Product Quantity**: the shopper must buy products from a list you choose (the **Product Pool**).
- Set how many products they must buy, from 1 to 10.
- Add up to 10 product SKUs or variants to the pool.
- Tick **All** to require the shopper to buy every product in the pool.
- **Minimum Cart Value**: the shopper's cart must reach a minimum amount, for example $50.
**Customer Gets (Y): what shoppers get**
- **Discount Type**: **Fixed Amount**, **Percentage (%)** or **Free**.
- **Maximum discounted products per order**: limit how many products get the discount, or leave it as **All** to discount all of the asset's products.
- If a shopper buys more than one of a product, the discount is taken off each one.
**Important**
- The discount applies only to products shown in the asset.
- Which products those are is set by the asset's **Products Display** settings, in the **Behavior** tab.
**Good for**
- Raising order value
- Selling products that go well together
- Rewarding bigger carts
---
## 3. Bundle discounts
This discount is made for product bundles and only shows in bundle assets.
**How it works**
Under **Choose what to apply this discount on**, pick one:
- **Entire Bundle**: discount every product in the bundle.
- **Main Product**: discount only the main product.
- **Add-ons only**: discount only the add-on products.
- **Custom**: choose specific products in the bundle.
**Good for**
- Complete-the-look offers
- A product plus its accessories
- Frequently bought together items
---
## Create your first discount
1. Open the **Discounts** section of your asset and click **New discount**.
2. Type a **Discount Name**. Shoppers see this name in their cart and at checkout, so make it clear.
3. Set the **Discount Type** and amount. For Buy X Get Y, switch on **Require Conditions** and set both parts.
4. Click **Create Discount**.
5. Select the discount and click **Apply Discount**.
---
## Combining discounts
By default, Dialogue discounts:
- **Combine with** other product discounts, including other Dialogue discounts and other apps' discounts.
- **Combine with** order discounts, like "$10 off your order".
- **Don't combine with** shipping discounts.
---
## Let Dia do it
You can ask Dia in plain words, for example "Create a 15% discount and add it to my Bundles asset". Dia can create discounts, add them to an asset or a bundle, explain how a discount works, and check why a discount isn't applying. Learn more in [Meet Dia, Your AI Assistant](https://help.nowdialogue.com/articles/meet-dia-your-ai-assistant.md).
---
## Tips for better discounts
1. **Start with a clear goal**: more orders, bigger orders, moving specific stock, or winning new customers.
2. **Match the discount to the goal**:
- Need to move stock fast? Use amount off products.
- Want bigger carts? Use Buy X Get Y with a minimum.
- Selling items that go together? Use a bundle discount.
3. **Watch the results**: check conversion rate, average order value and revenue on the **Statistics** page.
---
## Common questions
### Can I use different discount types at the same time?
Yes. For example, one asset can have an amount off products discount, and another asset a Buy X Get Y discount.
### How do discounts appear to shoppers?
The discount name shows in the cart and at checkout, and the discounted products show their new price in the cart.
### Can I limit how many products get the discount?
Yes. In a Buy X Get Y discount, set the maximum number of discounted products per order.
### Do discounts work with segments?
Yes. Each behavior of an asset can target a different audience, so you can give different shoppers different deals.
---
## Need help?
Open the chat in your Dialogue dashboard and ask Dia, or ask to talk to a person.
---
# Creating & Adding Badges
> Dialogue makes it easy to articulate your product's differentiation by highlighting special features using Dialogue's user friendly editor
- Web page: https://help.nowdialogue.com/articles/9387755-creating-and-adding-badges/
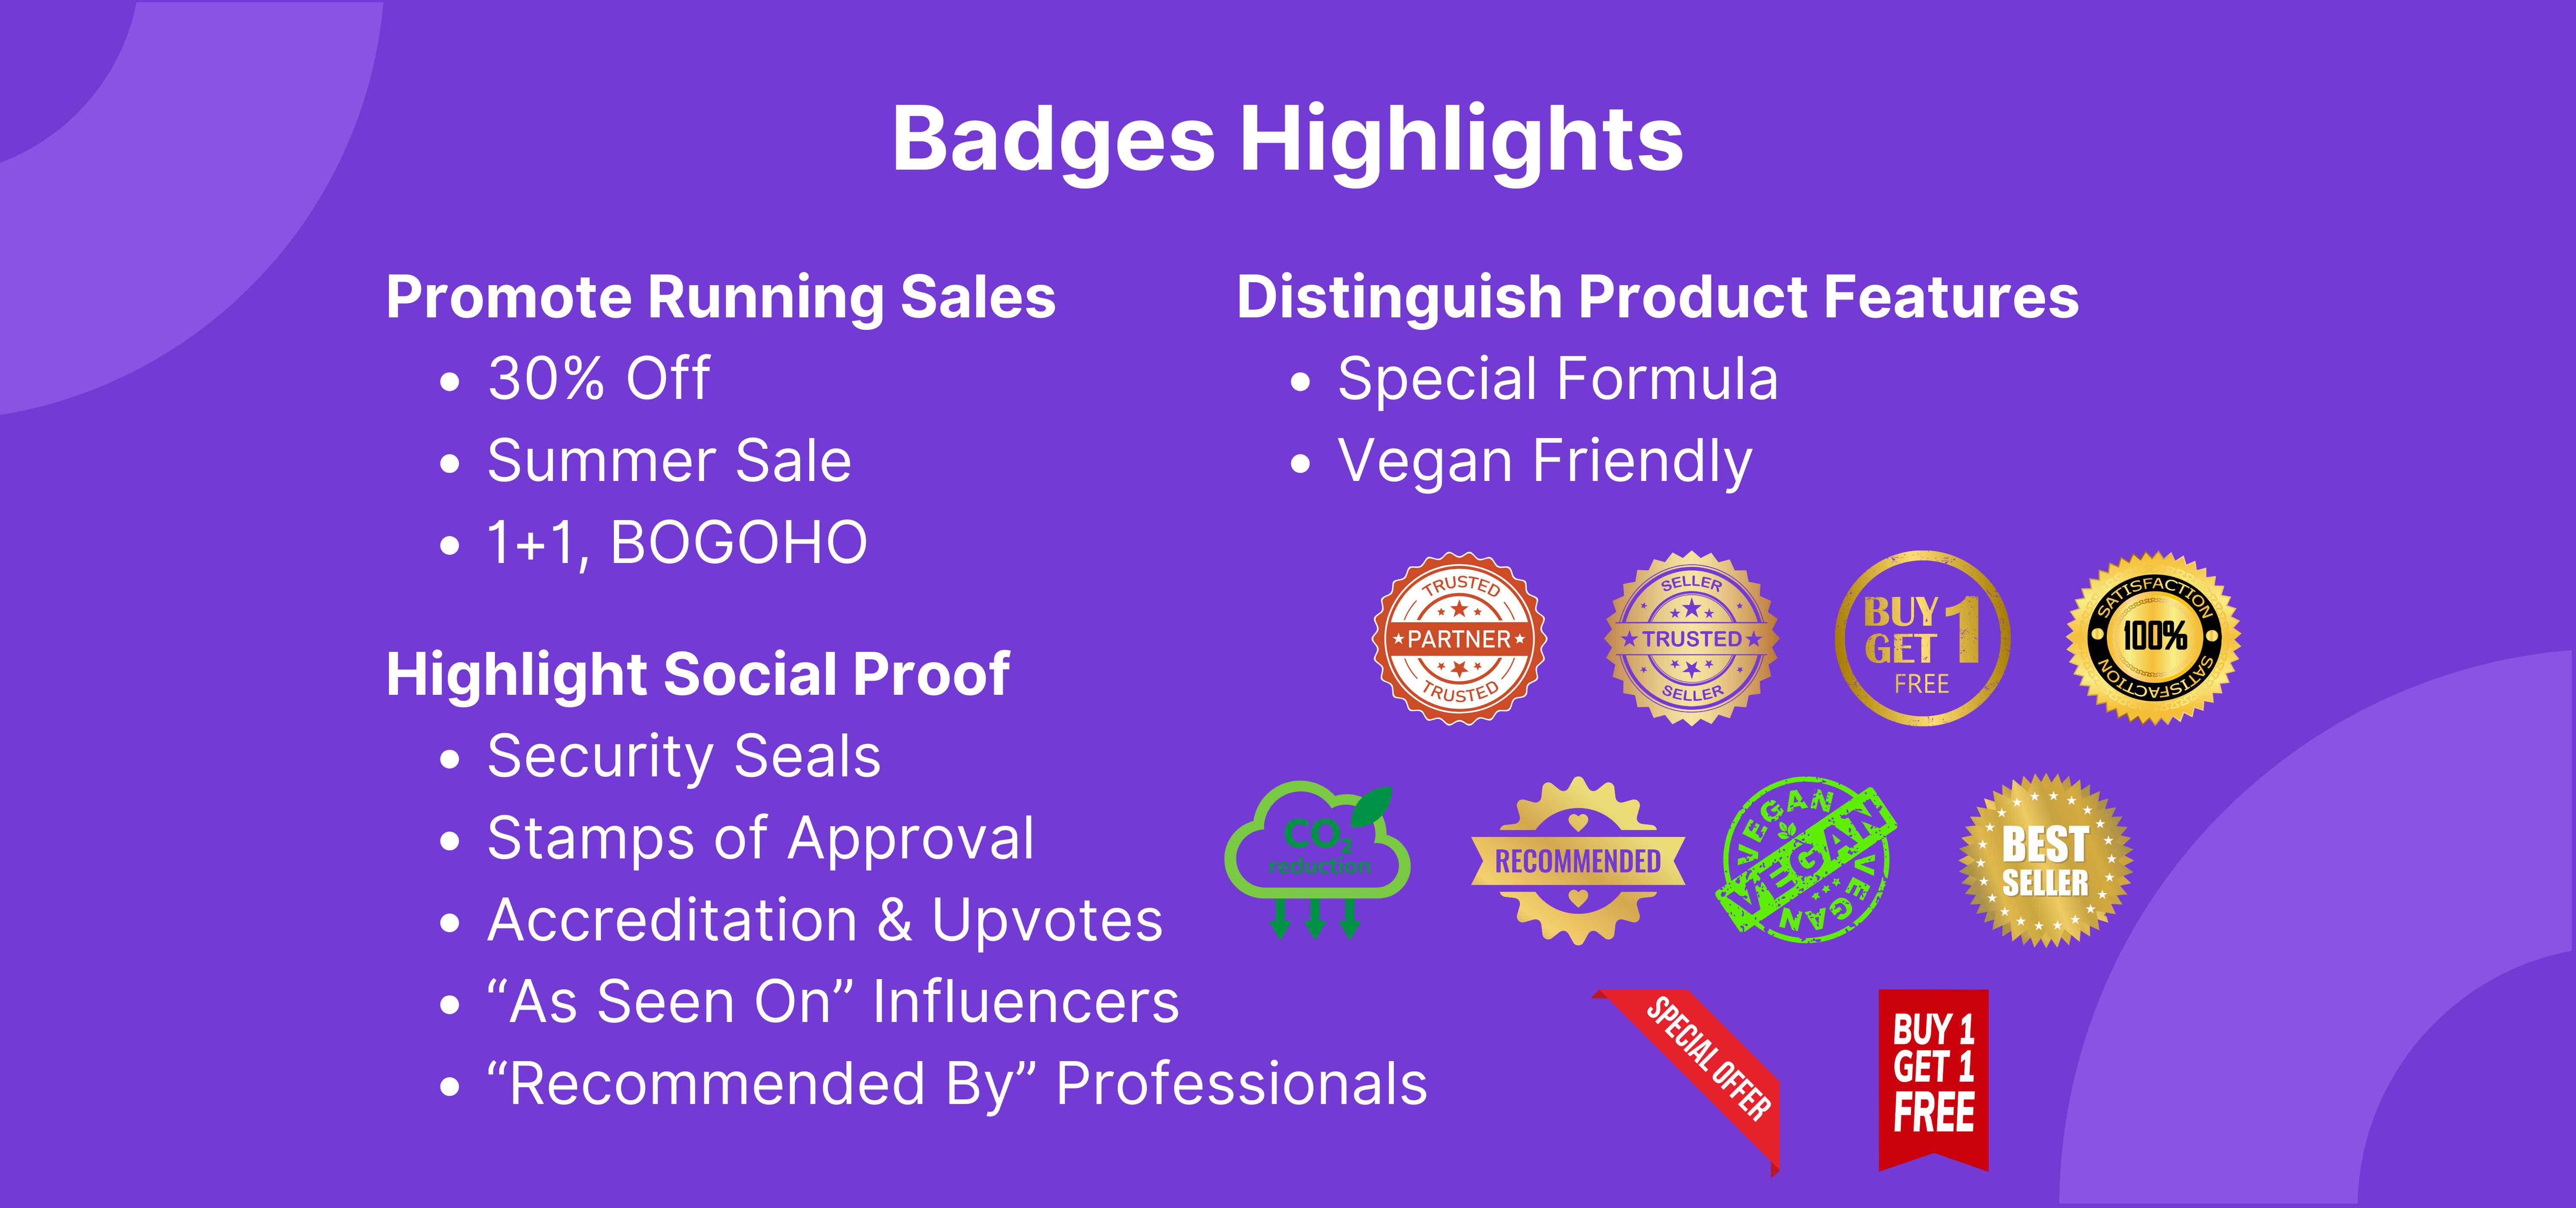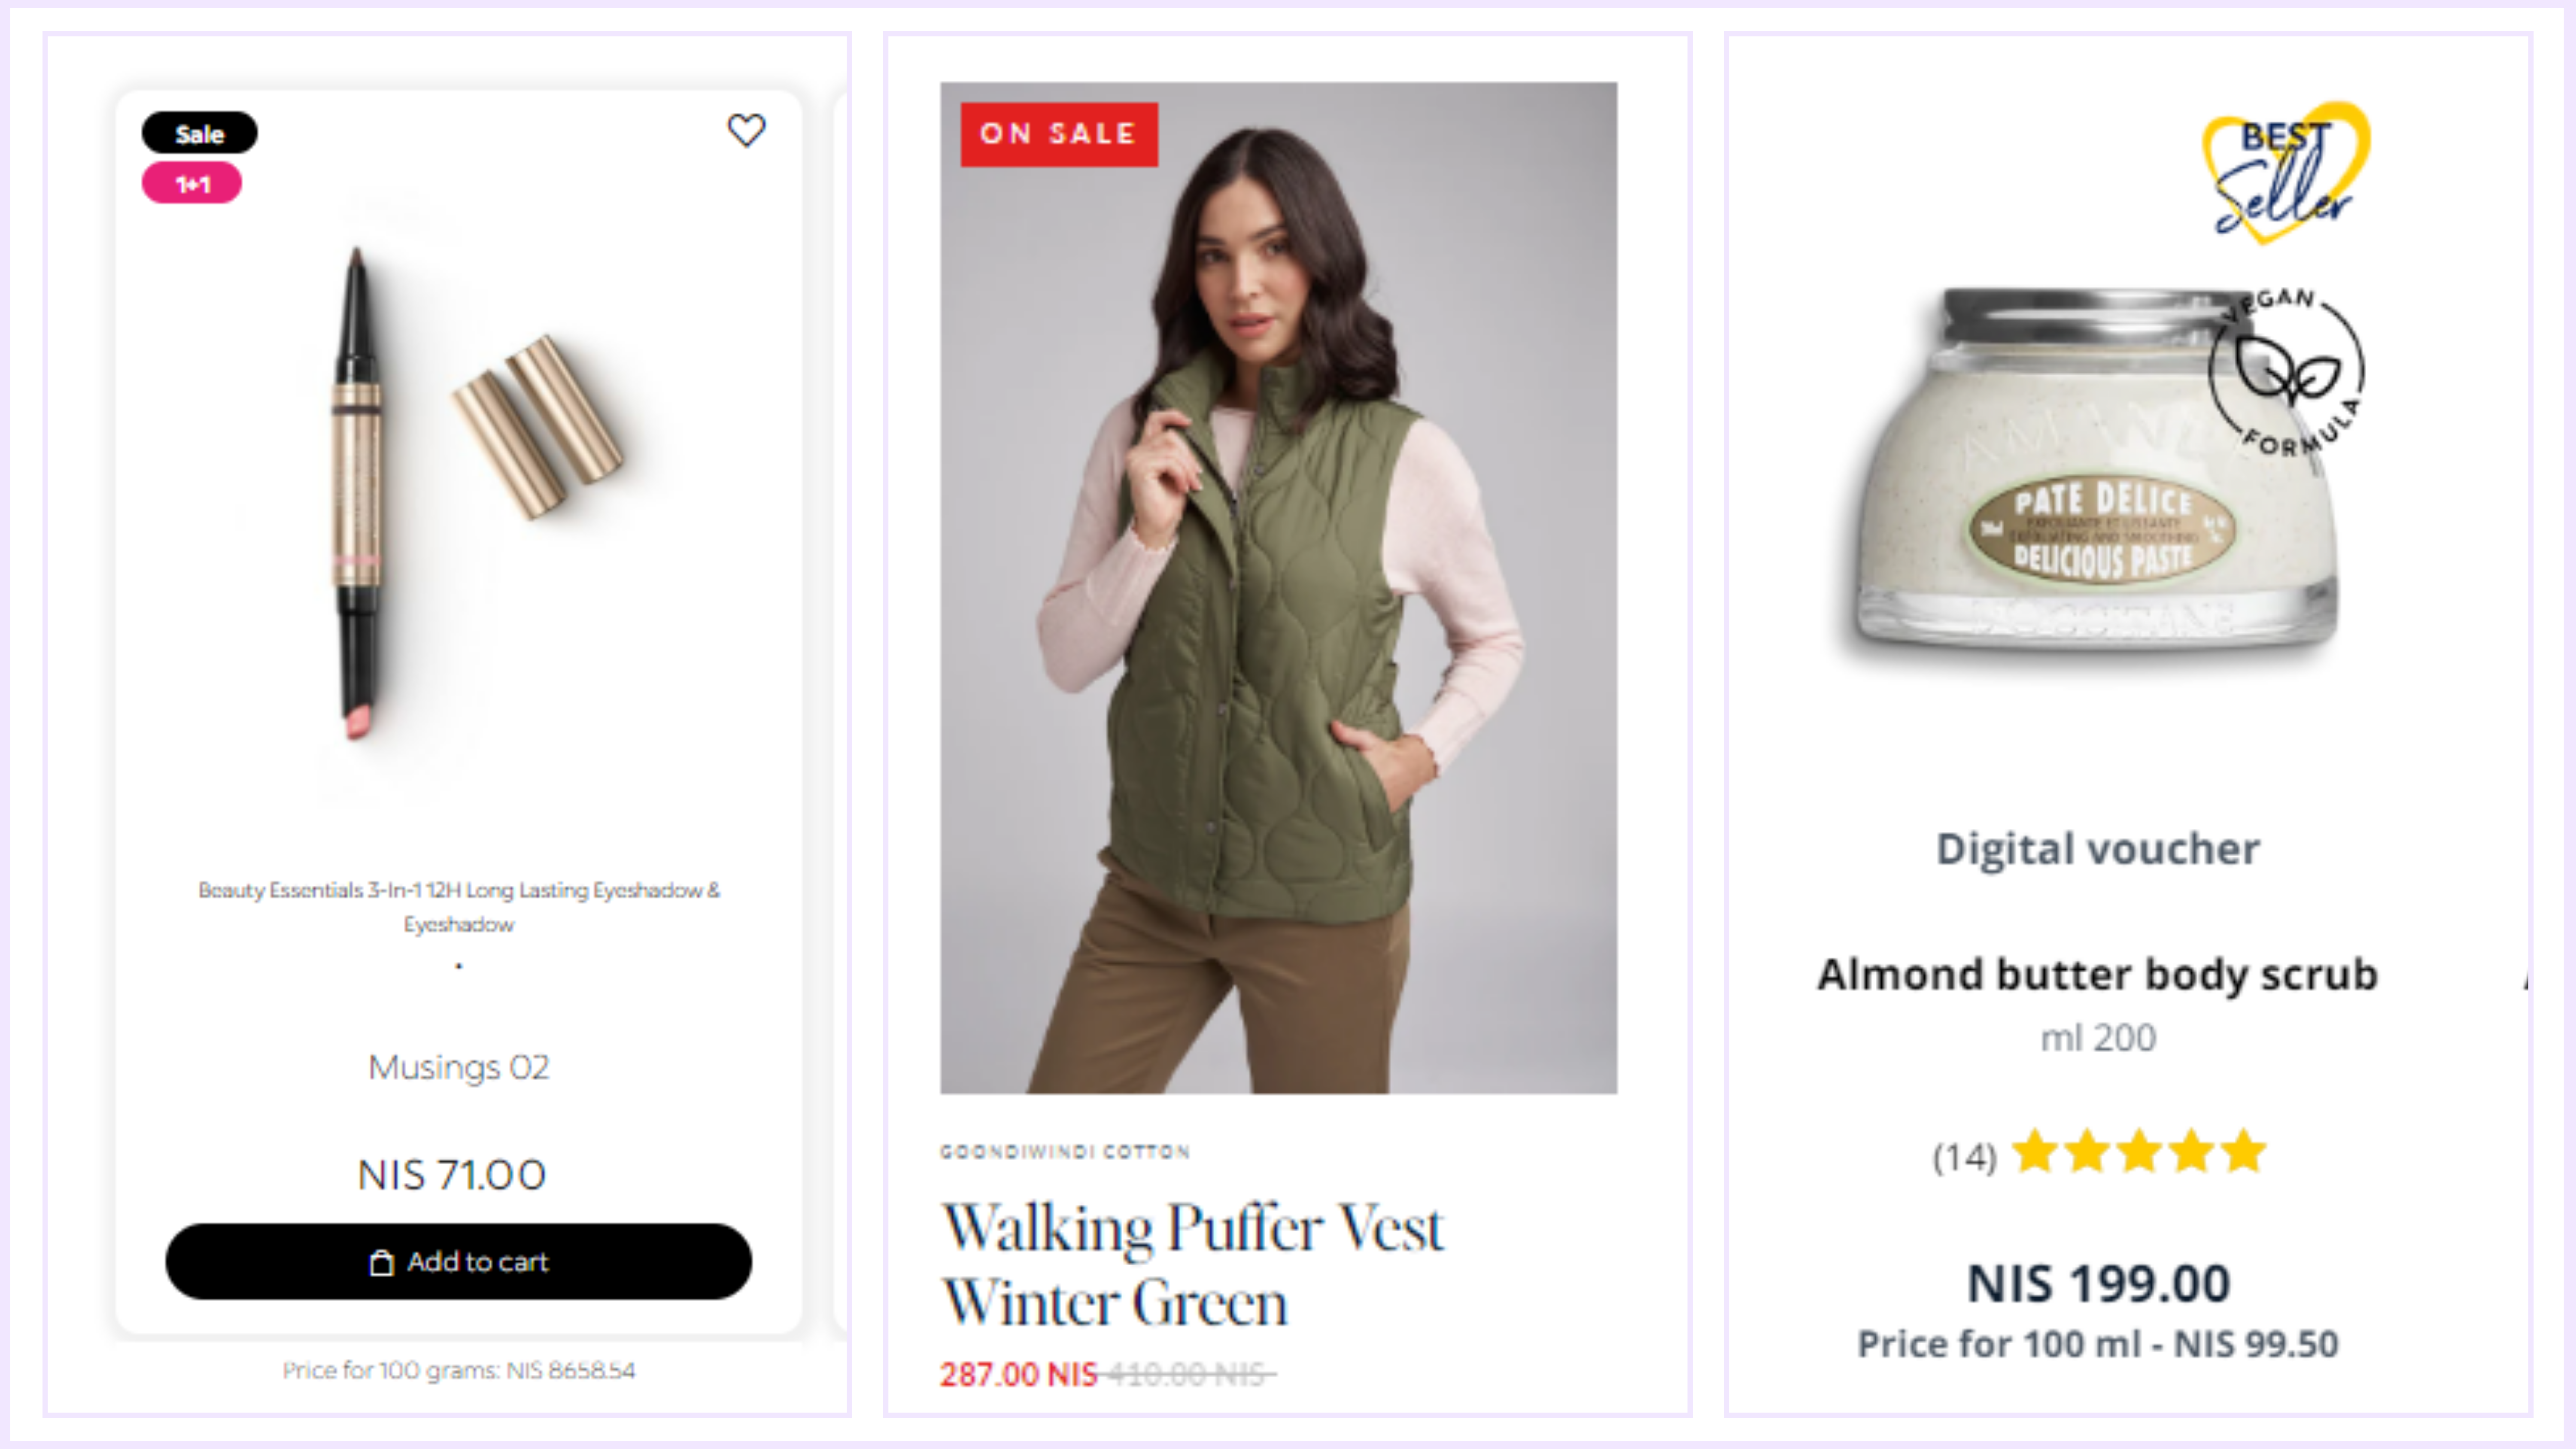
---
## Badges
- Customizable and brand compatible
- Can be assigned by many variations: to specific SKUs, fabrication lines, collections, price tags, discount rates and more!
- Design your badge or upload a file
- User friendly editor
---
[View Our Tutorial On Creating Badges](https://www.canva.com/design/DAGGfcEpLm4/qPIZ0k-_L5DxRrP5voloZA/watch?utm_content=DAGGfcEpLm4&utm_campaign=designshare&utm_medium=link&utm_source=editor)
---
## Two methods of creating a badge
From the Dialogue dashboard > Settings > Brand > Badge > Create First Badge
## 1. Click **Change Background** to Upload a file
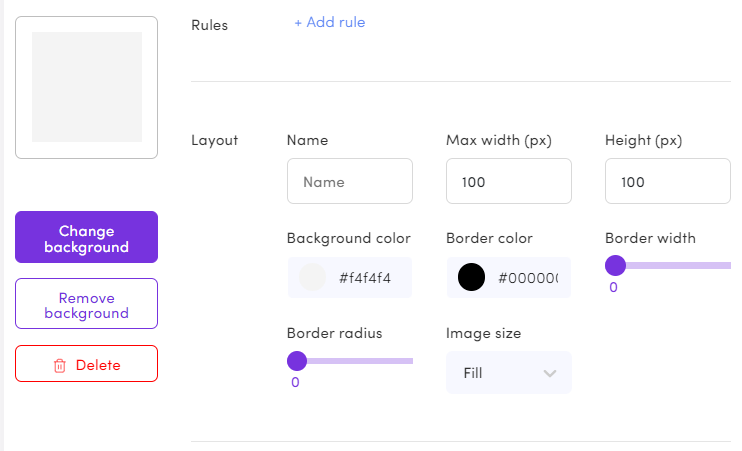
## 2. Design your own
Name your badge, adjust height and width, background color, Headline and Sub Headline font type, size and color, position on the asset or image.
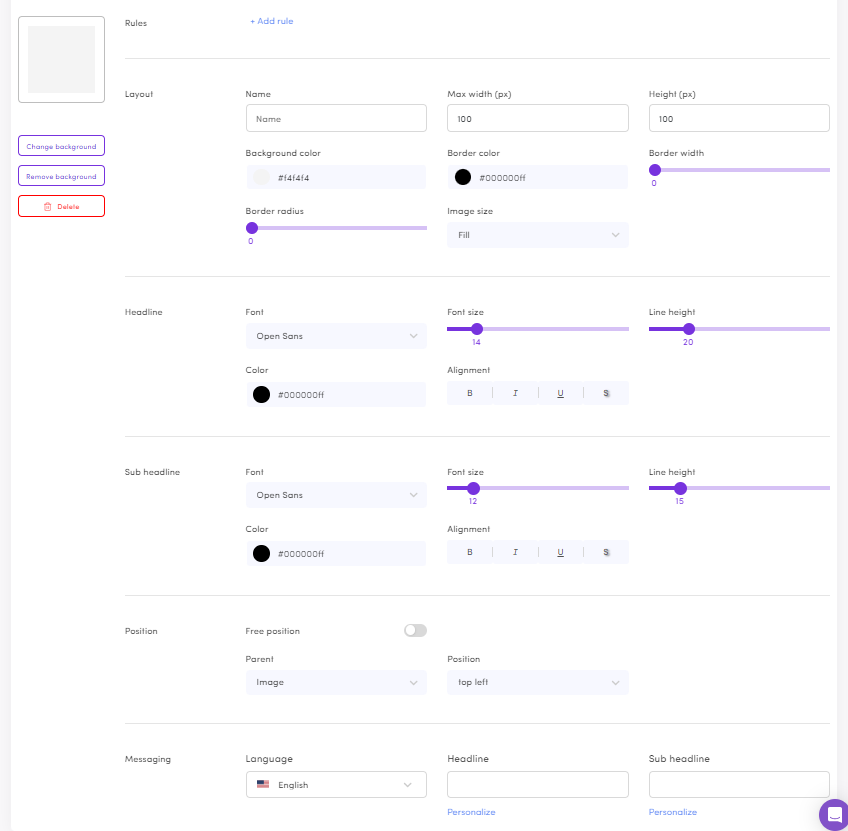
## Add a rule to assign the badge
Where should this badge be assigned?
By SKU? Variants? A certain collection? or several Collections? By price? Or sale price?
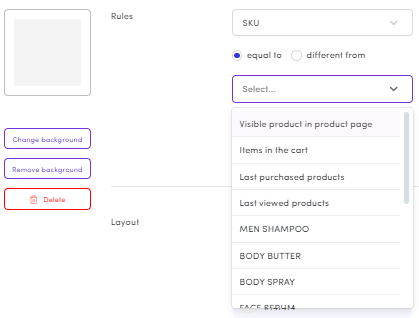
---
# Brand Vocabulary and Languages
> Save words and phrases you use often, translate them once, and show asset texts in every language your store sells in.
- Web page: https://help.nowdialogue.com/articles/brand-vocabulary-and-languages/
If your store sells in more than one language, or you repeat the same phrases across many assets (like "Free shipping" or "Shop now"), two tools save you time:
- **Vocabulary**: write a phrase once, translate it once, and reuse it in any asset.
- **Asset texts per language**: set an asset's title and button text for each of your store's languages.
Shoppers see the text in the language they browse your store in. If a language has no translation, they see your main text.
## Your brand vocabulary
Go to **Settings → Brand → Vocabulary**.
### Add a phrase
1. Make sure **Locale** is set to **Default**, your main language.
2. Click **Add Entry**.
3. In **Key**, type a short name for the phrase, for example `free_shipping`. Use only letters, numbers and underscores.
4. In the value box, type the text shoppers should see in your main language.
5. Click **Save**.
### Translate a phrase
1. In **Locale**, pick another language your store uses.
2. Type the translation next to each phrase.
3. Click **Save**.
To remove a phrase, click the trash icon on its row. It is removed right away, so check first that no asset still uses it.
### Use a phrase in an asset
1. Open the asset in the editor.
2. Click into a text box that supports vocabulary, such as the title or the button text.
3. A **Vocabulary** list opens under the box. Click the phrase you want.
The phrase appears in the box as a tag. When you change the phrase in **Vocabulary** later, every asset that uses it updates too.
## Translate an asset's texts
Each asset can have its own text for every language your store uses.
1. Open the asset in the editor and go to the **Behavior** tab.
2. On the behavior you want to edit, open **Messaging**.
3. The top section is your main language, marked **(default)**. Edit the texts there.
4. Below it, each of your other languages has its own section. Click a language to open it and type the translations.
A colored dot next to each language shows its progress: orange means some texts are translated, green means all of them are.
## Ask Dia to do it for you
You can also ask Dia in plain words, for example:
- "Translate the button on my AI Recommendations carousel to French: Ajouter au panier."
- "Which vocabulary entries are missing a Hebrew translation?"
- "Add a vocabulary entry for free shipping, and add the Spanish text."
Learn more in [Meet Dia, Your AI Assistant](https://help.nowdialogue.com/articles/meet-dia-your-ai-assistant.md).
## Need help?
Open the chat in your Dialogue dashboard and ask Dia, or ask to talk to a person.
---
# The Segments Page
> Create, organize and compare your audience segments in one place, and see how each segment performs.
- Web page: https://help.nowdialogue.com/articles/segments-page/
A segment is a group of shoppers who share something in common, such as "New Visitors", "Shoppers from the US" or "People with more than $100 in their cart". Once you have a segment, you can show those shoppers their own version of an asset: different products, different messaging, or a different asset altogether.
The **Segments** page in the left menu is where all your segments live.
## What you see on the Segments page
- **The segment list** on the left. Use the search box to find a segment by its name, or by the name of an asset it is used in.
- **Filters** above the list:
- **All**: every segment.
- **Asset**: segments used to personalize assets.
- **AB**: segments used to target A/B tests.
- **Unlinked Asset** and **Unlinked AB**: segments that are not used anywhere yet. Handy for cleaning up.
- **Tags**: add your own tags to a segment (for example "Holiday" or "VIP"), then filter the list by tag.
- **Segment details** on the right. Click a segment to see its name, type, conditions, page conditions and the assets it is linked to. Click the edit icon to change it.
## Create a segment
1. Go to **Segments** in the left menu and click **Create**.
2. Choose how to start:
- **New segment**: build your own from scratch.
- **Saved segment**: start from a segment you already made.
- **Klaviyo campaign**: build a segment from your Klaviyo campaigns and flows (connect Klaviyo first in **Settings** > **Integrations**).
- Or pick one of the ready-made segments under **Top popular segment for you**, such as **New Visitors**, **Returning Visitors**, **Paying Customers**, **Heavy Spenders** or **Members**.
3. Give the segment a name, add one or more conditions, and save.
You can also ask Dia. Open the chat in your Dialogue dashboard and describe the group, for example "create a segment for returning visitors from Canada".
## The kinds of conditions you can use
Each condition is a simple sentence, like "Number Of Visits is lower than 2". You can combine several conditions in one segment.
### Who the shopper is and how they got here
- **Visit history**: **Number Of Visits**, **Days From Last Visit**, **Page Views Per Session**. Use these to tell first-time visitors from returning ones.
- **Purchase history**: **Days from last order**, **Visitor Aov** (how much this shopper usually spends, compared to your store's average), **Number Of Transactions** and **Order complete**.
- **Traffic source**: **UTM**, to target shoppers who arrived from a specific campaign link. Paste the campaign link and Dialogue fills in the **UTM Campaign**, **UTM Medium** and **UTM ID** for you.
- **Location**: **Visitor Geo**, to target shoppers by country.
- **Device**: **Device type**, to target mobile, tablet or desktop shoppers.
- **Language**: **Locale**, to show content in the shopper's store language (available on Shopify).
- **Timing**: **Time Of Day**, **Day Of Week** and **Date**, for example to show a banner only on weekends or only after a launch date.
- **Membership**: **Member**, to target logged-in members or guests.
### What is in the cart
- **Cart Value**: the total value of the cart. You can compare it to a fixed amount or to your free shipping threshold.
- **Cart Products**, **Cart Products Number**, **Cart Products Quantity**: which products are in the cart and how many.
- **Cart Products Collections** and **Cart Products Features**: the collections or tags of the products in the cart.
### Which page the shopper is on
Page conditions sit in the **Pages** part of a segment:
- **Page Path** and **Page Query**: target pages whose address contains (or does not contain) some text.
- **Category**: target specific collection pages.
- **Product Category**, **Product Features**, **SKU** and **Variant**: target specific product pages.
- **Market**: target a Shopify Market, so shoppers in each market can see their own version.
### Klaviyo and Yotpo
- **Klaviyo campaigns and flows**: shoppers who arrived from a specific Klaviyo campaign or flow. Start from **Klaviyo campaign** when you create the segment.
- **Membership (Yotpo)**: target shoppers by their Yotpo loyalty status: **Member**, **Balance**, **Earned**, **Tier name** and **Purchases made**. Connect Yotpo first in **Settings** > **Integrations**.
## Segment insights
When you click a segment, its **Insights** show how its linked assets performed: **Direct Sales**, **Views**, **Clicks** and **CTR**. Use the date picker to change the period, and open **More insights** for a breakdown by asset.
To compare segments, tick two or more segments in the list. The right side switches to **Comparing segments**, with **Direct Sales**, **Views**, **Clicks**, **Qty**, **CTR** and **CVR** side by side.
## Delete segments
Tick the segments you no longer need and click **DELETE**, or delete a single segment from its row. Deleting cannot be undone. The default **All Visitors** segment cannot be deleted.
## Using a segment in an asset
Segments do their work inside your assets. Open an asset, go to the **Behavior** tab, and add a behavior for your segment. Each behavior has four parts: **Audience** (who), **Pages** (where), **Products Display** (which products) and **Messaging** (what text). Learn more in [Become a (1-Click) Segmentation Hero](https://help.nowdialogue.com/articles/6922302-become-a-1-click-segmentation-hero.md).
[Go to Segments](https://dashboard.nowdialogue.com/segments)
---
# Product Display Rules
> Every rule you can use to choose which products an asset shows, explained in plain words.
- Web page: https://help.nowdialogue.com/articles/product-display-rules/
Product display rules decide which products an asset shows and in what order. You don't need any rules for an asset to work: by default, Dialogue AI picks personalized products for every shopper. Rules let you take more control when you want it, for example "show only items on sale" or "show the best sellers to new visitors".
## Where to find them
1. Go to **Assets** > **My Assets** and open the asset you want to change.
2. Open the **Behavior** tab.
3. Pick a behavior (for example **All Visitors**) and click **Products Display**.
4. Click the rules you want to turn on. Click a rule again to turn it off.
5. Click **Save**.
Each behavior has its own rules, so different segments can see different products. See [The Segments Page](https://help.nowdialogue.com/articles/segments-page.md) to set up segments.
Some rules can't be used together. When one rule is on, the rules that clash with it are greyed out.
## Ready-made rules
- **Dialogue AI**: the default algorithm. It is on unless you turn it off. Click it to turn it off when you want to show any product in your store, for example best sellers across your whole store rather than products related to the page.
- **Customize User Journey**: picks products based on what the shopper is doing right now and what they browsed before. You can also choose the order: **Relevance to Customer Journey**, **Sort Products by Sales Volume** (best sellers first) or **Lowest to Highest Quantity Sold**.
- **Suggest Complementary Products**: suggests products that other shoppers bought together with the items in the cart, based on your store's order history. When there isn't enough history yet, it shows similar products from the same categories.
- **Left in Cart**: shows products the shopper added to their cart in recent visits but hasn't bought yet. Turn on **Automatic Carousel Fill** so shoppers with an empty cart still see products from your other rules.
- **Cross Sell Last Purchase Products**: suggests products that go with what this shopper bought before.
- **Highlight On-Sale Products**: shows only products that are on sale.
- **Showcase Full Price Products**: shows only products that are not on sale.
- **Newest Arrivals**: shows your newest products first.
- **Best Selling Products**: shows your top sellers.
- **Products with Highest Profit Margin**: orders products from highest to lowest profit margin.
- **Most Affordable Products**: orders products from cheapest to most expensive.
- **Previously Purchased**: shows products this shopper bought in the past, to encourage repeat buys.
- **Recently Viewed**: shows products this shopper looked at recently.
- **Products With Tagged Media**: shows only products that have images or videos tagged to them in your Gallery.
- **Yotpo's Favorites**: shows your most popular products according to Yotpo. Needs the Yotpo integration. See [Yotpo's Favorites Rule](https://help.nowdialogue.com/articles/9934181-yotpo-s-favorites-rule.md).
- **Matching Product Content**: for Shoppable Reels. Shows only videos tagged to the product the shopper is viewing. See [How to Use / Wear This Item](https://help.nowdialogue.com/articles/10172953-how-to-usewear-this-item-teacher.md).
## Custom rule
Click **Custom rule** to build your own, based on product details: **Price**, **Sale Price**, **SKU**, **Variant**, **Product Type**, **Brand**, **Color**, **Size**, **Discount amount**, **Discount percent**, **On sale** and more. Pick a detail, a condition (such as **Equal to**, **Different from**, **Larger than** or **Lower than**) and a value, then click **Save rule**.
See [How to Show Specific Products in a Carousel](https://help.nowdialogue.com/articles/6933877-rules-how-to-show-specific-products-carousel.md) for step-by-step examples, including how to hide a product.
## Advanced rules (set up with Dia or the Dialogue team)
These rules are not in the regular list. To use one, open the chat in your Dialogue dashboard and ask Dia, or ask to talk to a person.
- **Complementary / Goes-With (AI)**: shows products that go *with* the item the shopper is viewing, rather than more of the same. For example, a drill brings up drill bits and batteries. It can look at the product being viewed only, or at the product plus what is in the cart, and it can fill any gaps with products from the same parent category. It works once Dialogue's AI has tagged your catalog, which happens automatically for stores on a paid plan after each product sync (new products are tagged as they arrive). Dia can turn this on for you.
- **More expensive variant**: for each product in the cart, suggests a pricier version of the same product (for example a larger size). Ask the Dialogue team.
- **Bundled items**: shows the add-on products from your [Product Bundles](https://help.nowdialogue.com/articles/6967737-how-to-build-and-launch-bundles.md), based on what is in the cart or on the product being viewed. Ask the Dialogue team. See [Use Bundled Items recommendations in a banner](https://help.nowdialogue.com/articles/10960743-use-bundled-items-recommendations-in-a-banner.md).
## Ordering and filling options
At the bottom of the Products Display panel you'll find two more settings:
- **Auto-fill empty slots**: when your rules find only a few products, Dialogue adds more products so the asset is never half empty, putting the ones that best match your rules first. Turn it off to show only the products your rules find.
- **Results ordering**: choose how the matching products are ordered:
- **Top matches + variety, shuffled**: the best matches mixed with some variety, in a shuffled order.
- **Top matches only, shuffled**: only the best matches, in a shuffled order.
- **Top matches only, exact order**: only the best matches, in exact order (for example, recently viewed products in the order they were viewed).
You'll also see how many products currently match your rules, so you can check you haven't filtered out too much.
---
# Setting Asset Rules
> Asset rules allow to control which products are displayed in the asset
- Web page: https://help.nowdialogue.com/articles/5763210-setting-asset-rules/
Rules let you control which products an asset shows. You don't have to add any: by default, Dialogue AI picks personalized products for every shopper. Add rules when you want something specific, such as popular items, high-margin products, or a hand-picked list.
## Add rules to an asset
1. In the left menu, click **Assets** > **My Assets**.
2. Open the asset you want to change.
3. Go to the **Behavior** tab.
4. Pick the behavior you want to change (for example **All Visitors**) and click **Products Display**.
5. Choose one of the ready-made rules, such as **Best Selling Products** or **Newest Arrivals**, or click **Custom rule** to build your own.
6. Click **Save**.
## Example: show only products pricier than the cart
1. In **Products Display**, click **Custom rule**.
2. Choose **Price**.
3. Choose the condition **Larger than**.
4. For the value, choose **Items in the cart**, so the asset shows only products that cost more than what's already in the cart.
5. Click **Save rule**, then **Save**.
Your new rule appears as a tag under **Product Display Rules**. Click the tag to edit it, or click the small **x** on it to remove it.
## Learn more
- [Product Display Rules](https://help.nowdialogue.com/articles/product-display-rules.md): every ready-made rule explained.
- [How to Show Specific Products in a Carousel](https://help.nowdialogue.com/articles/6933877-rules-how-to-show-specific-products-carousel.md): pick or hide exact products.
- [The Segments Page](https://help.nowdialogue.com/articles/segments-page.md): show different products to different shoppers.
---
# Become a (1-Click) Segmentation Hero
> Create segments in 1-click based on users’ shopping behavior and real-time data to enable hyper focused personalization of your offers.
- Web page: https://help.nowdialogue.com/articles/6922302-become-a-1-click-segmentation-hero/
Show every visitor a version of your asset that fits them. It takes three steps:
1. **Segment** your audience: decide who sees this version.
2. **Choose products** with display rules: decide what they see.
3. **Choose messaging**: decide what the asset says to them.
## Why segment?
Segmentation means splitting your shoppers into smaller groups that share something, then speaking to each group in its own way. Dialogue segments are based on real shopping behavior and live data, such as:
- how often someone has visited and when they last ordered
- what is in their cart right now
- where they came from (for example a campaign link or a Klaviyo email)
- where they are, which device they use and which language they shop in
- their Yotpo loyalty membership
A few segments you can build:
- First-time visitors browsing sale items
- Returning visitors who never bought
- Shoppers with items in their cart
- Repeat customers and big spenders
- Members and guests
- Shoppers arriving from an influencer link
For the full list of conditions, see [The Segments Page](https://help.nowdialogue.com/articles/segments-page.md).
## The All Visitors behavior
Every asset starts with one behavior called **All Visitors**. It has four parts, which you'll see in the asset's **Behavior** tab:
- **Audience**: who sees it. For All Visitors, that's everyone who visits your store.
- **Pages**: where it shows.
- **Products Display**: which products it shows. By default, Dialogue AI.
- **Messaging**: the text, such as the headline.
As long as you only have All Visitors, everyone sees the asset the same way.
## Add a behavior for a segment
1. Open the asset and go to the **Behavior** tab.
2. Click **+ Add Behaviour**.
3. Choose a ready-made segment from **Top popular segment for you** (such as **New Visitors**, **Returning Visitors**, **Paying Customers**, **Heavy Spenders** or **Members**), pick a **Saved segment**, start from a **Klaviyo campaign**, or click **New segment** to build your own.
4. Save.
## Example: new visitors vs. returning visitors
Say you have a homepage recommendations carousel and want new visitors and returning visitors to see different products.
### Step 1: Create the New Visitors behavior
1. In the **Behavior** tab, click **+ Add Behaviour**.
2. Choose **New Visitors**. This segment includes shoppers whose **Number Of Visits** is lower than 2.
3. Save. You now have two behaviors: **All Visitors** and **New Visitors**.
### Step 2: Choose products for new visitors
New visitors don't know your store yet, so popular products are a good start.
1. On the **New Visitors** behavior, click **Products Display**.
2. Turn on **Best Selling Products**.
3. Click **Save**.
### Step 3: Choose the messaging for new visitors
1. On the **New Visitors** behavior, click **Messaging**.
2. Change the **Asset Headline**, for example to "Our Best Sellers".
3. Save.
### Step 4: Set up returning visitors
Anyone who isn't a new visitor will fall through to **All Visitors**, so you can use it for returning visitors:
1. On **All Visitors**, open **Products Display** and turn on **Newest Arrivals**.
2. Change its **Messaging** headline to something like "Just Landed".
### The result
One carousel, two experiences:
- **New visitors** see best sellers under the headline "Our Best Sellers".
- **Everyone else** sees your newest products under "Just Landed".
## Behavior order matters
Dialogue checks behaviors from top to bottom and uses the first one that matches the shopper. This matters when a shopper fits more than one segment, for example a member who is also a returning visitor. Drag behaviors by their handle to change the order.
Turn on **Continue on empty result** if you want Dialogue to move on to the next behavior when the current one finds no products.
## Learn more
- [The Segments Page](https://help.nowdialogue.com/articles/segments-page.md)
- [Product Display Rules](https://help.nowdialogue.com/articles/product-display-rules.md)
---
# How to Show (or Hide) Specific Products in a Carousel
- Web page: https://help.nowdialogue.com/articles/6933877-rules-how-to-show-specific-products-carousel/
By default, Dialogue AI shows personalized products to each shopper. Sometimes you want full control instead: a carousel with exactly the products you choose, or a carousel that never shows a certain product. A custom rule does both.
Tip: you can give each segment its own rules, so different shoppers see different products. See [The Segments Page](https://help.nowdialogue.com/articles/segments-page.md).
## Show only the products you choose
1. Go to **Assets** > **My Assets** and open the carousel.
2. Open the **Behavior** tab, pick a behavior (for example **All Visitors**) and click **Products Display**.
3. Click **Custom rule**.
4. Choose **SKU**.
5. Choose the condition **Equal to**.
6. Click the value box and pick the products from the list. You can add several products to the same rule.
7. Click **Save rule**, then **Save**.
You'll see how many products match your rules, so you can check the carousel has enough to show.
If you want the carousel to show only your chosen products and nothing else, turn off **Auto-fill empty slots** at the bottom of the panel. Otherwise Dialogue adds more products when your list is short.
## Hide specific products from an asset
1. Follow steps 1 to 4 above.
2. Choose the condition **Different from**.
3. Pick the products you want to hide.
4. Click **Save rule**, then **Save**.
Those products will no longer appear in this asset (for the behavior you edited).
### Hide a product from every asset at once
To keep a product out of all your Dialogue assets, add a tag to it in Shopify instead. See [Automatic Product Hiding with Shopify Tags](https://help.nowdialogue.com/articles/10960742-automatic-product-hiding-with-shopify-tags.md).
## Learn more
- [Product Display Rules](https://help.nowdialogue.com/articles/product-display-rules.md): every ready-made rule explained.
- [Setting Asset Rules](https://help.nowdialogue.com/articles/5763210-setting-asset-rules.md)
---
# "Add The Finishing Touch"... Headlines that resonate!
> Learn how to choose compelling headlines for Dialogue’s assets that engage shoppers and boost conversions on your eCommerce shop.
- Web page: https://help.nowdialogue.com/articles/10285121-add-the-finishing-touch-headlines-that-resonate/
## Choosing the right headline
Choosing the right headline is crucial for capturing shoppers' attention and guiding them toward key actions, like making additional purchases or discovering new products.
Headlines serve various purposes, such as **cross-selling, upselling, enhancing product discovery, improving site navigation, and encouraging engagement with promotions or bundles.**
📲 For mobile devices, headlines need to be concise and visually impactful, ensuring they don’t overwhelm smaller screens.
💻 On desktops, there's more space for slightly longer, more descriptive headlines that can encourage deeper exploration.
Well-crafted headlines drive conversions, improve UX and support strategic goals across all devices.
## Cross-Selling Headlines
- "Complete The Look"
- "Add the Finishing Touch"
- "Pair It With"
- "You Might Also Like"
- "Perfect Pairings"
- "Great Matches for You"
- "Don't Forget These"
- "Shop the Look"
- "Top Picks for You"
## Upselling Headlines
- "Treat Yourself to More"
- "Level Up Your Cart"
- "Upgrade Your Experience"
- "Get More for Less"
- "Why Stop Here?"
- "Get the Premium Version"
- "Unlock More Value"
- "The Next Level Awaits"
- "Take It a Step Further"
- "Go Bigger, Save More"
## Bundles Headlines
- "Complete The Routine"
- "The Perfect Pair"
- "Beauty Essentials Kit"
- "Mix & Match for More"
- "Create The Perfect Look"
- "Get the Full Experience"
- "Bundle & Save"
- "Beauty Must-Haves"
- "The Ultimate Set"
- "Get The Full Collection"
- "Upgrade Your Wardrobe"
- "Beauty in Every Bundle"
- "Fashion Faves Together"
- "Elevate Your Beauty Game"
- "Glow From Head to Toe"
- "Shop the Complete Look"
## Personalized Product Recommendations Carousel Headlines
- "Perfectly Paired for You"
- "Just For You"
- "Handpicked For Your Style"
- "You May Also Love"
- "Based On What You Like"
- "Your Personalized Picks"
- "Shop What’s Trending For You"
- "Tailored Just For You"
- "Picked With You In Mind"
- "Recommended Based on Your Taste"
- "Your Next Favorite Awaits"
- "Because You’ll Love These"
- "Looks Like You’ll Love These Too"
- "Perfect Matches for You"
- "Shop Your Personalized Collection"
- "Inspired by Your Selections"
- "Continuing Your Journey"
- "Get More of What You Love"
- "The Perfect Picks, Just For You"
## Product Discovery Headlines
- "Discover Your Next Favorite"
- "New Arrivals Just for You"
- "Explore Our Latest Picks"
- "Fresh Finds You’ll Love"
- "Unlock Hidden Gems"
- "Trending Now – Don’t Miss Out"
- "See What’s New"
- "Explore the Best of [Your Brand]"
- "New & Noteworthy"
- "Shop Fresh Discoveries"
- "Your Next Must-Have Awaits"
- "Find Something Special"
- "Handpicked Just for You"
- "Step Into Something New"
- "Curated Picks for You"
- "Fresh Styles, Just Dropped"
- "See What’s Trending"
- "Unlock New Styles Today"
- "Discover What’s Hot Right Now"
## Site Navigation-Enhancing Headlines
- "Quick Access to Your Faves"
- "Explore Our Collections"
- "Browse Our Best Sellers"
- "See What's Trending"
- "Jump to Your Favorite Styles"
- "Find Your Perfect Match"
- "Shop by Style"
- "Shop by Collection"
- "Shop by Category"
- "Your Guide to Our Best Picks"
- "Everything You Need in One Place"
- "Explore Our Categories"
- "Quick Links to Your Next Faves"
- "See Our Top Choices"
---
# Set Up A/B Testing on Your Store
> Turn on the Dialogue A/B testing app embed in your Shopify theme, add the script to a headless Shopify storefront, or add it to any other website, so your tests can show to shoppers.
- Web page: https://help.nowdialogue.com/articles/8962861-install-abcommerce-in-2-steps/
Before your A/B tests can show to shoppers, Dialogue needs to be switched on in your store. On Shopify this is a single switch in your theme. No code changes, and it won't slow down your store.
## If you use the Dialogue app on Shopify
1. In your Dialogue dashboard, open **A/B testing** from the left menu.
2. In the **Setup Status** box, click **Show install steps**. You'll see the steps below, plus the script for other platforms.
3. Open your **Shopify Admin**.
4. Go to **Online Store → Themes** and click **Customize** on your active theme.
5. Click **App embeds** in the left sidebar.
6. Switch on **Dialogue AB Commerce**.
7. Click **Save** in the top right.
That's it. You can now [create your first test](https://help.nowdialogue.com/articles/8967693-test-website-elements-with-abcommerce.md).
## If you use the Dialogue A/B testing app
If you installed the standalone [Dialogue A/B testing](https://apps.shopify.com/dialogue-a-b-testing) app from the Shopify App Store, your dashboard is at [ab.nowdialogue.com](https://ab.nowdialogue.com).
1. Open **Online Store → Themes** in your Shopify Admin and click **Customize** on your active theme.
2. Click **App embeds** in the left sidebar.
3. Find **Dialogue by PDQ** and switch it on.
4. Click **Save**.
Back in the A/B testing dashboard, the setup status shows when Dialogue is active on your store.
## Headless Shopify store
If your Shopify store runs on a custom storefront (Hydrogen, Next.js or another framework), the theme app embed can't reach it. Your developer adds the Dialogue script to the site's code once instead.
1. Open **A/B testing** in your Dialogue dashboard, click **Show install steps** and choose **Headless store**.
2. Copy the snippet. It looks like this, with your own store's file name:
```html
```
3. Add it to the `` of the layout that every page uses.
4. If your site has a Content Security Policy, allow `https://*.nowdialogue.com` for scripts, styles, images and connections.
5. Keep the Dialogue app installed in Shopify. Purchases are counted from Shopify's checkout.
### Hydrogen
Hydrogen adds a Content Security Policy by default. In `app/entry.server.jsx`, add our domain:
```js
const {nonce, header, NonceProvider} = createContentSecurityPolicy({
shop: {checkoutDomain: context.env.PUBLIC_CHECKOUT_DOMAIN, storeDomain: context.env.PUBLIC_STORE_DOMAIN},
scriptSrc: ['https://*.nowdialogue.com'],
connectSrc: ['https://*.nowdialogue.com'],
styleSrc: ['https://*.nowdialogue.com'],
imgSrc: ['https://*.nowdialogue.com'],
});
```
Then in `app/root.jsx`, add the script inside `` with the page nonce:
```jsx
const nonce = useNonce();
// inside
```
### Next.js
In the root layout (`app/layout.tsx`, or `pages/_document.tsx` on the older Pages Router), add the script inside ``:
```jsx
```
### Check that it works
Open your store and, in the browser console, type `window.DAI_EXP_MANAGER`. If it returns something other than `undefined`, the script is running.
### Good to know on headless stores
- **Page changes without a reload.** Tests are checked on each full page load. If your site switches pages without reloading, a test set for one page starts when the shopper lands on or reloads that page.
- **Page types.** Tests aimed at a page type (product, collection, cart) read it from the address, such as `/products/...` and `/collections/...`. If your addresses look different, set the page type before the script loads, for example `window.DAI_shopify_template = 'product'`.
- **Theme template tests** switch between Shopify theme templates, so they don't apply to a custom storefront.
- **Purchases.** Shopify's checkout runs on a different web address from a custom storefront, so some purchases may not be linked to the version a shopper saw. Views and clicks are counted as usual.
## If your store is not on Shopify
1. Open **A/B testing** in your Dialogue dashboard.
2. Click **Show install steps** and choose **Manual Code**.
3. Copy the script and paste it into the `` section of your site.
## What about the Chrome extension?
You no longer need the Chrome extension. Tests are built in the visual editor inside your dashboard. The extension is only a backup for the rare case where the editor can't load a preview of your store. If that happens, the editor shows a **Download Extension** button.
## Next steps
- [Test website elements with the visual editor](https://help.nowdialogue.com/articles/8967693-test-website-elements-with-abcommerce.md)
- [How Dialogue picks an A/B test winner](https://help.nowdialogue.com/articles/how-dialogue-picks-an-ab-test-winner.md)
- [A/B tests, page speed and flicker](https://help.nowdialogue.com/articles/ab-tests-page-speed-and-flicker.md)
Need help? Open the chat in your Dialogue dashboard and ask Dia, or ask to talk to a person.
---
# Test Website Elements With the Visual Editor
> Change text, images, buttons and layout on your store with the visual editor, then split traffic to see which version sells more. No code needed.
- Web page: https://help.nowdialogue.com/articles/8967693-test-website-elements-with-abcommerce/
With **Website Elements** tests you change any part of your store in a visual editor, right inside your Dialogue dashboard. Shoppers are split between your original page and your new versions, and Dialogue shows you which one performs better.
Nothing goes live until you start the test.
**Before you start:** make sure Dialogue is switched on in your theme. See [Set Up A/B Testing on Your Store](https://help.nowdialogue.com/articles/8962861-install-abcommerce-in-2-steps.md).
## Create a test
1. Open **A/B testing** from the left menu.
2. Under **Start a new test**, click **Website Elements**.
3. The editor opens with a preview of your store. Give your test a name at the top.
4. Browse to the page you want to test. You can type a page address in the bar above the preview, and switch between desktop and mobile preview.
## Add your changes
The **Variants** panel on the left lists your versions. **Control** is your original page. Click the **+** button to add another variant, and select the variant you want to edit.
Then click any element in the preview. A menu shows what you can do with it:
- **Edit Text**: change the words.
- **Change Image** or **Change Video**: swap the media (shown when you click an image or video).
- **Hide**: remove the element for shoppers in this variant.
- **Reposition**: move the element to another spot on the page.
- **Add Block**: add your own content **Before**, **After** or **Inside** the element.
- **Edit Element**: change several things at once, like typography, colors, border and spacing.
- **Hover Animation**: add a small animation when shoppers hover over the element.
For more advanced changes you can also use **Edit CSS**, **Edit HTML**, **Add Class**, **Remove Class** and **Add Script**.
Each change is saved as an "experience" and listed under **Experiences**. Click one to edit it again, or delete it. Click **Save** at the top to keep your work.
**Tip:** Give each change a name and add notes, so you remember why you made it.
## Choose your settings
Click **Settings** at the top of the editor.
### Targeting
Choose who sees the test:
- **Device Type**: **Desktop**, **Mobile** and **Tablet**.
- **Visitor Type**: **All Visitors**, **New** or **Returning**.
- **Add audience rule**: narrow it down further by **Campaign**, **New Visitors**, **Returning Visitors**, **Time of the day**, **Page path** or **Page query**.
### Traffic Allocation
Set what share of shoppers sees each version. The bar shows how your traffic is split between the control and your variants.
### Primary Metric
Pick the number that decides the winner:
- **Click Rate**
- **Conversion Rate**
- **Revenue per Visit**
- **Add to cart rate** (Shopify stores only)
Learn more in [How Dialogue Picks an A/B Test Winner](https://help.nowdialogue.com/articles/how-dialogue-picks-an-ab-test-winner.md).
### Stop Condition
Decide when the test ends:
- **Manual**: the test runs until you stop it.
- **End Date**: pick a date.
- **Auto-stop on Winner**: the test stops once there's a clear winner.
## Start the test
Click **Start** at the top right. The test starts showing to shoppers, and you'll find it under **Your current tests** on the A/B testing page.
If **Start** is greyed out, check that you saved at least one change and that Dialogue is switched on in your theme.
## If the preview won't load
Some stores block previews inside other sites. If that happens, the editor offers other ways to keep working: you may see **Open on live store**, which lets you pick elements on your store in another tab, or a **Download Extension** button for the Chrome extension.
## Learn more
- [How to check your test results](https://help.nowdialogue.com/articles/8967810-how-to-check-abcommerce-test-results.md)
- [A/B tests, page speed and flicker](https://help.nowdialogue.com/articles/ab-tests-page-speed-and-flicker.md)
- [Add new content to a page in a test](https://help.nowdialogue.com/articles/10959816-adding-ab-test-elements-via-abcommerce.md)
Need help? Open the chat in your Dialogue dashboard and ask Dia, or ask to talk to a person.
---
# Add New Content to a Page in an A/B Test
> Use Add Block in the visual editor to test a new section, banner or message that isn't on your page yet.
- Web page: https://help.nowdialogue.com/articles/10959816-adding-ab-test-elements-via-abcommerce/
Want to test something that isn't on your page yet, like a trust badge, a short message or a new banner? There are two ways to do it:
1. **In the visual editor** with **Add Block**. Best for small additions. This article shows how.
2. **With a Shopify template test**: duplicate a template, add the new content in the Shopify theme editor, and test it against the original. Learn how in [Adding A/B test elements via Shopify Template Testing](https://help.nowdialogue.com/articles/10960736-adding-ab-test-elements-via-shopify-template-testing.md).
## Add a block in the visual editor
1. Open **A/B testing** from the left menu and click **Website Elements**.
2. In the **Variants** panel, select the variant you want to change (not **Control**).
3. In the preview, click the element you want to place your new content next to.
4. Choose **Add Block** from the menu.
5. Under **Position**, choose where the new content goes: **Before**, **After** or **Inside** the element you clicked.
6. Add your content in **HTML Content**.
7. Check the result in the preview, then click **Save** at the top.
If you clicked an item in a menu or list, you'll also see an option to add your content as a new menu item, so it matches the items around it.
When you're ready, set up your audience and winning metric under **Settings** and click **Start**. See [Test Website Elements With the Visual Editor](https://help.nowdialogue.com/articles/8967693-test-website-elements-with-abcommerce.md) for every setting.
Need help? Open the chat in your Dialogue dashboard and ask Dia, or ask to talk to a person.
---
# How to Check Your A/B Test Results
> Find your tests, read the results page, and apply the winning version to all your shoppers.
- Web page: https://help.nowdialogue.com/articles/8967810-how-to-check-abcommerce-test-results/
All your A/B tests and their results live on the **A/B testing** page in your Dialogue dashboard.
## Find your tests
1. Open **A/B testing** from the left menu.
2. Scroll to **Your current tests**.
Each row shows:
- **Status**: **Draft**, **Active**, **Paused** or **Completed**.
- **Name**, **Created** date and **Run time**.
- **Goal**: the metric that decides the winner.
- **Results**: **Need more data**, **Not certain**, or which version won.
## Open the results
Click a test row, or open its menu and choose **Overview**. The exact layout depends on the type of test. The results page shows:
- **Test details**: status, goal, start date, devices and the pages the test runs on.
- **A chart** of how each version performs over time.
- **A comparison table** with the numbers for each version. Your original page is shown as **Original**. Click **Preview** to see a version on your store.
- **Dialogue's Insight**: a short, plain-language summary of what the results mean.
Results update as shoppers see your test. Early numbers can swing a lot, so give your test time. See [How Dialogue Picks an A/B Test Winner](https://help.nowdialogue.com/articles/how-dialogue-picks-an-ab-test-winner.md) for the rules a test must meet before a winner is called.
## When there's a winner
When one version clearly wins, the **Results** column in your tests list shows which version won. On the results page you'll also see a message with the winner's name. If it comes with a **Make it 100%** button, click it to show the winning version to all your shoppers.
## Stop or change a test
- Click **Finish** on the results page to end a running test.
- Click **Edit** to change it. Some tests need to be stopped and started again as a new test to change them. Dialogue asks you first.
- From the menu on each row in **Your current tests** you can also **Rename** or **Remove** a test.
Need help? Open the chat in your Dialogue dashboard and ask Dia, or ask to talk to a person.
---
# Shopify Theme A/B Testing
> Run your live Shopify theme against another installed theme and see which one sells more before you switch.
- Web page: https://help.nowdialogue.com/articles/shopify-theme-ab-testing/
Thinking about a new Shopify theme, or a big redesign in a theme copy? With a **Shopify Themes** test you split your shoppers between your current theme and another theme installed in your store, and measure which one performs better before you fully switch.
This test type is available for Shopify stores.
## Before you start
- The theme you want to test must already be installed in your Shopify store (in **Online Store → Themes**). It doesn't need to be published.
- Dialogue has to be switched on in **every theme in the test**. In the theme list, a theme without Dialogue shows an orange warning icon and an **Enable Script** button. Click it, switch on the Dialogue app embed in that theme, and save. See [Set Up A/B Testing on Your Store](https://help.nowdialogue.com/articles/8962861-install-abcommerce-in-2-steps.md).
## How to set up a theme test
1. Open **A/B testing** from the left menu and click **Shopify Themes**.
2. Give your test a name, for example "New theme vs current theme".
3. For **Variant A**, click **Select Theme** on the theme you want to compare against. Your live theme is marked with a star.
4. For **Variant B**, click **Select Theme** on the theme you want to test.
5. Want to compare more themes? Click **Add variant**.
6. Set the **Traffic Allocation** for each variant.
7. Open **Set Audience** and choose the devices the test runs on: desktop, mobile and tablet.
8. Open **Set Test Parameters** and choose:
- **Winning Metric**: **AOV**, **CVR** (conversion rate), **Revenue**, or **Add to cart rate**.
- **When you want your test to end?**: **Once I stop it**, **Specific date**, or **Stop test on winner**. With **Stop test on winner** you can also tick **Apply winner to all traffic**.
9. Click **Start A/B test**.
**Tip:** Just installed or renamed a theme and don't see it? Click **Refresh themes**. To change a theme before the test, click **Edit in Shopify** next to it.
## Tips for theme tests
- **Keep everything else the same.** Use the same products, prices and apps in both themes, so the theme is the only difference.
- **Run the test for full weeks**, so weekdays and weekends count equally.
- Read [How Dialogue Picks an A/B Test Winner](https://help.nowdialogue.com/articles/how-dialogue-picks-an-ab-test-winner.md) to understand when a winner is called.
## Next steps
- [How to check your test results](https://help.nowdialogue.com/articles/8967810-how-to-check-abcommerce-test-results.md)
- [Shopify Template Testing](https://help.nowdialogue.com/articles/10143195-shopify-template-testing.md), to test a single page layout instead of a whole theme
[Start a Shopify theme test](https://dashboard.nowdialogue.com/ab-themes/create)
Need help? Open the chat in your Dialogue dashboard and ask Dia, or ask to talk to a person.
---
# How Dialogue Picks an A/B Test Winner
> Winning metrics, including Add to cart rate, and the rules a test must meet before a winner is called.
- Web page: https://help.nowdialogue.com/articles/how-dialogue-picks-an-ab-test-winner/
When you create an A/B test, you choose a **winning metric**: the number that decides which version is better. Dialogue keeps checking the results and tells you when one version is clearly ahead.
## Winning metrics you can choose
| Metric | What it measures | Good for |
|---|---|---|
| **Conversion Rate** | Share of visitors who placed an order | Most tests |
| **Add to cart rate** | Share of visitors who added any product to the cart | Product page and collection changes, faster results than orders |
| **Revenue** | Revenue per visitor | Price, bundle and upsell tests |
| **AOV** | Average order value | Bundle and free shipping threshold tests |
| **Clicks** | Clicks per visitor on the tested element | Banners, buttons, navigation |
### About Add to cart rate
- **Shopify stores only.** It's not available on other platforms, so you won't see it there.
- **It counts every add to cart in your store,** not only clicks on Dialogue elements. A visitor counts once, even if they add several products.
- **It works automatically** with the Dialogue app on Shopify. Nothing to install or set up.
- **It needs the visitor's tracking consent,** like the rest of your test data.
Add to cart rate usually reaches a result sooner than Conversion Rate, because many more visitors add to cart than buy.
## When Dialogue calls a winner
To avoid declaring a winner by chance, every version in the test must first reach:
- **At least 7 days** of running time
- **At least 100 visitors**
- **At least 10 conversions** (orders, add to carts or clicks, depending on your metric)
After that, a version is the winner only when Dialogue is at least 95% sure it beats the original. With more than one variant, the bar is raised for each one, so testing many versions at once doesn't produce lucky winners.
Until then, the results page shows the numbers so far with **"Not enough data yet"** or **"No clear difference"**.
## Automatic actions
If your test is set to stop or move traffic to the winner automatically:
- **It waits at least 14 days,** even if a winner shows up earlier. Results often swing in the first days.
- **Only Conversion Rate and Add to cart rate winners are applied automatically.**
- **Revenue and AOV winners are shown on the results page** but never applied automatically. Review them and apply the winner yourself.
## Tips
- **Run tests for full weeks** (7, 14, 21 days), so weekdays and weekends are counted equally.
- **Don't stop a test as soon as one version pulls ahead.** Early leads often disappear.
- **Low traffic?** Test two versions, not three or four. Each extra version needs more visitors.
---
# A/B Tests, Page Speed and Flicker
> How Dialogue shows test changes without your page flashing, and how tests behave as visitors move between pages.
- Web page: https://help.nowdialogue.com/articles/ab-tests-page-speed-and-flicker/
A common worry with A/B testing tools is **flicker**: the visitor sees the original page for a moment, then it jumps to the new version. Here's how Dialogue avoids it.
## No flicker
- **Only the parts being tested are hidden, for a split second.** The rest of the page loads as normal. Hidden parts keep their space, so nothing moves around.
- **Your page doesn't wait for Dialogue.** Our script loads in the background and never slows your page down.
- **There's a 0.8 second limit.** If a change isn't ready by then, the visitor simply sees the original for that page view. Changes never swap in after the visitor has already seen the page.
- **It's fair to both versions.** The original and the variant wait the same way, so timing doesn't affect which one wins.
This applies to tests built with the visual editor. It's set up automatically when you turn on the Dialogue app embed in your Shopify theme.
## Moving between pages
- **Regular Shopify themes:** every page works out of the box. Tests also apply to content that appears after the page loads, like product grids, quick views and cart drawers.
- **Headless or single-page-app stores** (for example Hydrogen or a custom Next.js storefront): tests aren't re-checked yet when the visitor moves to another page without a full page load. Contact us before running tests on this kind of store.
## Checking that a test is showing
If a change sometimes doesn't appear, the tested element may be loading slowly or may not exist on every page. Dialogue keeps track of how often a change couldn't be applied. If you think a test isn't showing as it should, pick a more stable element in the editor, or contact us and we'll check it for you.
---
# Shopify Template Testing
> Test different Shopify templates against each other on your homepage, product, collection, cart, blog and other pages.
- Web page: https://help.nowdialogue.com/articles/10143195-shopify-template-testing/
Shopify template testing lets you compare two or more versions of a page template, like two product page layouts, and see which one sells more. You build the templates in the Shopify theme editor you already know. Dialogue splits your shoppers between them and tracks the results.
This test type is available for Shopify stores.
## Highlights
- **Test whole page layouts**: compare entirely different templates, not just single elements.
- **Flexible traffic split**: choose what share of shoppers sees each template.
- **Target your audience**: run the test on desktop, mobile or tablet, and add audience rules.
- **No code needed**: everything is set up in the dashboard and the Shopify theme editor.
## Page types you can test
- **Homepage Templates**
- **Product Page Templates**
- **Collection Pages Templates**
- **Cart Page Templates**
- **Blog Article Templates**
- **Blog Pages Templates**
- **Pages Templates**
You'll see the page types your theme has templates for.
## How to set up a template test
1. Make sure Dialogue is switched on in your theme. See [Set Up A/B Testing on Your Store](https://help.nowdialogue.com/articles/8962861-install-abcommerce-in-2-steps.md).
2. Open **A/B testing** from the left menu and click **Shopify Templates**.
3. Give your test a name.
4. Under **Choose Variant A**, pick a page type, then click **Select Template** on the template you want to compare against. Your default template is marked with a star.
5. For **Variant B**, click **Choose from existing** and pick another template with **Select Template**. Or click **Test a duplicate** to make a copy you can change in Shopify.
6. Need more versions? Click **Add variant**.
7. Set the **Traffic Allocation** for each variant.
8. Open **Set Audience** to choose the devices the test runs on and, if you like, add audience rules with **+ Add rule**.
9. Open **Set Test Parameters** and choose:
- **Winning Metric**: **AOV**, **CVR** (conversion rate), **Revenue**, or **Add to cart rate** on Shopify.
- **When you want your test to end?**: **Once I stop it**, **Specific date**, or **Stop test on winner**. With **Stop test on winner** you can also tick **Apply winner to all traffic**.
10. Click **Start A/B test**.
To add brand new content to a template copy, see [Adding A/B test elements via Shopify Template Testing](https://help.nowdialogue.com/articles/10960736-adding-ab-test-elements-via-shopify-template-testing.md).
## Ideas to test
- **Homepage layout**: a minimal homepage vs. one with promotional banners.
- **Cart page**: a cart page with trust badges (like secure payment icons) vs. one without.
- **Product page**: a template with a bigger image gallery vs. one with a detailed feature list.
- **Collection page**: a simple grid with fewer filters vs. a layout with more sorting options.
- **Seasonal homepage**: a holiday-themed homepage vs. your standard one.
## Next steps
- [How to check your test results](https://help.nowdialogue.com/articles/8967810-how-to-check-abcommerce-test-results.md)
- [How Dialogue picks an A/B test winner](https://help.nowdialogue.com/articles/how-dialogue-picks-an-ab-test-winner.md)
- [Shopify theme A/B testing](https://help.nowdialogue.com/articles/shopify-theme-ab-testing.md)
[Start a Shopify template test](https://dashboard.nowdialogue.com/ab-pages/create)
Need help? Open the chat in your Dialogue dashboard and ask Dia, or ask to talk to a person.
---
# Adding A/B Test Elements via Shopify Template Testing
> Work in the Shopify theme editor you already know: duplicate a template, add your new content, and test it against the original.
- Web page: https://help.nowdialogue.com/articles/10960736-adding-ab-test-elements-via-shopify-template-testing/
There are two ways to test new content that isn't on your page yet:
1. **In the visual editor** with **Add Block**. Learn [how it's done](https://help.nowdialogue.com/articles/10959816-adding-ab-test-elements-via-abcommerce.md).
2. **With a Shopify template test**: duplicate an existing template, add the new content in the Shopify theme editor, and test it against the original. This article shows how.
## Steps
1. Open **A/B testing** from the left menu and click **Shopify Templates**.
2. Under **Choose Variant A**, pick a page type (for example **Product Page Templates**) and click **Select Template** on the template you want to start from. Your default template is marked with a star.
3. For **Variant B**, click **Choose from existing**.
4. Find the template you picked for Variant A and click **Test a duplicate**. Give the copy a name and click **Duplicate**.
5. Click **Edit template on Shopify** to open the copy in the Shopify theme editor.
6. Add your new sections or blocks to the copy and save it in Shopify. Use **View template in my store** to check how it looks.
7. Back in Dialogue, set the **Traffic Allocation** for each variant, then open **Set Audience** and **Set Test Parameters** to choose who sees the test and your winning metric.
8. Click **Start A/B test**.
Your original template stays untouched. Only shoppers in the test group see the copy with your new content.
Learn more about [Shopify Template Testing](https://help.nowdialogue.com/articles/10143195-shopify-template-testing.md).
Need help? Open the chat in your Dialogue dashboard and ask Dia, or ask to talk to a person.
---
# Redirect & Split Traffic Between Pages
> Split traffic and redirect between pages to test different versions of your store, landing pages and product offers.
- Web page: https://help.nowdialogue.com/articles/10143165-redirect-and-split-traffic-between-pages/
A **Redirect** test sends some of the shoppers who visit a page to a different page instead. It's the easiest way to compare two fully separate page designs, like an existing landing page against a brand new one.
## Highlights
- **Custom traffic split**: choose what share of shoppers goes to each page.
- **More than two versions**: add several test pages and compare them all.
- **Campaign tracking stays intact**: shoppers sent to a test page keep their UTM tags, so your analytics still show where they came from.
## Before you start
Make sure Dialogue is switched on in your store. See [Set Up A/B Testing on Your Store](https://help.nowdialogue.com/articles/8962861-install-abcommerce-in-2-steps.md).
## How to set up a redirect test
1. Open **A/B testing** from the left menu and click **Redirect**.
2. Enter a **Test Name**.
3. In **Original (Source URL)**, enter the page shoppers already visit.
4. In **Variant B (Destination URL)**, enter the page you want to test. Click **Add Variant** to test more pages.
5. Set the traffic split for each page.
6. Under **Audience**, choose the devices the test runs on. Everyone who visits the original page on those devices is part of the test.
7. Choose a **Winning Metric**: **AOV**, **CVR** (conversion rate), **Revenue**, or **Add to cart rate** on Shopify.
8. Under **When you want your test to end?**, choose **Once I stop it**, **Specific date**, or **Stop test on winner**. With **Stop test on winner** you can also tick **Apply winner to all traffic**.
9. Click **Start A/B test**.
### Good to know
- **One exact page per test.** Redirect tests don't support wildcards like `/products/*`. To test several pages, create one test per page.
- **Testing one campaign only?** Add its tag to the original address, for example `?utm_campaign=summer`. Only shoppers with that tag join the test. The value must match exactly (summer and Summer are different).
- Shoppers who arrive with UTM tags (from ads or emails) are included in the test.
## Ideas to test
- **Landing page redesign**: a minimal product page vs. one with more storytelling.
- **Pricing and offers**: a page with 20% off vs. a buy-one-get-one-free offer.
- **Seasonal promotions**: a "Holiday Sale" page vs. a "Black Friday Special" page.
- **Subscriptions**: a page highlighting monthly plans vs. one highlighting yearly plans.
- **Visual content**: a product page with an explainer video vs. one with images and detailed text.
## Next steps
- [How to check your test results](https://help.nowdialogue.com/articles/8967810-how-to-check-abcommerce-test-results.md)
- [How Dialogue picks an A/B test winner](https://help.nowdialogue.com/articles/how-dialogue-picks-an-ab-test-winner.md)
[Start a redirect test](https://dashboard.nowdialogue.com/tests/create/redirect)
Need help? Open the chat in your Dialogue dashboard and ask Dia, or ask to talk to a person.
---
# How to A/B Test Your Dialogue Assets
> Find out which of your Dialogue carousels, banners and other assets work best. Test an asset's impact, two assets against each other, rules and messaging, or campaigns.
- Web page: https://help.nowdialogue.com/articles/8110201-how-to-ab-test-your-dialogue-assets/
Asset tests show you which of your Dialogue assets, like carousels and banners, really help you sell. Dialogue splits your shoppers into groups, shows each group a different version, and tells you which one performs better.
Want to test other parts of your store, not just Dialogue assets? See [Test Website Elements With the Visual Editor](https://help.nowdialogue.com/articles/8967693-test-website-elements-with-abcommerce.md).
## How to start an asset test
1. Open **A/B testing** from the left menu.
2. Under **Start a new test**, click **Assets**.
3. Choose the type of test you want to run (see below).
You need at least one asset to run an asset test. If you don't have one yet, Dialogue will offer to create one first.
## Types of asset tests
### Test impact
Not sure whether an asset is worth showing? Compare your store with and without it.
1. Enter a **Test Name**.
2. Under **Control Group (With Asset)**, choose the asset under **Choose Asset**. Shoppers in this group see the asset.
3. Shoppers in **Variant B (Without Asset)** never see it.
4. Set the **Traffic Allocation** for each group.
Winning metrics: **Conversion Rate** or **AOV**.
### Test between 2 assets
Wondering whether a banner or a carousel works better in the same spot? Show one asset to each group.
1. Enter a **Test Name**.
2. Under **Control Group**, choose the first asset.
3. Under **Variant B**, choose the second asset.
4. Set the **Traffic Allocation** for each group.
Winning metrics: **Direct Sales** or **CTR** (click-through rate).
### Test rules & messaging
Compare two setups of the same asset: which products it shows and what the title and button say.
1. Enter a **Test Name**.
2. Under **Control Group**, choose the asset and the **Segment**. Its current rule and messages fill in for you.
3. Under **Variant B**, change the rule, the messages, or both.
4. Set the **Traffic Allocation** for each group.
Winning metrics: **Direct Sales** or **CTR**.
### Test Campaigns
Debating between two campaigns? Show a different one to each group.
1. Enter a **Test Name**.
2. Under **Control Group**, choose the asset and **Segment**. The campaigns currently assigned to it fill in for you.
3. Under **Variant B**, choose the **Campaigns** to show instead.
4. Set the **Traffic Allocation** for each group.
Winning metrics: **Direct Sales** or **CTR**.
## Finish the setup
For every test type, open **Set Test Parameters** and choose:
- **Winning Metric**: the number that decides the winner.
- **When you want your test to end?**: **Automatically**, once the test has enough traffic, or **Manually**, when you decide to stop it.
- **Description** (optional): a note about why you're running the test.
Then click **Start A/B test**.
## Next steps
- [How to check your test results](https://help.nowdialogue.com/articles/8967810-how-to-check-abcommerce-test-results.md)
- [How Dialogue picks an A/B test winner](https://help.nowdialogue.com/articles/how-dialogue-picks-an-ab-test-winner.md)
[Go to A/B testing](https://dashboard.nowdialogue.com/ab-testing)
Need help? Open the chat in your Dialogue dashboard and ask Dia, or ask to talk to a person.
---
# Dialogue Integration With Google Analytics GA4
> Send Dialogue views and clicks to Google Analytics and compare shoppers who used Dialogue with everyone else.
- Web page: https://help.nowdialogue.com/articles/5630458-dialogue-integration-with-google-analytics-ga4/
Connect Google Analytics and Dialogue sends an event to your GA4 property each time a shopper sees or clicks a Dialogue asset. The two main events are **asset_view** and **asset_click**.
With these events you can build an audience of shoppers who clicked a Dialogue recommendation, and compare their revenue, average order value and conversion rate with all other shoppers.
## 1. Add your Measurement ID in Dialogue
1. In Google Analytics, copy your GA4 **Measurement ID**. It starts with **G-**.
2. In your Dialogue dashboard, go to **Settings** > **Integrations**.
3. Find **Google Analytics** and click **Connect**.
4. Paste the ID into **GA Tracking ID** and click **Save**.
Your Google Analytics tag needs to be on your store for the events to arrive.
## 2. Create an audience in Google Analytics
1. In Google Analytics, open **Admin** and go to **Audiences**.
2. Click **New audience** and choose **Create a custom audience**.
3. Add a condition on the event **asset_click**.
4. Name the audience and save it.
## 3. Compare results
Use the new audience in your Google Analytics reports or explorations. Compare it with all users to see how shoppers who interacted with Dialogue spend and convert.
---
# Dialogue Integration With Stamped
> Connect Stamped to show your product star ratings on Dialogue assets.
- Web page: https://help.nowdialogue.com/articles/9305850-dialogue-integration-with-stamped/
Stamped is a reviews and loyalty platform for online stores. Connect it to Dialogue and your Stamped star ratings can show on the products inside your Dialogue assets, so shoppers see social proof right where they browse.
## What you need
- Your **Store URL** from Stamped
- Your **API Key** (the public key) from Stamped
## Connect Stamped
1. In your Dialogue dashboard, go to **Settings** > **Integrations**.
2. Find the **Stamped** card and click **Connect**.
3. In your Stamped dashboard, go to **Settings** and copy your **Store URL**. Paste it into the **Store url** box in Dialogue.
4. In your Stamped dashboard, go to **Reviews Integration** > **API Keys** and copy the **API Public Key**. Paste it into the **Api Key** box in Dialogue.
5. Click **Connect**.
The Stamped card now shows **Connected**.
## Show the stars on an asset
1. Open the asset and go to the **Design** tab.
2. Open **Rating & Badges**.
3. Turn on **Rate**.
4. Save and publish your asset.
## Disconnect
Go back to **Settings** > **Integrations**, click the Stamped card, and click **Disconnect**.
[Take me to Integrations](https://dashboard.nowdialogue.com/settings/integrations/partnerships)
---
# Dialogue Integration With Instagram & TikTok
> Bring your Instagram and TikTok posts and videos into Dialogue and use them in shoppable assets on your store.
- Web page: https://help.nowdialogue.com/articles/9344817-dialogue-integration-with-instagram-and-tiktok/

Your social media is full of great photos and videos of your products. Connect Instagram and TikTok to Dialogue and use that content on your store, without downloading and uploading files by hand.
## What you can do with it
- Use your Instagram and TikTok videos in **Shoppable Reels**, so shoppers can watch and buy on your product pages.
- Use photos and videos in **Shoppable Stories** and banners.
- Show real-life, lifestyle content next to your product recommendations instead of plain product photos.
## Connect your accounts
1. In your Dialogue dashboard, go to **Settings** > **Integrations**.
2. Find the **Instagram** or **Tiktok** card and click **Connect**.
3. Sign in to your account and approve the connection.
The card now shows **Connected**. You can also connect **Meta for business** from the same page.
## Use your content
Once connected, your media is ready to pick when you build Shoppable Reels, Shoppable Stories and other content assets. To start, click **Assets** > **Create Asset** and choose an asset under **Stories**.
[Take me to Integrations](https://dashboard.nowdialogue.com/settings/integrations/partnerships)
---
# Connect Dialogue to Claude
> Connect your store to the Claude app or Claude Code and let Dia work on your assets, segments and results from inside Claude.
- Web page: https://help.nowdialogue.com/articles/connect-dialogue-to-claude/
If you already use Claude, you can connect it to your Dialogue store. Then you can ask Claude to look at your assets, change texts, build segments and report on results, all in plain words. Claude uses Dia, the Dialogue AI assistant, to do the work. Learn more in [Meet Dia, Your AI Assistant](https://help.nowdialogue.com/articles/meet-dia-your-ai-assistant.md).
## Open the connection window
You can start from either place:
- **Home**: on the **Use Dia inside Claude and ChatGPT** card, click **Connect Claude**. The card only shows while your store is not connected yet.
- **Integrations page**: go to [dashboard.nowdialogue.com/settings/integrations](https://dashboard.nowdialogue.com/settings/integrations) and click the **Connect to Claude** card.
If you don't have a connection yet, click **Generate token**. You'll then see your **Server URL** and the steps below.
## Connect the Claude app or claude.ai
1. Next to **Server URL**, click **Copy**.
2. In Claude, open **Settings → Connectors → Add custom connector**.
3. Paste the server URL and click **Add**.
4. Claude asks you to sign in to Dialogue and approve. On the approval page, click **Allow**.
That's it. Dia's tools show up in Claude automatically. If you are not signed in to your Dialogue dashboard, the approval page asks you to sign in first.
**Using an older Claude version that can't sign in?** In the connection window, click **Older Claude that can't sign in? Use a direct link instead**, copy that link, and paste it into Claude instead.
## Connect Claude Code
In the connection window, under **Claude Code (terminal)**, click **Copy** next to the command. Run it once in your terminal.
## What to ask Claude
Once connected, try:
- "Show my active widgets and how they did this week."
- "Change my AI Recommendations widget button to 'Add to bag'."
- "Create a segment for shoppers who added to cart but didn't check out."
Claude only works on your own store. Before a change that shoppers would see, Claude shows you what will change and asks you to approve it, just like Dia does in the dashboard.
## Disconnect or start over
Open the connection window again:
- **Revoke** disconnects every Claude app that uses your connection. It stops working right away.
- **Regenerate** creates a new connection and disconnects the old one. Add the new server URL to Claude again.
The window also shows when Claude last connected.
## Need help?
Open the chat in your Dialogue dashboard and ask Dia, or ask to talk to a person.
## For AI assistants
Read the [Guide for AI Assistants](https://help.nowdialogue.com/articles/guide-for-ai-assistants.md) first.
**When to use this article**: the merchant wants Claude to work on their Dialogue store, Dialogue's tools don't show up in Claude, or the connection stopped working.
- **The merchant connects it themselves.** Only they can open the connection window and click **Allow**. Walk them through the steps above, one at a time.
- **Keep the links private.** Don't ask the merchant to paste the direct link for older Claude versions into the chat. It works like a key to their store.
- **Check the connection.** Once connected, call `whoami`. It shows whose connection this is, their role, which stores you can work on and what you're allowed to do.
- **Tools missing or failing?** Ask the merchant to open the connection window and look at when Claude last connected. If the connection was revoked or regenerated, they add the new server URL to Claude again.
- **Disconnecting**: **Revoke** stops every Claude app that uses the connection. Make sure the merchant knows this before they click it.
---
# Loox and Reviews.io Integrations
> Connect Loox or Reviews.io to show your product star ratings on Dialogue assets.
- Web page: https://help.nowdialogue.com/articles/loox-and-reviews-io-integrations/
Already collecting reviews with Loox or Reviews.io? Connect it to Dialogue and your star ratings can show on the products inside your Dialogue assets, like carousels. Shoppers see social proof right where they browse.
## Connect Loox
1. In your Dialogue dashboard, go to **Settings** > **Integrations**.
2. Find the **Loox** card and click **Connect**.
3. In the window that opens, click **Connect**.
That's it. The card now shows **Connected**.
## Connect Reviews.io
1. In your Dialogue dashboard, go to **Settings** > **Integrations**.
2. Find the **Reviews.io** card and click **Connect**.
3. Enter the **CSS class** your store uses for its Reviews.io star rating.
4. Click **Connect**.
Not sure which class to enter? Open the chat in your Dialogue dashboard and ask Dia, or ask to talk to a person.
## Show the stars on an asset
Once you're connected, turn ratings on for each asset where you want them:
1. Open the asset and go to the **Design** tab.
2. Open **Rating & Badges**.
3. Turn on **Rate**.
4. Save and publish your asset.
You can also choose where the stars sit on the product card from the same panel.
## Disconnect
Go back to **Settings** > **Integrations**, click the card, and click **Disconnect**.
Using a different review app? Dialogue also connects to [Yotpo](https://help.nowdialogue.com/articles/9929014-yotpo-reviews-and-dialogue-integration.md) and [Stamped](https://help.nowdialogue.com/articles/9305850-dialogue-integration-with-stamped.md).
---
# Yotpo Loyalty & Dialogue Integration
> Use Yotpo Loyalty details, like membership and tier, to show each shopper personalized offers and messages.
- Web page: https://help.nowdialogue.com/articles/9569370-yotpo-loyalty-and-dialogue-integration/
Yotpo Loyalty lets you reward customers with points, discounts and perks. Connect it to Dialogue and you can show each shopper content that matches their loyalty status: a sign-up invite for non-members, and exclusive offers for your top tier.
## Ideas to try
1. Invite non-members to join your rewards program, or to sign in and see their perks.
2. Show members a different offer for each tier.
3. Remind members how many points they have and what they can get with them.
4. Highlight member perks like early access to sales or bonus points on special days.
5. A/B test different loyalty offers to see which one drives more sales.
## Connect Yotpo
1. In your Dialogue dashboard, go to **Settings** > **Integrations**.
2. Find the **Yotpo** card and click **Connect**.
3. You're sent to Yotpo. Sign in (or, if you're already signed in, approve Dialogue's access).
When you're back in Dialogue, the Yotpo card shows **Connected**.
## Build a loyalty segment
1. In the left menu, click **Segments** and create a new segment.
2. In the rules list, find **Membership (yotpo)**. You can use:
- **Member**: members or non-members
- **Balance**: the shopper's current points balance
- **Earned**: points earned
- **Tier name**: the shopper's loyalty tier
- **Purchases made**: how many purchases they've made
3. For example, choose **Tier name** and enter the name of your tier, like "Gold".
4. Save the segment.
## Use it in an asset
1. Open the asset and go to the **Behavior** tab.
2. Click **+ Add Behavior** and choose your loyalty segment as the audience.
3. Set the products and messaging this audience should see.
4. Save and publish.
The same asset now looks different depending on the shopper's tier. Your Gold members see their exclusive offer, and everyone else sees the regular version.
[Take me to Integrations](https://dashboard.nowdialogue.com/settings/integrations/partnerships)
---
# Yotpo Visual UGC & Dialogue Integration
> Add your shoppers' photos and videos from Yotpo to Dialogue assets for authentic social proof.
- Web page: https://help.nowdialogue.com/articles/9929012-yotpo-visual-ugc-and-dialogue-integration/
Yotpo helps online stores collect reviews and customer photos and videos. With the Yotpo integration, you can add those real customer visuals to your Dialogue assets, so shoppers see your products the way other customers use them.
## Ways to use it
1. **Visual proof next to recommendations.** Pair personalized product suggestions with shopper and influencer photos.
2. **Customer content in banners and stories.** Use shopper visuals in content assets across your store.
3. **Content by loyalty level.** Combine it with [Yotpo Loyalty](https://help.nowdialogue.com/articles/9569370-yotpo-loyalty-and-dialogue-integration.md) to show different content to different members.
## Connect Yotpo
1. In your Dialogue dashboard, go to **Settings** > **Integrations**.
2. Find the **Yotpo** card and click **Connect**.
3. You're sent to Yotpo. Sign in (or, if you're already signed in, approve Dialogue's access).
When you're back in Dialogue, the Yotpo card shows **Connected**.
## Add Yotpo images to an asset
1. Open a content asset (for example, a Storyteller or a banner) and go to the **Content** tab.
2. Add a content unit, or open an existing one.
3. Choose the product the content unit is about.
4. Click the image to replace it. Your gallery opens.
5. In the folder list, choose **Current product**, then **Yotpo images**.
6. Pick the image you want.
Dialogue decides which content unit to show each shopper.
## Tips
- Place the asset where shoppers see it without scrolling.
- Use a headline that says what the content is, like "Our customers in action", so shoppers know what they're looking at.
[Take me to Integrations](https://dashboard.nowdialogue.com/settings/integrations/partnerships)
---
# Yotpo Reviews & Dialogue Integration
> Show Yotpo star ratings on your Dialogue assets and recommend your best-reviewed products.
- Web page: https://help.nowdialogue.com/articles/9929014-yotpo-reviews-and-dialogue-integration/
Yotpo helps online stores collect product reviews. Connect it to Dialogue and your Yotpo star ratings show on the products in your Dialogue assets. Shoppers get instant social proof, which helps them click and buy with confidence.
## What you get
1. **Star ratings on recommendations.** Show Yotpo stars on the products inside your carousels and other assets.
2. **Recommend your best-reviewed products.** Use the **Yotpo's Favorites** product rule to promote products by star rating, number of reviews and more. Learn more in [Yotpo's Favorites Rule](https://help.nowdialogue.com/articles/9934181-yotpo-s-favorites-rule.md).
## Connect Yotpo
1. In your Dialogue dashboard, go to **Settings** > **Integrations**.
2. Find the **Yotpo** card and click **Connect**.
3. You're sent to Yotpo. Sign in (or, if you're already signed in, approve Dialogue's access).
When you're back in Dialogue, the Yotpo card shows **Connected**.
## Show Yotpo stars on an asset
1. Open the asset you want to add stars to and go to the **Design** tab.
2. Open **Rating & Badges**.
3. Turn on **Rate**.
4. Choose where the stars sit on the product card.
5. Save and publish your asset.
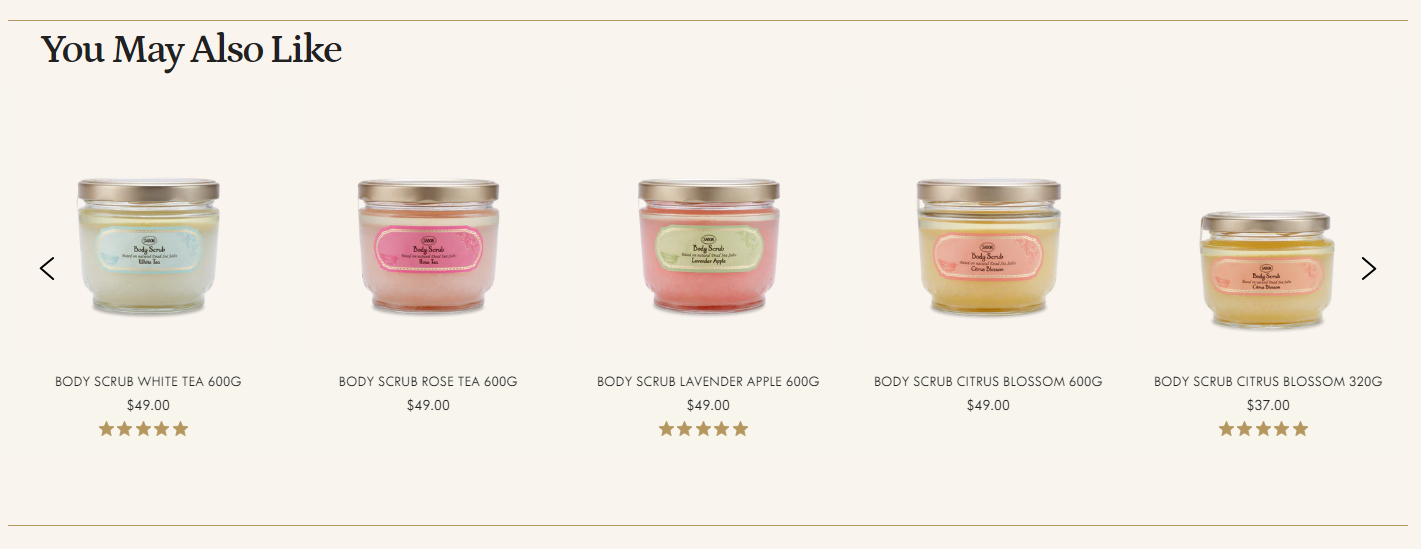
Want to fine-tune how the stars look? You can style them with [Global CSS](https://help.nowdialogue.com/articles/10960741-setting-up-your-global-css-no-code.md).
[Take me to Integrations](https://dashboard.nowdialogue.com/settings/integrations/partnerships)
---
# Yotpo's Favorites Rule
> This product rule features the most popular products by purchase date, star rating, number of reviews & more!
- Web page: https://help.nowdialogue.com/articles/9934181-yotpo-s-favorites-rule/
**Yotpo's Favorites** is a product display rule that fills your asset with your most popular products, as chosen by Yotpo. Yotpo ranks them by things like star rating, number of reviews and recent purchases, and Dialogue shows them in that order.
Featuring proven favorites is a simple way to catch new shoppers' attention, since people are drawn to products others already love.
## Before you start
- Connect Yotpo reviews in **Settings** > **Integrations**.
- The products Yotpo picks must also be in your Dialogue product feed, or Dialogue can't show them.
## Turn on Yotpo's Favorites
1. Go to **Assets** > **My Assets** and open the asset.
2. Open the **Behavior** tab and pick a behavior (for example **All Visitors**).
3. Click **Products Display**.
4. Turn on **Yotpo's Favorites**.
5. Click **Save**.
Yotpo's Favorites decides the whole product list on its own, so while it is on, the other ready-made rules and custom rules are switched off for that behavior.
## Idea: mix it with segments
Give each segment the rule that suits it. For example, show **Cross Sell Last Purchase Products** to **Paying Customers**, and **Yotpo's Favorites** to everyone else. See [The Segments Page](https://help.nowdialogue.com/articles/segments-page.md) and [Product Display Rules](https://help.nowdialogue.com/articles/product-display-rules.md).
[Go to Integrations](https://dashboard.nowdialogue.com/settings/integrations/partnerships)
---
# Dialogue Integration With Klaviyo: Setting Up
> Integrating your Klaviyo account with Dialogue will provide your visitors with a consistent experience across all channels.
- Web page: https://help.nowdialogue.com/articles/7129811-dialogue-integration-with-klaviyo-setting-up/
At Dialogue, we constantly strive to increase the functionality of our app to better help brands like yours deliver personalized customer experiences.
## Highlights of Integrating Dialogue with Klaviyo
- Share data between Dialogue and Klaviyo to create an omnichannel shopping experience.
- Build and target segments in Dialogue based on Klaviyo campaigns and flows.
- Build campaigns and flows in Klaviyo based on information shared from Dialogue.
- Send Klaviyo data about how users interact with your Dialogue assets.
- Build content on your store based on email sequences you have so that every time a user comes to the store they will see content and products relevant to them and directly related to their email campaign.
In this article, we explain how to integrate Dialogue with Klaviyo in just a few simple steps:
1. From Klaviyo Dashboard | Connecting with Dialogue via Klaviyo Private API Key
2. From Dialogue Dashboard | Pasting the Klaviyo Private API Key
3. From Klaviyo Dashboard | Enable UTM settings
To read more about the benefits of integrating Dialogue with Klaviyo [see here](https://help.nowdialogue.com/articles/9571870-dialogue-integration-with-klaviyo-best-practices.md).
---
## 1. Klaviyo Dashboard | Connect Klaviyo API Key
The first step in integrating Dialogue with Klaviyo is to connect your Klaviyo account to Dialogue using your Klaviyo Private API Key. This key is necessary to access Klaviyo data such as subscriber information and campaign metrics. Here are the steps to follow:
Log in to your Klaviyo account dashboard, navigate to **Settings** > Select **API Keys.**
Click on **Create** **Private API Key**
**Name** your API Key and select **Full access Key >** Click on **Create** to create your API Key.
**Copy your API Key** and go back to your Dialogue Dashboard.
---
## 2. Dialogue Dashboard | Paste The Klaviyo Private API Key
1. In your Dialogue dashboard, go to **Settings** > **Integrations**.
2. Find the **Klaviyo** card and click **Connect**.
3. Paste your Klaviyo Private API Key into the **App Secret** box and click **Connect**.
---
## 3. Klaviyo Dashboard | Enable UTM Settings
From your Klaviyo Dashboard navigate to **Account** > **Settings** > **UTM Settings** > Enable the UTM\_ID toggle.
In the following screen go to **Your Account** > **Settings** > **Other** > **UTM Tracking.**
1. Set **Campaign Value** = your Campaign ID.
2. Set **Flow Value** = your Flow Message ID.
3. Enable **Automatically Add UTM Parameters to Links** toggle.
4. Click to update **UTM Tracking Settings**
Here's [a quick link](https://www.klaviyo.com/settings/other/utm-tracking)
That's it! You have now successfully integrated Dialogue with Klaviyo 🎉
[Learn More: Best Practices Of Integrating Dialogue with Klaviyo](https://help.nowdialogue.com/articles/9571870-dialogue-integration-with-klaviyo-best-practices.md)
---
# Dialogue Integration With Klaviyo: Best Practices
> Combining Dialogue's CRO capabilities and Klaviyo's advanced marketing automation provides a comprehensive solution for E-comm businesses
- Web page: https://help.nowdialogue.com/articles/9571870-dialogue-integration-with-klaviyo-best-practices/
**By integrating Dialogue with Klaviyo, eCommerce businesses can unlock the full potential of their marketing strategies, driving growth through enhanced personalization, automation, and data-driven insights.**
- **Seamless Customer Experience** - Synchronize Klaviyo's marketing flows with Dialogue's personalized shopping experiences.
- **Personalized Marketing Campaigns** - Dialogue's AI guided product offering paired with Klaviyo's segmentation and targeting create highly personalized marketing campaigns.
- **Automated Customer Journeys** - Automate and optimize customer interactions based on real-time behavior and preferences.
## Classic Use Cases for Dialogue <> Klaviyo Integration
**Personalized Campaign Triggers** - Klaviyo sends out a seasonal promotion or a welcome series email. When customers click through the email and land on your site, Dialogue personalizes the landing page based on the promotion, highlighting relevant products & offers that increase the chances of conversion.
**Behavior-Driven Messaging** - Klaviyo identifies segments of customers who haven't made a purchase in a while and sends a re-engagement email. When these customers return to the site, Dialogue triggers personalized messaging offering special discounts or highlighting new arrivals to encourage purchases.
## Maximize Influencer Campaigns by Synchronizing Email Marketing with On-Site Personalization
1. **Campaign Launch** - An eComm business collaborates with an influencer to promote a new product line. The influencer shares a unique promotional code and a link to the eComm site on their social media channels.
2. **Email Campaign via Klaviyo** - The business uses Klaviyo to send out an email campaign to its subscriber list, highlighting the influencer’s promotion. The email includes the same promotional code and a link to the site.
3. **Personalized product recommendations by Dialogue** - When customers click on the link from the influencer’s social media post or Klaviyo's email, they are directed to a personalized page. **Dialogue customizes this page to include:**
- A welcome message mentioning the influencer.
- The featured products from the influencer’s promotion.
- Exclusive recommendations based on customer browsing history and preferences.
- A prominent display of the promotional code for easy access.
**Increased Conversion Rates -** By combining Klaviyo's targeted email and SMS campaigns with Dialogue's on-site personalization, businesses can create a seamless and persuasive shopping journey that drives higher conversion rates.
**Improved Customer Engagement -** Synchronizing personalized marketing messages with tailored on-site experiences keeps customers engaged, encouraging them to interact more with the brand and make purchases.
**Higher ROI on Marketing Efforts -** The integration ensures that marketing efforts are more effective and aligned, maximizing the return on investment by providing a cohesive and compelling customer experience.
**Scalable Solutions** - Both platforms offer scalable solutions that grow with your business, ensuring you can continue to optimize and personalize as your customer base expands.
[Learn How To Set-Up The Integration Between Dialogue And Klaviyo](https://help.nowdialogue.com/articles/7129811-dialogue-integration-with-klaviyo-setting-up.md)
---
# The Dialogue Statistics Dashboard
> A tour of the Statistics page and its five tabs: Overview, Direct Sales, Bundle Sales, AB Tests and Content. Your aid in making data driven decisions.
- Web page: https://help.nowdialogue.com/articles/5796546-the-dialogue-statistics-dashboard/
The **Statistics** page shows how Dialogue performs on your store: your main numbers, your assets, the products Dialogue sold, your bundles, your A/B tests and your content. Use it to track progress over time and compare your assets.
To open it, click **Statistics** in the left menu, or click **View all statistics** on Home.
## Ask Dia about your numbers
At the top of the page there is a box where you can ask Dia about your results in plain words, for example "Which asset brought the most sales last week?". Answers can come back as charts. Learn more in [Meet Dia, Your AI Assistant](https://help.nowdialogue.com/articles/meet-dia-your-ai-assistant.md).
## The five tabs
The Statistics page has five tabs: **Overview**, **Direct Sales**, **Bundle Sales**, **AB Tests** and **Content**.
## 1. Overview
Your main numbers in one place.
- Pick the dates with the date picker, then view them **Daily**, **Weekly** or **Monthly**.
- Click **Add indicator** to choose which numbers to show, such as revenue, conversion rate, average order value, CTR, session time, page views, transactions, and asset loads, views and clicks. You can also remove the ones you don't need.
- See your top selling products and your assets, sorted by the number you care about, like sales, CVR, CTR, loads, views or clicks.
- See when the numbers were last updated, and click **Update** to refresh them.
### How to read the numbers
A few questions to ask yourself as you look:
- **Loads, views and clicks**: assets load on a page, shoppers scroll and see them, then some click. If views are much lower than loads, the asset may be too far down the page. If clicks are low compared to views, try a different title, design or products.
- **Average order value**: compare the order value of shoppers who used a Dialogue asset with your store's overall order value.
- **Engagement**: compare page views and session time of shoppers who used your assets with your other shoppers.
Learn what each number means in [KPIs & Metrics Explained](https://help.nowdialogue.com/articles/6871086-kpis-and-metrics-explained.md).
## 2. Direct Sales
A direct sale is a purchase of a product that a shopper clicked in a Dialogue asset. This tab shows:
- **Direct sales**: revenue from Dialogue assets.
- **Direct Sales %**: direct sales as a percentage of all your store's sales.
- **Total transactions**: the number of direct orders.
- **Quantity**: the number of products sold through Dialogue assets.
- A list of every product sold directly through Dialogue, with the **Order**, **Product**, **Product SKU**, **Transaction time**, **Asset name**, **Location**, **Quantity** and **Revenue**.
You can search the list, pick dates, filter by asset, and download the data.
## 3. Bundle Sales
Once shoppers start buying bundles, this tab shows:
- **Main Product Sales**: revenue from the main products in your bundles.
- **AddOns Sales**: revenue from the add-on products.
- **Bundles Transactions**: every bundle order.
- **Top Bundles Transactions**: your best selling bundles.
- **Most Modified Bundles**: bundles shoppers changed most often.
You can look at up to 3 months at a time.
## 4. AB Tests
**Your A/B tests**: a list of all your tests and how they are doing. Learn more in [How Dialogue Picks an A/B Test Winner](https://help.nowdialogue.com/articles/how-dialogue-picks-an-ab-test-winner.md).
## 5. Content
Results for the content inside your assets, such as banner and story content.
- Totals for **Total loads**, **Total views**, **Total clicks** and **Total revenue**.
- **Contributed Revenue** and **Contributed Transactions** for each piece of content.
- Filter by **Asset**, **Campaign**, **Segment**, **Date** and status, or search by name.
- Click **Export** to download the data.
## Need help?
Open the chat in your Dialogue dashboard and ask Dia, or ask to talk to a person.
---
# KPIs & Metrics Explained
> Conversion Rate Optimization experts use many KPIs to measure success. Deep dive into CRO KPIs to see how Dialogue boosts your business! 🚀
- Web page: https://help.nowdialogue.com/articles/6871086-kpis-and-metrics-explained/
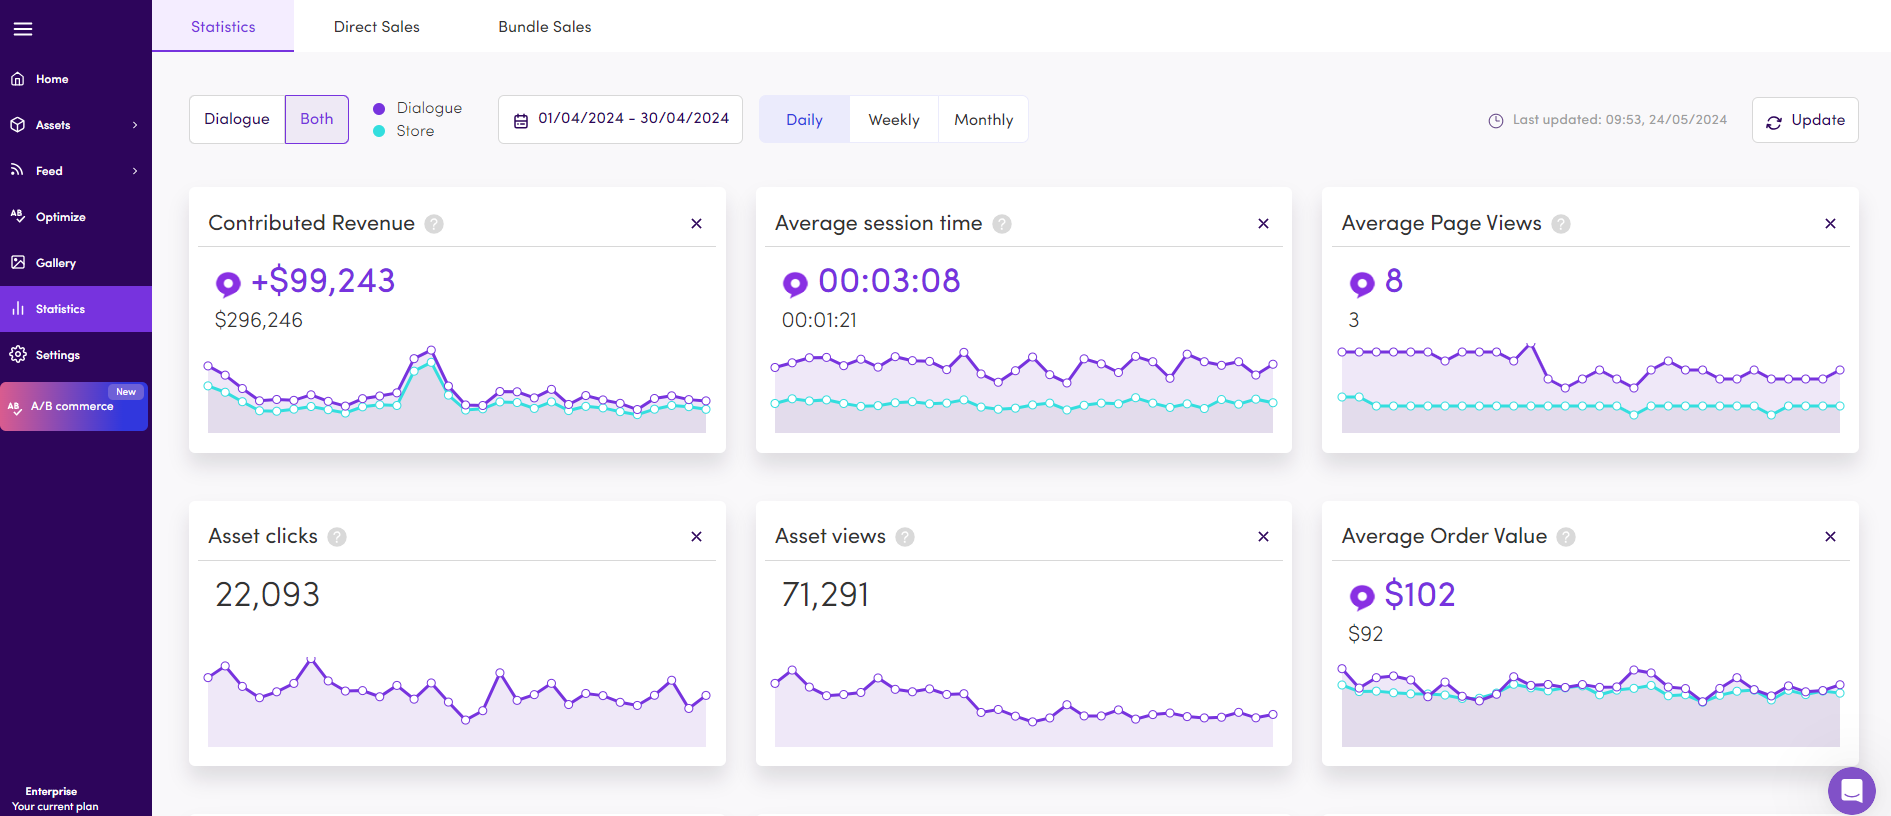
## What are Key Performance Indicators (KPIs)?
KPIs are specific, quantifiable measures used to evaluate the success of an organization in achieving its business objectives. They are critical for understanding performance in key areas. KPIs are usually SMART, i.e.: Specific, Measurable, Achievable, Relevant and Time-bound.

Dialogue helps you track your store's KPIs with conversion, engagement, and overall revenue growth metrics.
## Contribution Metrics
Contributed Revenue
**Revenue from Customers who interacted with Dialogue assets.**
Generated only when your customer **purchased a product during the same session** in which they **interacted with a Dialogue asset,** without necessarily being redirected.
**Not Contributed Revenue**: If your customer interacts with a Dialogue asset > Leaves the website without buying > Returns > buys without interacting with any Dialogue assets.
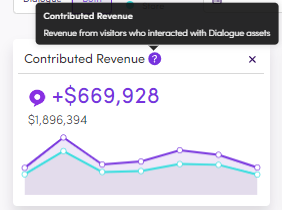
---
Contributed Transactions
**The number of transactions from customers who interacted with Dialogue assets.**
Counted only when your customer **purchased a product during the same session** in which they **interacted with a Dialogue asset,** without necessarily being redirected.
**Not Contributed Transactions** - If your customer interacts with a Dialogue asset > Leaves the website without buying > Returns > Buys without interacting with any Dialogue assets.
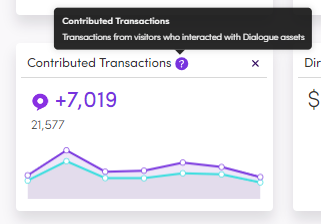
---
## Engagement Metrics
Average session time
Time spent on site by visitors who engage with one of Dialogue's assets. A session ends after30 minutes of inactivity or when a user leaves the website.
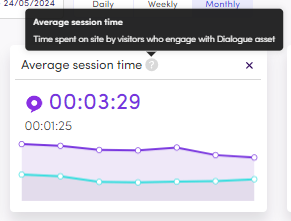
---
Average Page Views
The average number of times a visitor who engage with one of Dialogue asset has viewed a page in one session. This metric captures the total page views of all visitors who have engaged with Dialogue, regardless of how many times they have interacted with one of the Dialogue assets. As long as a user has interacted with a Dialogue asset at least once, their page views will be counted in this metric.
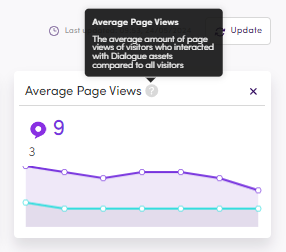
---
## Asset Loads, Views & Clicks
Asset Views
**Number of times visitors viewed Dialogue Assets.**
A view is counted when two conditions are met:
1. The asset has loaded on the page.
2. Your customer scrolled and viewed the asset.
Not counted as a view - If the asset loaded on the page, but your customer didn't scroll and view it.
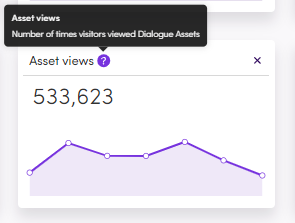
---
Asset Loads
**The number of times that users visited pages that have active Dialogue assets on them.**
Assets may load on pages but not be viewed by your customers. This happens when a Dialogue asset is located at the bottom of the page and your customer didn't scroll down to view it. In this case, the asset load will be counted, but the asset view will not be counted.
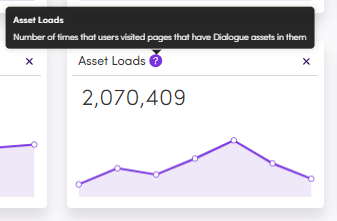
---
Asset Clicks
**Number of times visitors clicked on Dialogue Assets.**
Asset clicks refer to the number of times your customer clicked on an asset link that redirected them to another page. Every time a link is clicked, and your user is redirected to a new page, is an Asset Click.
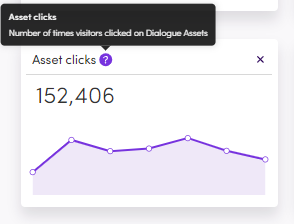
---
## Average Order Value
Average Order Value (AOV)
The average order value of customers who engage with a Dialogue asset on your store.
AOV is a metric used to measure the average amount spent per purchase in an online store. In order to calculate Dialogue AOV, we divide **Contributed Revenue** by **Contributed Transactions.**
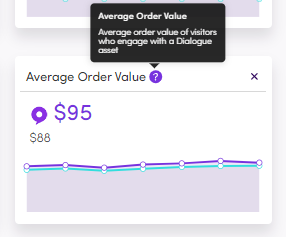
---
Average Order Value Beta (AOV Beta)
**AOV of Customers who engage with a Dialogue asset on your cart, mini cart or checkout pages.**
AOV Beta is calculated by dividing the total revenue from customers who interacted with assets located on your cart page, checkout page, or with the Booster, a cross-sell asset featuring products, by the total number of transactions from those customers.
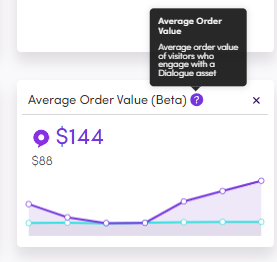
---
## Direct & Pure Metrics
Direct Sales
**Total sales from users who clicked on a product through Dialogue assets, and purchased the exact same product.**
Sales generated through Dialogue assets as a result of your customers clicking on a product and then purchasing the exact same product within 7 days.
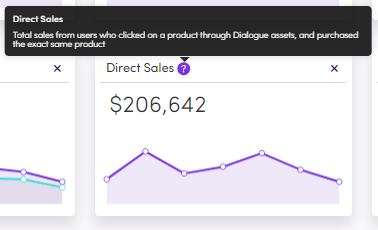
---
Pure Transactions
**Pure Transactions refer to the number of transactions generated through Dialogue assets.**
The number of transactions from your customers who clicked on a product through a Dialogue asset, and purchased the exact same product within 7 days.
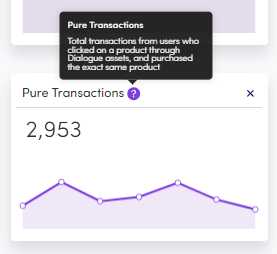
---
## CTR & CVR
Click Through Rate (CTR)
**Clicks/Views = The rate of visitors that clicked on Dialogue Assets out of the number of times visitors viewed Dialogue Assets.**
***CTR*** is a measure of how successful an asset is at encouraging users to take a desired action. It is calculated by dividing the number of ***Asset Clicks*** by the number of ***Asset Views***. For example, if an asset is viewed 100 times and receives 5 clicks, its CTR would be 5%.
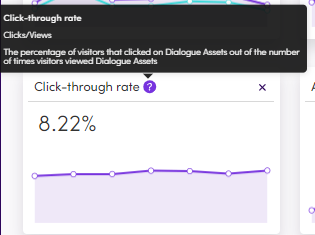
---
Dialogue Conversion Rate (CVR)
The rate of users who interacted with a Dialogue asset and purchased during the same session. Calculated by dividing the number of Contributed Transactions by Dialogue Contributed Sessions.
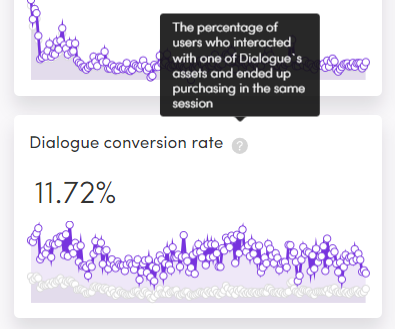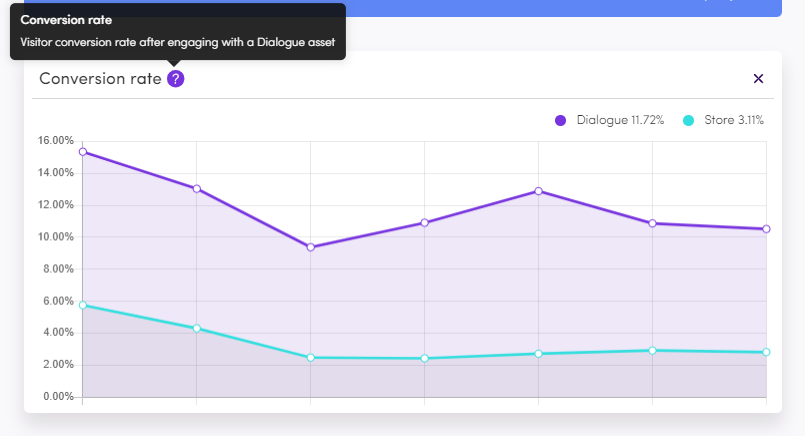
---
[Learn All About The Dialogue Statistics Dashboard](https://help.nowdialogue.com/articles/5796546-the-dialogue-statistics-dashboard.md)
---
# The Dialogue Dashboard Homepage
> A tour of your Dialogue Home page: Ask Dia, your key metrics, your assets and your A/B tests, all in one place.
- Web page: https://help.nowdialogue.com/articles/5144167-the-dialogue-dashboard-homepage-a-wealth-of-knowledge/
**Home** is the first page you see when you open your [Dialogue dashboard](https://dashboard.nowdialogue.com). It gives you a quick view of how Dialogue is doing on your store and a fast way to get things done.
## The left menu
Use the left menu to move around the dashboard: **Home**, **Assets**, **Feed**, **A/B testing**, **Segments**, **Gallery**, **Statistics** and **Settings**. Stores in the AI Shopping Assistant pilot also see **AI Assistant**.
## Alerts at the top
If something needs your attention, a message shows at the top of Home. For example, on Shopify stores you'll see **Dialogue app is not embedded into your Shopify store** if the Dialogue app embed is turned off in your theme. Click **Go to Shopify** to fix it.
## Ask Dia
Under the welcome message there is a box that says **Ask Dia anything about your store…**. Type a question or a request in plain words, for example "Which of my assets sold the most this month?" or "Create a carousel of best sellers for my home page". Dia opens and takes it from there. Learn more in [Meet Dia, Your AI Assistant](https://help.nowdialogue.com/articles/meet-dia-your-ai-assistant.md).
## Use Dia inside Claude and ChatGPT
If your store is not connected to Claude yet, you'll see the **Use Dia inside Claude and ChatGPT** card. Click **Connect Claude** to set it up (ChatGPT is coming soon), or close the card if you don't need it. Learn more in [Connect Dialogue to Claude](https://help.nowdialogue.com/articles/connect-dialogue-to-claude.md).
## Your Key Metrics
This section shows your main numbers for the dates you pick (the last month by default):
- **Direct Sales**: sales of products shoppers clicked in a Dialogue asset and then bought.
- **Direct Transactions**: the number of orders behind those direct sales.
- **Dialogue conversion rate**: how often shoppers who used a Dialogue asset bought in the same visit.
- **Session Duration**: how long shoppers stay on your store once they use your assets.
If there is no direct sales data for the dates you picked, you'll see **Contributed Revenue** instead of **Direct Sales**: revenue from shoppers who used a Dialogue asset.
Use the date picker to change the dates. Click **View all statistics** to open the full **Statistics** page.
**New to Dialogue?** Your numbers start low and grow as shoppers see and use your assets.
Learn what each number means in [KPIs & Metrics Explained](https://help.nowdialogue.com/articles/6871086-kpis-and-metrics-explained.md).
## Your assets
A table of your assets with their **Name**, **Status**, **Loads**, **Views**, **Clicks**, **CTR**, **CVR**, **Direct sales**, **Location** and **Type**. Click a column title to sort by it, or use the search box to find an asset by name.
Click **Create asset** to build a new one. If you don't have any assets yet, the create window opens for you.
## Your A/B tests
At the bottom of Home you'll see **Check out your current A/B tests**, a list of your tests and how they are doing. If you haven't run a test yet, this section says **Choose what you'd like to A/B test**. Click **Create A/B test** to start one.
## Need help?
Open the chat in your Dialogue dashboard and ask Dia, or ask to talk to a person.
---
# Dialogue Settings Overview
> A tour of the Settings page: your account and team, store details, brand, integrations, product feed and billing.
- Web page: https://help.nowdialogue.com/articles/5140514-dialogue-settings-overview/
To open Settings, click **Settings** in the left menu of your dashboard. Settings has six tabs: **Account**, **Site Settings**, **Brand**, **Integrations**, **Feed Browser** and **Billing**.
## Account
Your personal details and your team.
- **Two-step sign-in**: click **Enable 2FA** to add an extra security step when you sign in.
- **Users**: see everyone who has access to your store. The owner is marked **Owner**, and people who haven't accepted their invite yet are marked **Pending**.
- To add a teammate, click **Invite new user**.
- If the invite email didn't arrive, click the link icon next to a pending user to copy their invite link and send it yourself.
- To remove someone, click the trash icon on their row.
- **Store script**: if a change to an A/B test doesn't show on your store, click **Refresh store script**. This rebuilds your A/B tests so shoppers get the latest version.
- **Your details**: name, email, password, address and phone number. Click **Save Changes** when you're done.
## Site Settings
Details about your store:
- **Store Name** and **Store URL**.
- **Allowed Domains**: click **Manage** to see and add the web addresses that belong to your store, for example a second domain. Only domains on this list are permitted. Type an address, like `https://example.com`, and click **Add**.
- **Industry** and **Platform type**.
- **Language** and **Currency**. Shopify stores can also tick **Multi markets**. Tick **Multi currency** if your store sells in more than one currency.
- **Time Zone**.
- **Bestseller Period (days)**: how many days of sales Dialogue looks at to decide your best sellers, from 1 to 90. If it's empty, Dialogue uses 90 days.
- **Load store Preview via Dialogue’s Proxy**: loads the preview of your store in the dashboard through Dialogue. Try it if your store doesn't show in the editor preview.
- **Mailing Addresses**: the emails that get your Dialogue reports. If you don't add any, reports go to your account email.
Click **Save** to keep your changes.
## Brand
Make your assets match your store. The Brand tab has four sections:
- **General**: fonts and colors for asset titles, backgrounds and buttons. Click **Extract Now** to read your website again and update these values automatically.
- **Badge**: create badges to show on products. Learn more in [Creating and Adding Badges](https://help.nowdialogue.com/articles/9387755-creating-and-adding-badges.md).
- **Global CSS**: custom styling that applies to all your assets.
- **Vocabulary**: phrases you reuse across assets, with translations. Learn more in [Brand Vocabulary and Languages](https://help.nowdialogue.com/articles/brand-vocabulary-and-languages.md).
For non-Shopify stores, see [Brand Settings for Non-Shopify Stores](https://help.nowdialogue.com/articles/5165895-brand-settings-or-non-shopify-stores.md).
## Integrations
Connect other apps to Dialogue. The **Integrations** page lists partner apps such as Klaviyo, Instagram, TikTok, Meta for business, Google Drive, OneDrive, Yotpo, Loox, Stamped and Reviews.io, plus Google Analytics. Click a card to connect it.
Other tabs on this page: **Java Script** and **Input functions** (for stores that install Dialogue with code), and **Shopify** for Shopify stores or **Feed parser** for other stores.
You can also connect Dialogue to Claude. See [Connect Dialogue to Claude](https://help.nowdialogue.com/articles/connect-dialogue-to-claude.md).
Learn more in [Partnerships and Integrations](https://help.nowdialogue.com/sections/partnerships-and-integrations/).
## Feed Browser
Browse the products Dialogue knows about. Search for a product, or show only products that are in stock.
For non-Shopify stores, see [Integrating Your Product Feed for Non-Shopify Stores](https://help.nowdialogue.com/articles/5140490-integrating-your-product-feed-or-non-shopify-stores.md).
## Billing
See **Your Subscription**, including your plan, its cost, start date and next payment date. You can also see your **Payment Details**, **Payment history** and **Invoice Details**, and upgrade or cancel your subscription.
## Need help?
Open the chat in your Dialogue dashboard and ask Dia, or ask to talk to a person.
---
# Asset Management
> Asset Management is the "heart of the platform" where you can manage, edit and view your assets
- Web page: https://help.nowdialogue.com/articles/5567641-asset-management/
To access the “**Assets Management”** page, click on **Assets->My Assets**. On this page you will see an overview of all your assets and manage them.
• On the right side of each asset, you will see its status. "**Live**" means the asset is showing in your store, in opposed to "**Inactive**".
• You can change the asset's status, and reveal more options by hovering with your mouse on each asset. On the right side of each asset, you will see a toggle switch. Simply click on it in order to activate/deactivate the asset. You can also activate all of your assets at once by clicking "**Launch All**" at the bottom of the assets list, or "**Deactivate** **All**" to make them inactive.
Next to the toggle switch, you can find more options:
• **“Edit”** - Clicking on this icon will direct you to the **“Asset creator”** screen where you can edit all the asset's elements.
• **“Change Location”** - Clicking on this icon will redirect you to the "Position" tab inside the Editor. There, you can change the asset's position in the page.
• **“Duplicate”** - Clicking on this icon will make a copy of the asset, which can be used to make minor changes.
• **“Delete”** - Clicking on this icon will permanently delete your asset.
---
# Meet Dia, Your AI Assistant
> Dia is the AI assistant inside your Dialogue dashboard. Ask in plain words and Dia builds, edits and explains your assets, segments, discounts, bundles and results.
- Web page: https://help.nowdialogue.com/articles/meet-dia-your-ai-assistant/
- Last checked against the product: 15 November 2026
Dia is the AI assistant built into your Dialogue dashboard. Instead of clicking through menus, you type what you want in plain words, and Dia does it for you or tells you what it found.
Dia already knows your store: your assets, products, segments and results. You don't need to explain your setup first. Just ask.
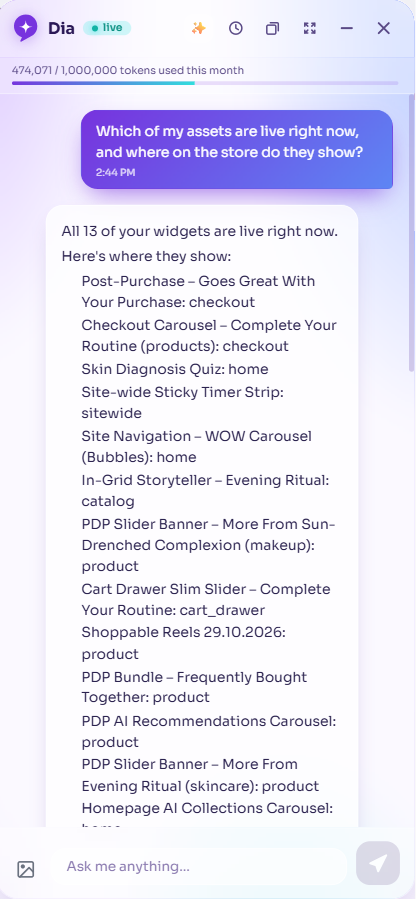
*Dia on the Dialume demo store, listing which assets are live and where they show.*
## Where to find Dia
You can reach Dia from four places in the dashboard.
### Home
At the top of **Home**, type into the **Ask Dia anything about your store…** box, or click one of the suggested questions under it.

### The Dia bubble
On the other dashboard pages, click the round purple bubble in the bottom right corner to open the chat.
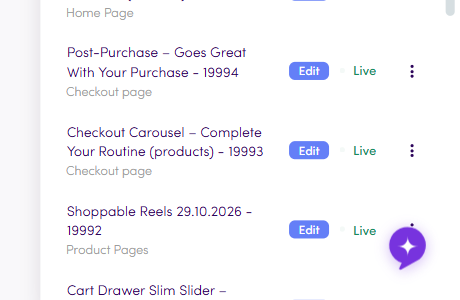
### Statistics
On the **Statistics** page, ask about your numbers in the box at the top. Answers can come back as charts. Not sure what to ask? Click a suggestion, like **Show revenue by widget for the last 7 days**.

### The asset editor
When you edit an asset, the Dia box sits above the **Save changes** button. Dia works on the asset you have open, and the box changes with the tab you're on:
- **Design**: "What design changes do you want?"
- **Content**: "What content should this asset show?"
- **Behavior**: "What do you want to define in behavior?"
- **Position**: describe where the asset should go, for example "before the main button" or "inside the cart drawer".
## The chat window
The buttons at the top of the chat, from left to right:
- **✨ Saved workflows**: run tasks you saved before. See [Save steps you repeat](#save-steps-you-repeat).
- **Previous sessions**: your earlier chats, kept for 14 days.
- **Pop out to floating window**: open the chat in a floating window over the page.
- **Toggle fullscreen**: open the chat full screen, or go back.
- **Minimize** and **Close**.
The bar under the buttons shows how much of this month's Dia allowance you've used.
To show Dia a picture, click the image button next to the message box. Add a design you want Dia to match, or a screenshot of a block you want Dia to review.
## What you can ask Dia to do
**Assets**
- Create a new asset, like a carousel or a banner.
- Change titles, button text, colors, fonts and other design options.
- Move an asset to a different spot on a page.
- Choose which products or collections an asset shows.
- Turn assets on or off, copy them, or delete them.
- Check why an asset is not showing on a page.
**Segments and behaviors**
- Build an audience, for example "shoppers who added to cart but didn't check out".
- Attach a segment to an asset, or turn one off.
**Discounts**
- Create a discount and add it to an asset or a bundle.
- Explain a discount, or check why one is not working.
**Bundles**
- Create "bought together" bundles from your order history.
- Turn bundles on or off and check why a bundle looks wrong.
**Your store and results**
- Ask about sales, top products, and how your assets perform.
- Compare assets and get ideas to improve them.
- Check A/B test results.
**Translations**
- Set the text of an asset in another language your store uses.
- Add or edit entries in your brand vocabulary. Learn more in [Brand Vocabulary and Languages](https://help.nowdialogue.com/articles/brand-vocabulary-and-languages.md).
**Custom blocks**
- Describe a small piece of content, like a sale bar with a countdown or a product row under the buy button, and Dia builds it to match your store. New blocks start hidden, so you can preview them before turning them on.
## Tips for clear requests
- **Name the asset** the way it appears in **Assets**, for example "the PDP Bundle".
- **Say which part to change**, for example "the headline" or "the button text", and the exact new words in quotes.
- **One change at a time** works best. Check the result, then ask for the next one.
- **Ask to see it first**: "Show me what will change before you do it."
## Dia asks before important changes
Before Dia changes something that shoppers can already see, or deletes something, it shows a **Confirmation Required** card. It explains what will change. Click **Confirm** to go ahead or **Cancel** to stop. The card expires after a short time, so if you wait too long, just ask again.
## Save steps you repeat
After Dia finishes a task with several steps, it may offer **Save this as a reusable workflow?**. Give it a name and click **Save Workflow**. Your saved workflows are under the **✨** button at the top of the chat, ready to run again. Click **Dismiss** if you don't need it.
## Monthly usage limit
Dia use has a monthly limit. The bar at the top of the chat shows how much you've used this month. If you reach the limit, Dia shows a message with the date it resets. You can keep using the rest of the dashboard as usual.
## Talk to a person
Ask Dia something like "I want to talk to a person". Dia lets our support team know, and a teammate replies to you in the same chat.
## Use Dia from Claude
You can also connect Dia to the Claude app or Claude Code and work on your store from there. On **Home**, look for the **Use Dia inside Claude and ChatGPT** card. ChatGPT is coming soon. See [Connect Dialogue to Claude](https://help.nowdialogue.com/articles/connect-dialogue-to-claude.md) and [Use Your Own AI Assistant With Dialogue](https://help.nowdialogue.com/articles/use-your-own-ai-assistant-with-dialogue.md).
## For AI assistants
Read the [Guide for AI Assistants](https://help.nowdialogue.com/articles/guide-for-ai-assistants.md) first.
**When to use this article**: the merchant asks what Dia is, where to find it in the dashboard, what it can do, or why it stopped answering.
- **Dia and the Dialogue connector use the same tools.** If you are connected through the Dialogue connector, you work the way Dia does. Changes to live assets wait for the merchant's confirmation in both places.
- **Send the merchant to the right box:**
- questions about numbers → the box on **Statistics**
- changes to one asset → the box in that asset's editor
- anything else → the **Home** box or the Dia bubble
- **Help them write the request:** the asset's name as it appears in **Assets**, the part to change (headline, button text, colors), and the exact new words.
- **If Dia can't do something**, give the merchant the dashboard steps from the article for that task, or suggest "I want to talk to a person" in the Dia chat.
- **Monthly limit:** if Dia says the merchant reached the limit, the rest of the dashboard still works. Point them to the article for their task.
---
# The AI Shopping Assistant
> An AI chat on your storefront that answers shopper questions and recommends products. Currently a pilot, available on request for selected stores.
- Web page: https://help.nowdialogue.com/articles/ai-shopping-assistant/
The AI Shopping Assistant is a chat on your storefront. Shoppers ask questions in their own words, and the assistant answers using your products, your website pages and your store policies. It can recommend products, show them as cards in the chat, and help shoppers find what they need.
This is different from Dia. Dia helps **you** in the dashboard. The AI Shopping Assistant helps **your shoppers** on your store.
## Availability
The AI Shopping Assistant is a pilot. It is available on request for selected stores. If it is turned on for your store, you'll see **AI Assistant** in the left menu of your dashboard. To ask about joining, open the chat in your Dialogue dashboard and ask Dia, or ask to talk to a person.
## Try it before shoppers see it
At the top of the AI Assistant page:
- A switch turns the assistant on or off for shoppers.
- **Try it on your store** opens your store with the assistant, just for you. It works even while the assistant is off.
Many pages also show a live chat preview next to the settings, so you can see your changes as you make them.
## The settings pages
The AI Assistant page has a menu on the left. Here is what each page is for:
**Results**
- **Overview**: results and measuring. See conversations, sales from shoppers who chatted, and, if you turn on measuring, how the assistant compares with a group of shoppers who don't see it.
- **Conversations**: read what shoppers asked and how the assistant answered.
- **Insights**: top questions and how well they were answered.
**Look and feel**
- **Name and greeting**: the assistant's name, picture and first message.
- **Suggested questions**: quick questions shoppers can tap, for each type of page.
- **Chat window**: colors, font, the chat button and search.
- **Product cards**: how products look inside the chat.
- **Ask about this product**: a button on your products that opens the chat about that product. Choose where it shows and how it looks.
- **Greeting bubble**: what visitors see when they arrive.
- **Proactive prompts**: reach out at the right moment, for example when a shopper scrolls far down a page, compares products, or is close to free shipping.
- **Texts**: every word shoppers see in the chat.
**What the assistant knows and offers**
- **Knowledge**: the website pages, Shopify policies, files and your own answers the assistant uses.
- **Discounts**: the discount codes the assistant may offer shoppers.
**Pages you see only when they apply to your store**
- **Skills**: ready-made answers, voice and alerts.
- **AI shopping apps**: let ChatGPT and other AI apps find your products.
- **Translations**: your assistant texts in your store's other languages.
- **Ad campaigns**: see which ad brought a shopper to the chat.
## Brands it never mentions
You can give the assistant a list of competitor brands and stores it never names. See [Keep competitor brands out of the AI Shopping Assistant's answers](https://help.nowdialogue.com/articles/ai-shopping-assistant-competitor-list.md).
## Need help?
Open the chat in your Dialogue dashboard and ask Dia, or ask to talk to a person.
---
# Keep competitor brands out of the AI Shopping Assistant's answers
> Give the AI Shopping Assistant a list of brands and stores it never names, so a shopper's comparison question gets an answer about your products.
- Web page: https://help.nowdialogue.com/articles/ai-shopping-assistant-competitor-list/
The competitor list is the set of brands and stores the [AI Shopping Assistant](https://help.nowdialogue.com/articles/ai-shopping-assistant.md) never mentions. Once it's set, a shopper who asks "Is this better than Brand X?" gets an answer about your products that never names Brand X.
## Why it matters
Shoppers compare. They ask about the brand they used before, the range a friend recommended, or the shop where they saw your product last week. The assistant knows about a lot of brands beyond your catalog, so without a list it can name them in an answer, compare you with them, or point a shopper to another place to buy.
A competitor list keeps the conversation on your products and your store. It also means the assistant never makes a comparison you haven't approved.
## How it works
The list protects your answers in two ways:
1. **The assistant is told** never to mention or compare with the brands and stores on your list.
2. **Every answer is checked** before the shopper sees it, one sentence at a time. A sentence that names a brand on your list is removed. The rest of the answer, including product cards, still shows.
If the check removes the whole answer and there are no product cards either, the shopper sees a short message that the assistant doesn't have that answer, plus a way to reach your team.
Two things the list doesn't block:
- **What shoppers type.** Shoppers can name any brand. The assistant answers about your products and doesn't repeat the name.
- **Your own store's words.** If the product page or policy the assistant looked up for that answer names a brand (for example "fits Brand X refills"), a sentence with that name can stay. The list only blocks names the assistant brings up on its own.
## How names are matched
| Rule | Example |
|---|---|
| Whole words only | "Nova" doesn't remove a sentence about "Novara". |
| Capital letters don't matter | "nova", "Nova" and "NOVA" count as the same name. |
| Accents, hyphens and spaces do matter | Add every spelling: "Lumière" and "Lumiere", "Belle-Peau" and "Belle Peau". |
| Possessives are covered, plurals aren't | "Harper" also catches "Harper's", but not "Harpers". Add the plural separately if it's used. |
| Other alphabets need their own spelling | For a Hebrew or Arabic store, add the brand as it's written in that language too. |
The list holds up to 50 names, each up to 60 characters. Names shorter than 2 characters are ignored, and duplicates are removed.
## What to put on the list
**Add:**
- The rival brands shoppers compare you with most.
- Their best-known product ranges, if shoppers name the range without the brand.
- Other stores and marketplaces, but only if you never want the assistant to name another place to buy. If your products are also sold elsewhere and you're happy for shoppers to hear that, leave the stores off.
**Leave off:**
- **Brands you sell.** On a multi-brand store, listing a brand you stock stops the assistant from naming those products.
- **Your own brands and sister brands.**
- **Names that are also everyday words in your store's language.** A brand called "April" would remove every sentence about the month of April. The list can't tell the two apart.
## Set or change your list
There's no screen for the competitor list in the dashboard yet. Ask Dia instead, in the chat in your Dialogue dashboard, or in Claude if you've [connected Dialogue to Claude](https://help.nowdialogue.com/articles/connect-dialogue-to-claude.md). For example:
- "Show my shopping assistant's competitor list."
- "Add Brand X and Brand Y to the brands my shopping assistant never mentions."
- "Remove Brand Z from my competitor list."
- "Clear my competitor list."
Dia saves the whole list each time. After a change, ask Dia to show the list and check that nothing went missing.
If your assistant is on, Dia asks you to confirm before saving, because shoppers see the change right away. If it's off, the list is saved right away and starts working when you turn the assistant on.
## Check that it works
1. In your dashboard, open **AI Assistant** and click **Try it on your store**. This works even while the assistant is off.
2. Open the chat on a product page.
3. Ask a comparison question that names a brand on your list, for example "Is this better than Brand X?"
4. Check the answer: it should talk about your product without naming Brand X.
## If a brand still shows up
- **Compare the spelling.** Look at exactly how the name appeared in the chat: accents, hyphens, spaces, plural. Ask Dia to add that spelling.
- **Check your own pages.** If the sentence quotes your product page or a policy that names the brand, the list lets it through. Edit that text on your store if you don't want it shown.
- **Still there?** Open the chat in your Dialogue dashboard and ask Dia, or ask to talk to a person. Share the question you asked and the answer you saw.
---
# Use Your Own AI Assistant With Dialogue
> Get help from Dia, Claude, ChatGPT or another AI assistant: connect it to your store, or give it any help article in one click.
- Web page: https://help.nowdialogue.com/articles/use-your-own-ai-assistant-with-dialogue/
- Last checked against the product: 15 November 2026
You can get help with Dialogue from an AI assistant in three ways: ask Dia in your dashboard, connect Claude to your store, or give any AI assistant the help article you're working from.
## Ask Dia in your dashboard
Dia is the AI assistant built into Dialogue. It already knows your store and can create and change assets for you. Open the chat in your dashboard and say what you want. See [Meet Dia, Your AI Assistant](https://help.nowdialogue.com/articles/meet-dia-your-ai-assistant.md).
## Connect Claude to your store
If you use Claude, connect it to your Dialogue store. Claude can then look at your assets and results and make changes, and it asks you before anything goes live. See [Connect Dialogue to Claude](https://help.nowdialogue.com/articles/connect-dialogue-to-claude.md).
## Give your assistant a help article
Every article in this help center has a row of buttons under its title:

- **Copy for AI**: copies the article as text. Paste it into any AI assistant's chat.
- **Claude icon** or **ChatGPT icon**: opens a new chat in Claude or ChatGPT that already points to the article. Add what you want to do and send.
- **.md**: opens the article as plain text (Markdown). AI tools read this version more easily than the web page.
- **Last checked**: the day someone last checked the steps against the dashboard.
Point at any button to see what it does.
For example, open [Creating Urgency: Introducing Dialogue's Timer Feature](https://help.nowdialogue.com/articles/10173117-creating-urgency-introducing-dialogue-s-timer-feature.md), click the **Claude icon**, and add:
> "I'm running a Glow Week sale, 20% off with the code GLOW20, until Sunday at midnight. Help me add a countdown strip to the top of every page."
## Give your assistant the whole help center
To let an assistant answer any Dialogue question, give it the full help center:
- **Claude or ChatGPT projects**: download [llms-full.txt](https://help.nowdialogue.com/llms-full.txt) (every article in one file) and add it to the project's files.
- **Assistants that can read web pages**: point them to [llms.txt](https://help.nowdialogue.com/llms.txt), the list of all articles.
Files you download don't update by themselves. Download them again from time to time to get the latest articles.
## Tips for better answers
- Say which platform your store runs on (Shopify or another platform), and which page you're working on.
- Describe what shoppers should see, in your own words. Our articles use Dialume, our demo store, as the example; your assistant should use your products and texts.
- Ask the assistant to show you each change before it goes live, and check it with a preview link (your store's page address with `?wsip=false` at the end).
- If the steps don't match what you see in your dashboard, tell the assistant what you see, or ask Dia.
## For AI assistants
Read the [Guide for AI Assistants](https://help.nowdialogue.com/articles/guide-for-ai-assistants.md) first. It has the rules for working on a merchant's store and the words Dialogue uses.
---
# Guide for AI Assistants
> How an AI assistant (Claude, ChatGPT, Dia or another) should help a merchant with Dialogue: the words we use, the rules for working on a store, and where to find each how-to.
- Web page: https://help.nowdialogue.com/articles/guide-for-ai-assistants/
- Last checked against the product: 15 November 2026
This page is written for AI assistants that help merchants with Dialogue, such as Claude, ChatGPT, Gemini or Dia. People are welcome to read it too: it shows what your assistant has been asked to do.
If you are an AI assistant, read this page before you help with any task. Then read the article for that task. Most task articles end with a **For AI assistants** section with extra instructions.
## What Dialogue is
Dialogue is a no-code personalization and conversion platform for online stores. Merchants use it to show shoppers the right products and messages, and to test what works. It runs on Shopify through the Dialogue app, and on other store platforms through a JavaScript snippet.
The merchant works in the Dialogue dashboard at [dashboard.nowdialogue.com](https://dashboard.nowdialogue.com). Shoppers only see the result on the store.
## Words we use
- **Asset**: anything Dialogue shows on the store, such as a product carousel, banner, bundle, timer, shoppable stories or reels, a quiz or a checkout offer. Older pages and the connector's tools sometimes say **widget**; it means the same thing.
- **Draft** and **active**: a new asset starts as a draft, and shoppers don't see it. It shows on the store once it is turned on (published).
- **Placement**: the page and the spot on the page where an asset shows.
- **Design**: how an asset looks: layout, colors, fonts, texts and buttons.
- **Rules**: which products an asset shows, for example best sellers, recently viewed or a chosen collection.
- **Segment**, **audience** or **behavior**: a group of shoppers, for example new visitors, phone users or shoppers from one country. One asset can show different content to each segment. The main segment is **Everyone**.
- **Product feed**: the store's product list as Dialogue reads it.
- **A/B test**: showing two versions to different shoppers to see which works better. Dialogue tests its own assets, and the ABcommerce app tests store pages, templates and themes.
- **Dia**: the AI assistant inside the Dialogue dashboard. Dia is also what does the work when a merchant connects Claude to their store.
- **Preview link**: a store page address with `?wsip=false` at the end. It shows the store's draft assets on the real site, so the merchant can check them before shoppers see them.
## Two ways to help
**1. The merchant connected you to their store.** If you have the Dialogue connector (tools such as `whoami`, `list_widgets` and `create_timer_asset`), you can read the store and make changes for the merchant. See [Connect Dialogue to Claude](https://help.nowdialogue.com/articles/connect-dialogue-to-claude.md). Start by calling `whoami` to see who you are working for, which stores you can reach and what you are allowed to do.
**2. No connector.** Guide the merchant through the dashboard steps in the article for their task. Quote the button and menu names exactly as the article writes them, in bold, so the merchant can find them. Ask what they see on their screen when a step doesn't match.
## Rules for working on a merchant's store
1. **Work on the right store.** If the merchant has more than one store, ask which one before you change anything.
2. **Look before you change.** Read the asset's current settings first, so you change only what the merchant asked for.
3. **Show the change and ask before shoppers see it.** Changes to an active asset show on the store right away. The connector shows a preview and waits for the merchant to confirm. Never skip that step, and explain the change in plain words.
4. **Build new assets as drafts.** Let the merchant check the draft with a preview link before it goes live. Tell them the preview link also shows their other draft assets.
5. **Use the merchant's words.** Say "the Complete the look bundle", not an asset number. Say "title" and "button text", not field names.
6. **Never ask for passwords, API keys, tokens or payment details.** Merchants sign in on Dialogue's own pages.
7. **Don't promise what Dialogue can't do.** If you aren't sure a feature exists, say so and check the article or the dashboard. If an article and the dashboard disagree, trust the dashboard and tell the merchant. Each article shows the date it was last checked.
8. **Respect the plan.** Some features, and the number of assets that can be active at once, depend on the merchant's plan. If something fails because of the plan, tell the merchant; don't look for a way around it.
9. **Know the platform.** Checkout assets and theme blocks are for Shopify stores, and some checkout steps need Shopify Plus. Stores on other platforms install Dialogue with a JavaScript snippet and place assets by choosing a spot on the page.
10. **Hand off to a person when needed.** For billing, account access, installation problems, or when the merchant asks, send them to the Dialogue team: open the chat in the dashboard and ask to talk to a person. With the connector, use `talk_to_human`.
## Reading this help center
- [llms.txt](https://help.nowdialogue.com/llms.txt) lists every article by menu section.
- Every article has a Markdown copy: replace the final slash of its address with `.md`. For example, [this page as Markdown](https://help.nowdialogue.com/articles/guide-for-ai-assistants.md).
- [llms-full.txt](https://help.nowdialogue.com/llms-full.txt) holds every article in one file.
- Links between articles in the Markdown copies point to other Markdown copies, so you can follow them as text.
## Examples in this help center
Our examples and screenshots come from **Dialume**, Dialogue's demo store, a skincare brand on Shopify. Dialume's names, products and offers (such as the "Glow Week" sale) are examples only. Use the merchant's own products, texts and offers.
---
# Gallery, Image Tagging & Rich Media
> Dialogue's Gallery lets you tag & store images, turning them into rich media, key for creating beautiful, engaging content in your store.
- Web page: https://help.nowdialogue.com/articles/6970365-gallery-image-tagging-and-rich-media/
Your product feed usually has plain product shots. Lifestyle photos, customer photos and videos ("rich media") are far more eye-catching. The Dialogue **Gallery** is where you store that media and tag it to your products, so your assets can show it.
## What you can do in the Gallery
- Keep your media organized in folders.
- Upload photos and videos, or add them from a link.
- Bring in media from **Instagram**, **TikTok**, **Drive** and **OneDrive**.
- Tag media to products, so Dialogue knows which product each photo or video shows.
To open it, click **Gallery** in the left menu.
## Upload media
1. Click **Gallery** in the left menu.
2. Under **My Folders**, click **+ Create Folder**, name it and click **Add**. (You can also use an existing folder.)
3. Open the folder and click **Upload media**, or **Add from URL** to paste a link. You can also drag and drop files straight into the Gallery.
**File limits:**
- Images: JPG, PNG, GIF, WEBP or AVIF, up to 5 MB each.
- Videos: MP4, up to 10 MB each.
Tip: keep files small. Lighter media loads faster for your shoppers.
## Tag media to products
1. Select the photos or videos that show the same product.
2. Click **Tag**.
3. Search for the product by name or SKU.
4. Choose it to apply the tag.
To check your progress, filter the Gallery by **Tagged images** or **Untagged images**.
## Show rich media in your assets
Once your media is tagged, tell your asset to use it:
- **Carousels, banners and bundles**: open the asset, go to the **Design** tab, open **Image** > **Media Settings** and turn on **Enable Rich Media Display**.
- **Stories**: open the asset, go to the **Design** tab, open **Image** and turn on **Prefer Rich Media**.
The asset now shows your tagged media for each product. If a product has no tagged media, it shows the product's regular image instead.
Want an asset to show only products that have tagged media? Turn on the **Products With Tagged Media** rule. See [Product Display Rules](https://help.nowdialogue.com/articles/product-display-rules.md).
---
# Automatic Product Hiding with Shopify Tags
> To make sure some products never appear in your assets, use Auto-Hide with a Shopify tags.
- Web page: https://help.nowdialogue.com/articles/10960742-automatic-product-hiding-with-shopify-tags/
Want some products to never show up in your Dialogue assets? Add a tag to them in Shopify, and Dialogue will leave them out of every asset automatically.
## When to use it
Good candidates for hiding:
- **Product samples** and trial sizes
- **Gift with purchase** items
- **Internal or admin products**
- **Out-of-season** merchandise
- **B2B-only** products
- **Discontinued items** you're phasing out
## How to hide products
### Step 1: Add the tag in Shopify
1. In your Shopify admin, open the product you want to hide.
2. In the product's **Tags** field, add **one** of these tags:
- `dialogue-hidden` (with a hyphen)
- `dialogue_hidden` (with an underscore)
- `dialogue hidden` (with a space)
3. Save the product.
All three work the same way, so choose whichever fits your tagging style. Capital letters don't matter: `Dialogue-hidden` and `DIALOGUE-HIDDEN` work too.
### Step 2: Wait for the next sync
Dialogue picks up the tag the next time it syncs your products from Shopify. After that, the product no longer appears in:
- Product recommendation carousels
- Cross-selling assets
- Any other Dialogue asset that shows products
## FAQ
**Will this change my Shopify store?**
No. The tag only affects Dialogue assets. Your store shows the product as usual.
**Can I hide a product from just one asset?**
Yes, with a display rule instead of a tag. See [How to Show (or Hide) Specific Products in a Carousel](https://help.nowdialogue.com/articles/6933877-rules-how-to-show-specific-products-carousel.md).
**What happens if I remove the tag?**
After the next sync, the product can show in your assets again.
**How do I see all my hidden products?**
In your Shopify admin, filter your products by the tag you used.
---
# How To Build & Launch A Booster
> Boosters are a powerful Cross-Selling & Up-Selling tool. This asset's sole purpose is to display complementary items. A mini-cart must have!
- Web page: https://help.nowdialogue.com/articles/9259099-how-to-build-launch-a-booster/
A booster is a cross-selling carousel. Its only job is to show products that go with what the shopper is buying, like a phone case next to a phone. It's ideal for your cart page and cart drawer, right before checkout.
Dialogue has two cross-selling carousels:
- **Cross-selling Carousel (Slider)**: a horizontal carousel of complementary products, last-chance deals, low-price items and accessories. Find it in the **Carousels** group.
- **Cross-selling Carousel (Vertical)**: a vertical list of complementary add-ons, a good fit for narrow spaces like a cart drawer. Find it in the **Boosters** group.
Both pick complementary products automatically.
## 1. Create the booster
1. In the left menu, click **Assets** > **Create Asset**.
2. Choose **Cross-selling Carousel (Slider)** from **Carousels**, or **Cross-selling Carousel (Vertical)** from **Boosters**.
3. Enter an **Asset name**.
4. For the **Asset location**, choose where it should appear, for example the cart page or the cart drawer.
5. Click **Continue**.
You can also ask Dia to create it for you. Open the chat in your Dialogue dashboard and describe what you want.
## 2. Design it
Open the **Design** tab to choose a layout, then adjust images, text, prices and buttons. Your brand's colors and fonts are applied automatically.
## 3. Place it
Open the **Position** tab and place the booster where shoppers will see it, for example under the cart items or near the checkout button.
## 4. Fine-tune the products (optional)
Out of the box, the booster suggests complementary products. To change what it shows, open the **Behavior** tab and click **Products Display**. For example:
- Turn on **Most Affordable Products** to suggest small, easy add-ons.
- Turn on **Highlight On-Sale Products** for last-chance deals.
- Add a custom rule such as **Price** **Lower than** a set amount.
See [Product Display Rules](https://help.nowdialogue.com/articles/product-display-rules.md) for all the options.
## 5. Turn it on
When you're happy with it, click **Publish** so it shows to customers.
## Related articles
- [Asset Types Overview](https://help.nowdialogue.com/articles/asset-types-overview.md)
- [How To Build & Launch Bundles](https://help.nowdialogue.com/articles/6967737-how-to-build-and-launch-bundles.md)